Table of Content:
1. Ingredients & Preparations Tab
1.2 Methodology
5. Allergens and Nutrition Tab
9. Outlets Tab
10. Image Tab
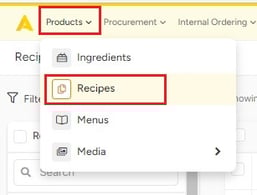
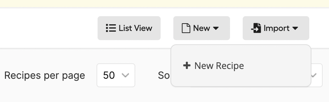
On the recipe overview page, go to the top bar menu. Click on "New" and "+New Recipe". You are now redirected to the recipe entry page.
The Recipe module has several tabs that allow you to fill in very detailed information on your recipes. It is very important that you think about the use of your recipes in order to fill out this information correctly.
1. Ingredients & Preparations Tab
1.1 Ingredients section
Here you add the used ingredients for the recipe.
- Click on "+Add" to start adding ingredients.
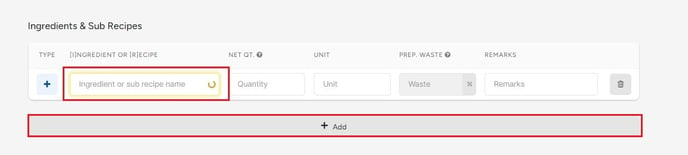
- Ingredient or sub Recipe name: When you search for an ingredient, more detailed information is displayed upfront. Specifically, we’ve added details such as the package sizes available, supplier name, and the supplier article-number to each product’s information. This way, users can quickly and effectively differentiate between similar items without having to sift through each option individually. For enhanced clarity, these details are listed alongside the ingredient or sub-recipes, allowing customers to effortlessly distinguish between similar ingredients and choose the product that best fits their needs.
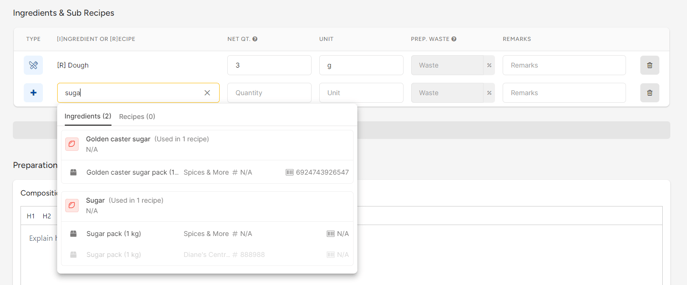
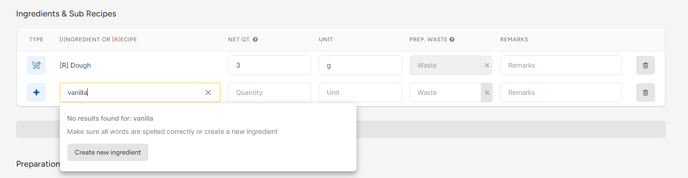
If you enter an ingredient that is not yet in your library, Apicbase gives you the option to create a new ingredient.
You can fill in the rest of the ingredients, package and pricing information in the ingredient module. If you want to read up on adding ingredient information, check this article.
- Net Qt.: Fill in the net quantity you are using for this recipe.
- Unit: Fill in the unit for the quantity you are using (kg, g, mg, l...).
- Prep. Waste%: Here you can enter the waste % for every ingredient. You can enter the default waste for an ingredient in the ingredient module, but this is overwritten if you enter a value in this field.
- Remarks: Here you can make any remarks you want to add to an ingredient.
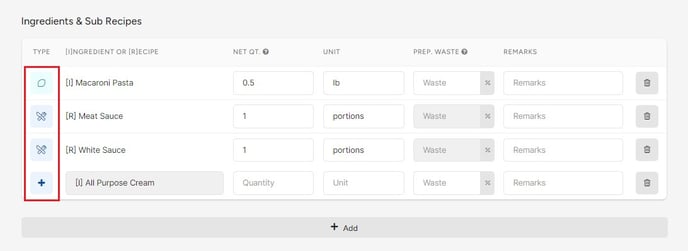
- On the right side of every ingredient you find the Actions:
- Click on the icon on the left and drag the ingredient to the desired position in the ingredient list.
 Delete the ingredient from a recipe.
Link with database:
 this is a recipe in your database.
  this is an ingredient in your database.
  When you see this symbol, you know the ingredient is not linked to an existing ingredient, you can create a new ingredient this way if you type in the name of the new ingredient and fill in the quantity, unit... Don't forget to fill in the necessary data on the ingredient afterward.
1.2 Methodology
The methodology allows you to add information on the composition of the recipe and also a step by step tutorial on how to make the recipe. Fill in for every step of the process what actions have to be taken to create the recipe.
- Click on "+Add a new step" to start adding the first step.

For each step you have a few buttons you can use to add an image, move or delete the step.
- Move a step in your recipe. Click on the number and drag the step to the desired position in the methodology.
 Click on this symbol to delete a step.
 Add an image to this step of the methodology. You can only add images from your library. If you want to use another image, you first have to upload it to your APICABSE library.
  Delete the chosen image.
 Remove this step from the methodology.
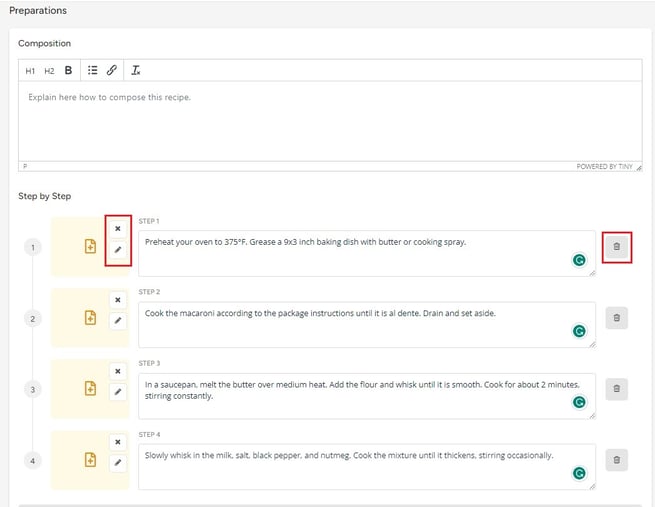
2. Info & Categories Tab
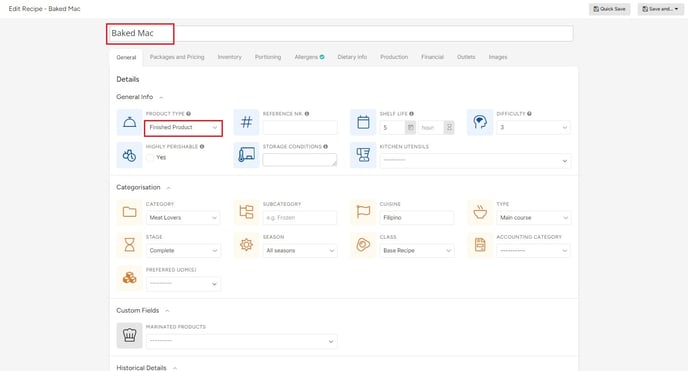
2.1 General Info
In this tab you can enter general information on the recipe: reference #, cuisine, shelf life (in days and/or hours), difficulty, dish type, class, stage and seasons. This information is not required but it helps to structure your library. You can also filter recipes on these criteria.
One variable we do recommend to fill in is the "Product Type": This indicates if the recipe is a finished product or a semi-finished product. "Finished products" are sold as such and for these recipes, you have to set the portioning (see 3. Portioning tab). For "Semi-finished" recipes you don't have to set the portioning because these are products that are used as sub-recipes finished products such as a sauce, potato puree, dough... These can be used in different amounts.
Extra information can also be added to this section, as well as HACCP remarks, kitchen Utensils and custom fields you've created yourself.
3. Inventory Tab
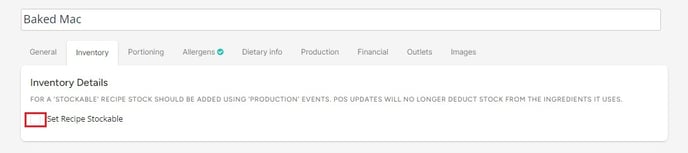
This tab lets you select if a recipe is stockable. Check the box next to "Set Recipe Stockable" if this is a recipe for a product you make beforehand and have in stock. E.g. sauces that are made and kept in stock. If you want to learn more on working with stockable recipes, check this article.
4. Portioning Tab
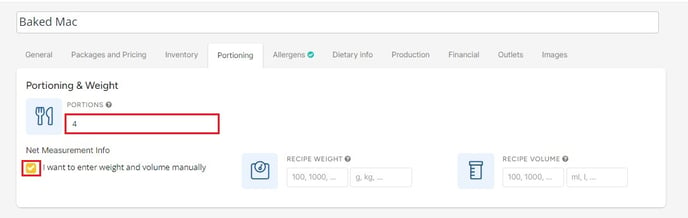
- #portions: In this field, you can enter how many portions the recipe gives.
- Net Measurement info: In general the net weight of a recipe is the added weights of all the ingredients. Sometimes the net weight of a recipe can differ. E.g. if you reduce a sauce, it weighs considerably less then the sum of its ingredients. This can be important if you make this a semi-finished product as stockable. If your sauce is only 500gr after being reduced and it contains 1000gr of ingredients, you can only use 500gr of finished product from your stock. You can check the box and enter either the net weight or volume.
Tip: We recommend that you be sure to fill in the Net Amount for each half-product. This has to do with how the amount used in ingredients are calculated when you add a sub-recipe to a main recipe.
If you don't fill in the number of portions, Apicbase will set the recipe to 1 potion by default.
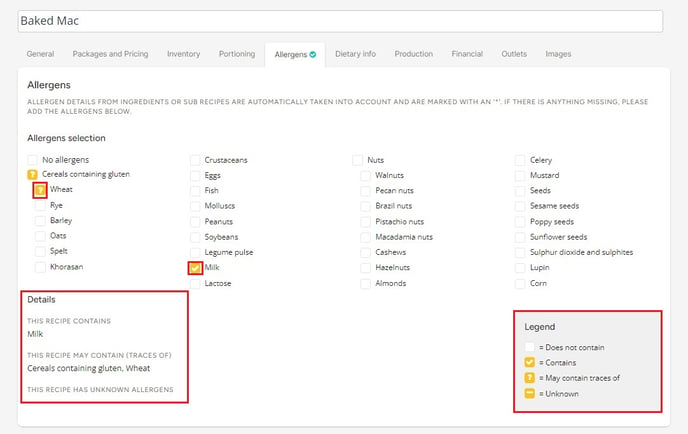
5. Allergens and Nutrition Tab
In this tab you can enter additional allergen information. Apicbase automatically adopts all the allergens from every ingredient used in the recipe. You can, however, add extra allergens. E.g. if the recipe does not contain nuts, but there are nuts processed in the kitchen, you can add "may contain traces" for this allergen.
You have four options for every allergen, that you can find in the "Legend" in the lower righthand corner.
In the lower-left corner of this tab, you see the allergen information of this recipe. The allergens coming from the ingredient information have an asterisk behind them.
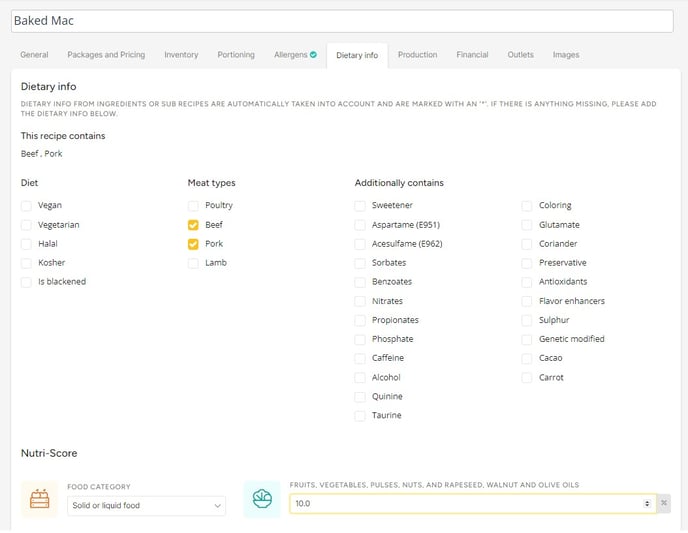
6. Dietary Info Tab
If you want to add dietary info on this recipe, you can do so here. Just check the box next to the diet or condiment the recipe contains. In this tab you can also set everything to calculate the Nutri-Score of the recipe. Read this article to learn more on this.
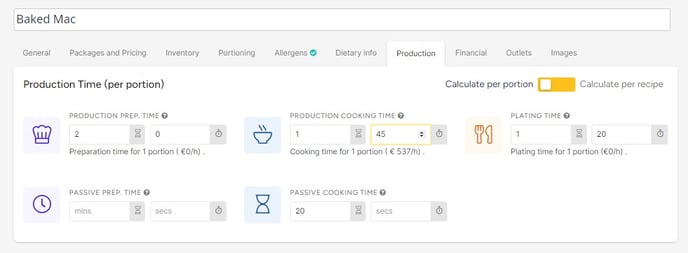
7. Production Tab
This tab gives the option to add very detailed production time information. If you enter the wages in your library settings, you also get the production cost per portion. You can enter:
- Production preparation time
- Production cooking time
- Plating time
- Passive preparation time: e.g. marinating an ingredient in advance
- Passive cooking time: e.g. letting a stock steep
- Calculate per portion: This involves determining the amount of ingredients required to make a single serving or portion of a dish.
This information is optional. If you want to take the production cost into account, the time you fill in here will be multiplied with the wage/hour and added to the food cost. This gives a more complete picture of your costs. In case you don't know how to add the wage/hour, please check this article.
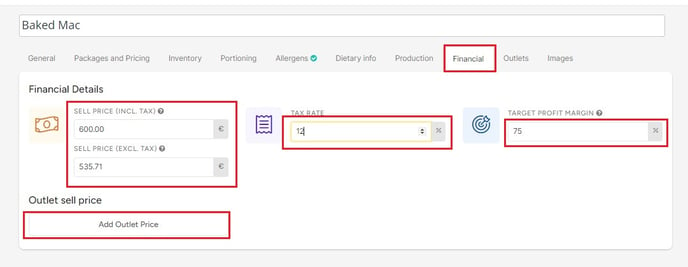
8. Financial Tab
Calculating food cost is one of the most insightful features of Apicbase. Filling in the financial information on your recipes is crucial to do this. You can enter this information here.
- Sell price (per portion) in the currency selected in your library
- Selling price (Incl. Tax)
- Selling price (Exl. Tax)
- You can set a specific price per outlet by clicking on "Add outlet price".
- VAT %
- Target Profit Margin in %
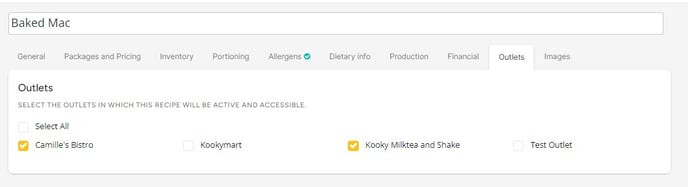
9. Outlets Tab
This tab allows you to select the outlets that will be able to see this recipe. The outlet users will only be able to see the recipes you assign to them by checking the box next to the outlet name in this tab.
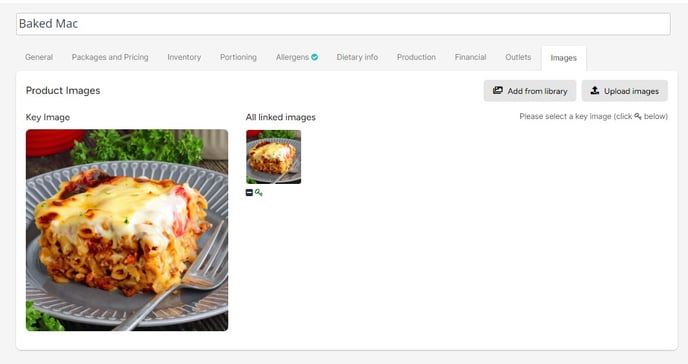
10. Image Tab
In the Image tab you can enter images of the recipe.
- Click on the "Add from Library" button on the right: Add images from your Apicbase library.
- Click on the "Upload images" button: this lets you upload an image from your device to Apicbase.
You can add several images. Use the key button to select the primary recipe image you will see in the recipe list or grid.
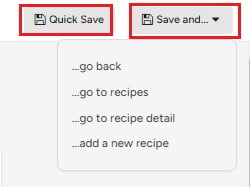
- Click "Quick Save" at the top of the page to save the recipe or click "Save and...go back/go to recipe grid/go to recipe detail/add new recipe".