Even without a central kitchen, stock items can always be transferred between branches. You can register this in Apicbase with the "transfer between branches" function. Click here to read more about this.
If you do have one (or more) central kitchen(s) where recipes are prepared for other branches, you can use "Internal ordering" in Apicbase. Below is a step-by-step guide:
- Go to via the settings icon at the top right to "Outlet settings" and select the branch you want to set up as the central kitchen. This is the central production kitchen that the other branches can order from.

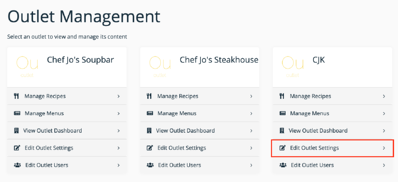
Then click on "Create Supplier Outlet."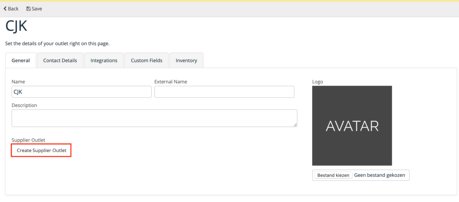
- Then a pop-up appears where you can enter the information of the central kitchen. The most important field is the e-mail address, to which internal orders are sent.
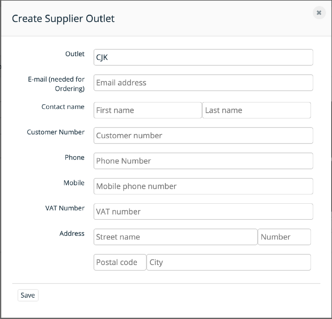
- Now click on "Save." This branch will now be available in the list of suppliers, preceded by the
 - symbol.
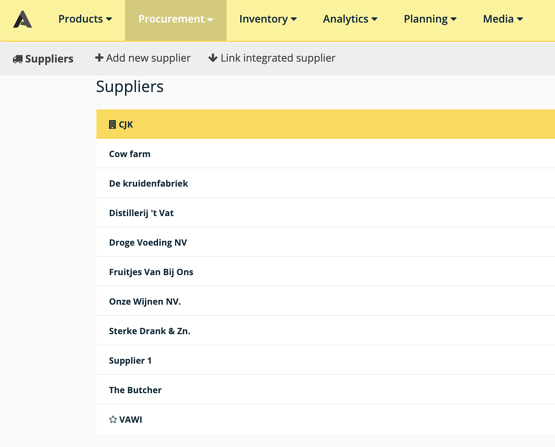
This branch (the central kitchen) is now available as a supplier for ingredients.
❗Please note that only inventoryable recipes are available for internal ordering (click here for more information on inventoryable recipes).
❗Also, packaging information should always be available for the ingredients and recipes you want to order internally (more information here).
Creating and placing an internal order
After creating a new internal supplier, it is possible to place orders with this branch. This is how you do it:
- Go to "Procurement" and click on "Create order".
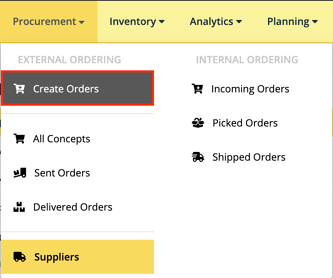
- Then select the branch you want to create the order for.
- Create an order (same way you would do this for an external supplier, read how in this article).
- After confirming your order, the order will be emailed to the central kitchen.
- Has the order been delivered? Then you can take delivery of it in Apicbase. Read how in this article.
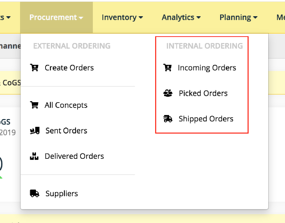
Internal orders for the central kitchen
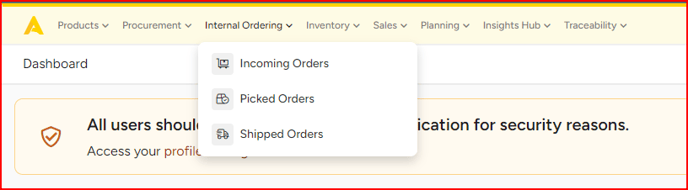
As a central production kitchen, you will find an overview of all orders under "Internal Orders".
- "Incoming orders": an overview of all new orders.
- "Picked orders": an overview of all prepared orders.
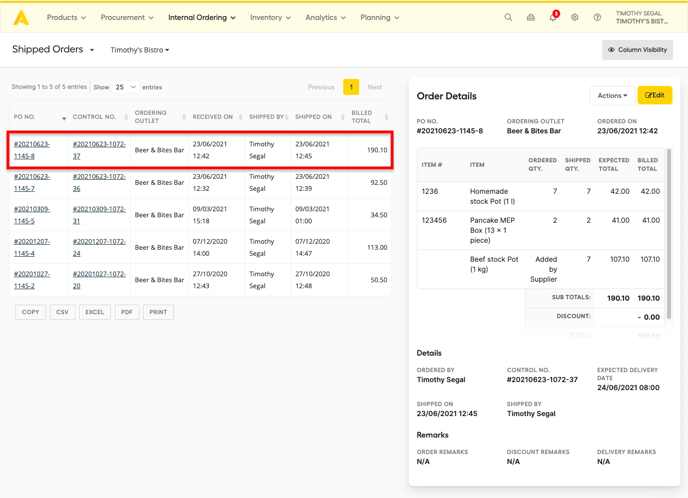
- "Shipped orders": an overview of all sent orders.
How to handle incoming orders in the central kitchen?
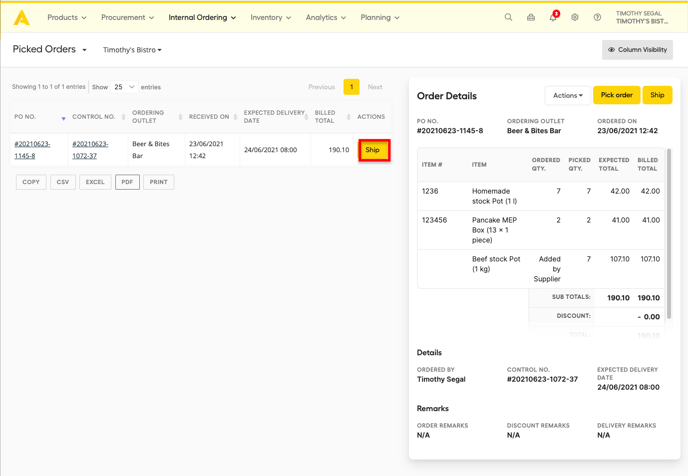
For the supplier outlet, as soon as an order arrives, it is visible in the "Incoming Orders" section. When you want to prepare the order, click "Pick Order."
This allows you to enter the shipping date and time, the quantity chosen, and the ability to add comments to the various items in the order.
You can also change the selected status to "Partial" if you could only choose part of the amount ordered, or to "None". If you choose "Partial", you can enter the selected amount in "Picked Qt".
You can also add items that were not ordered by entering the name of the item, the quantity chosen, and you can add comments in the bottom row. Click on the "Disc" symbol to the right of the newly added item to save it in the order.
In the example below, we had added "Beef stock."
After you click the save/disc symbol, the newly added item will appear in the order as follows.

You can note a comment in the text field.
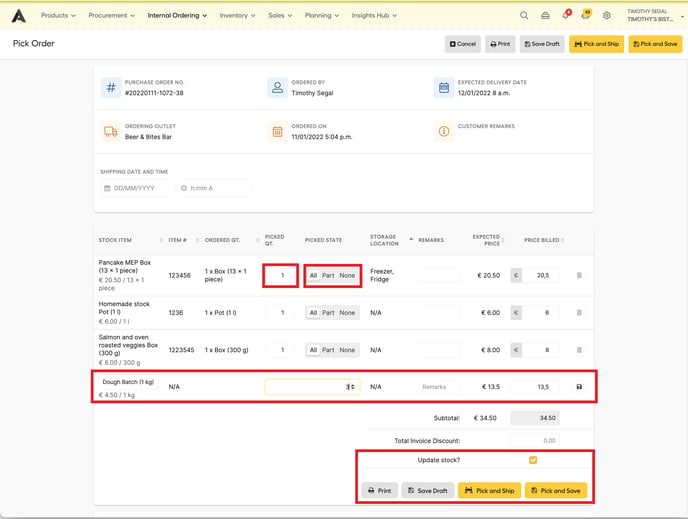
Click "Save Draft" if you want to resume preparing this order at a later time without losing the information already entered.
Check the "Update stock" box if you want to update your stock. Leave this box unchecked if stock does not need to be updated.
The need not to check the "Update Stock" box may arise, for example, when the intake of an order was forgotten and the stock had already been updated through a stock count.
Once you have prepared the order, click "Pick and Ship" to ship the order immediately. In Apicbase, this order is now visible under "Shipped orders".
When you click "Pick and Save," the collected items are saved and ready for shipment. In the "Picked Orders" section, you will find the collected orders that have not yet been shipped.
If necessary, you can check the list of merged orders. Check out this article to learn how.
To send the order later, simply press the "Submit" button, next to the order. When you do this, the order will be moved to "Orders Sent".
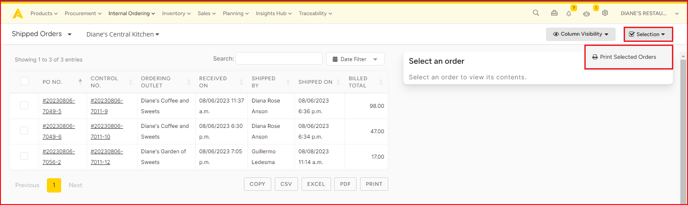
How to print in bulk in internal orders
Printing orders can be useful if you are collecting orders or want to attach delivery notes to them. However, it can be challenging to print incoming, picked or shipped orders separately, especially if you have a lot of orders. Fortunately, Apicbase lets you create bulk prints for your incoming, picked and shipped orders in a few easy steps. Just follow this step-by-step guide:
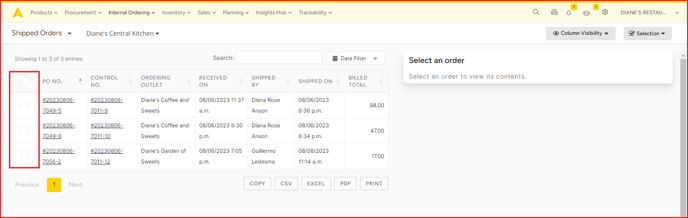
- Go to Internal Ordering and choose which type of order you want to bulk print. Note that all of the following steps apply to all order types (Incoming, Picked and Shipped)
- When you are in one of the order lists, you will be asked to select the order items you want to print in bulk. If you want to print them all, you can check the box in the upper left corner next to the "PO number" label. If you don't want to print them all, check the box next to the order's PO number individually.
- Once you have checked all the orders you want to print, click the Selection button in the upper right corner of your screen and click Print Selected Orders.
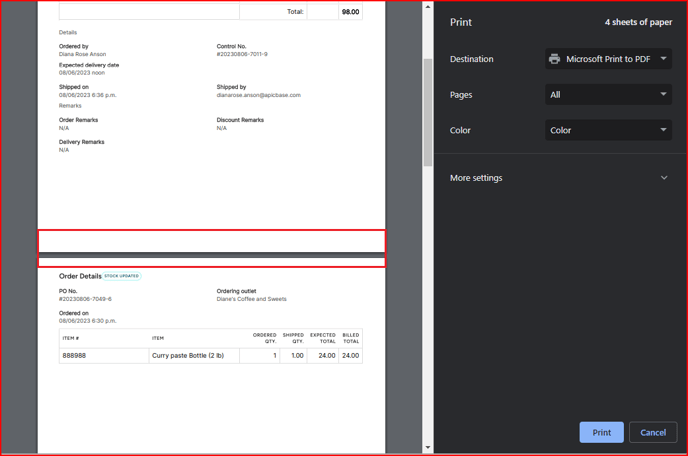
- After you click, you are redirected to the print page where you can view the details of the document, especially how many sheets you need to print all the selected orders. You can also change the settings before printing.
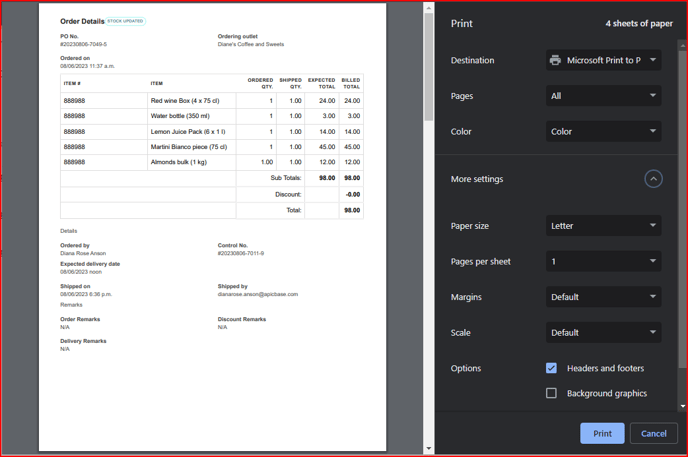
Please note that you can print a maximum of 100 orders per bulk and that there is a page break for each order. This means that the order details for each order are always on a different page to avoid data confusion and for better assortment.