After installing the printer, connecting it to the network, and linking it with the Nicelabel Business account, we're close to finalizing the cloud printer setup on Apicbase. Please, keep in mind that you will need the assistance of your Apicbase Customer Success Manager (CSM) for, at least, the initial steps of this guide.
- The first step of the integration can only be taken by your CSM, but they will need to fill in 2 information that you will have to facilitate them: the Project Name and the Subscription Key. To begin with, let's see where to find these.
First, the Project Name is the name of your project on Nicelabel. You will find it by going to the Nicelabel Control Center and selecting the part in the URL before .onnicelabel.com. In our example, the name of the project was apicbasedemo.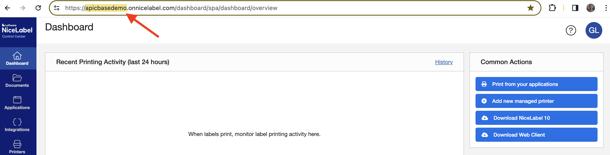
The Subscription Key is the code you should have obtained by completing the guide Step 3 - Setting up Subscription Key (if you haven't completed that yet, please follow the steps in that guide). As indicated in that guide, go to the API Developer Portal, then go to Profile (1). The Primary Key on your subscription is the one we will need: click on Show (2) to be able to see and copy the Subscription key (3).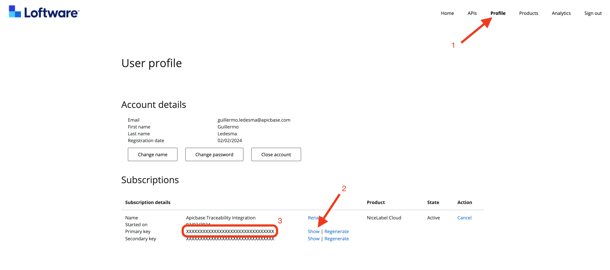
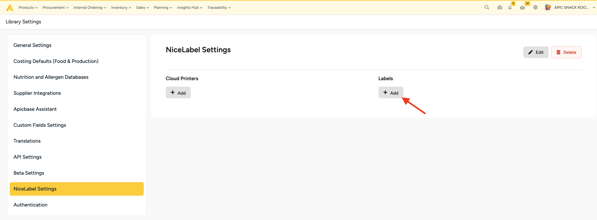
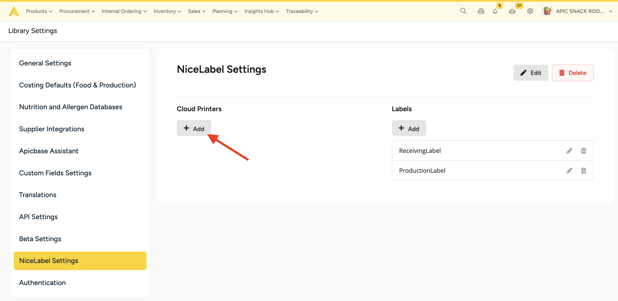
- With these two pieces of information, get in touch with your CSM and ask them to take the following action for you. They'll have to go to your library on Apicbase, go to the Library Settings, and click on NiceLabel Settings (1), then Create (2). The Create button will only be visible for the CSM.
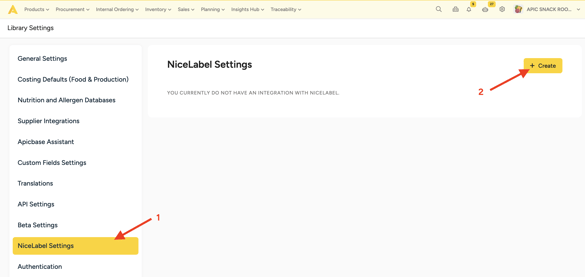
They can then enter the necessary information provided by you and click on Create.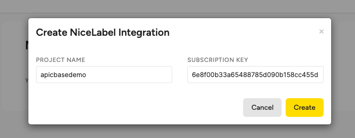
You should then be able to see the Cloud Printers and Labels sections. With this, the integration is set. Now you need to map the printer and labels we have on Nicelabel to Apicbase.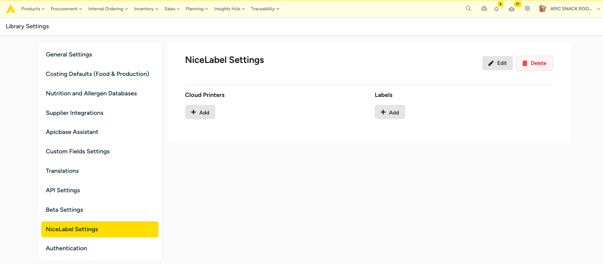
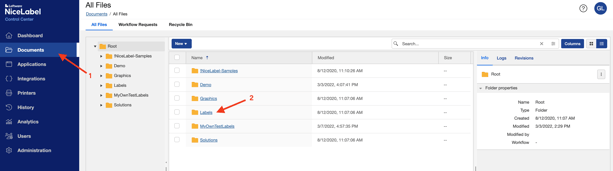
- Let's begin by setting up the labels. For the usage of the Traceability module, we will need to use some label templates. Please, ask your CSM to provide them to you. We currently support "Receiving" and "Production" labels. To begin with, we will upload the labels to your Nicelabel account. Go to the Nicelabel Control Center and go to Documents (1), then enter in the folder Labels (2).
Inside that folder, create a new folder named Traceability. You can do this by right-clicking on the center area and selecting Create Folder.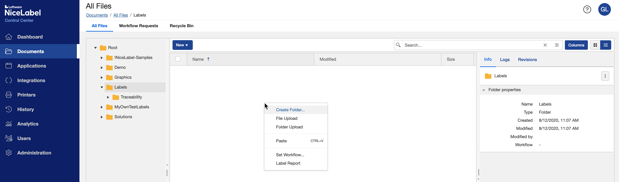
Once inside the new folder, drag the two label files into the folder and click on Upload.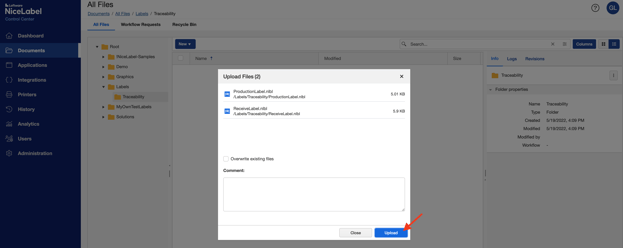
- Let's map the labels into Apicbase. We will use the "Receiving" label as an example, but the same will apply to the "Production" one. Go back to your Apicbase library settings and click on the Add button under Labels. A window will pop up.
In the pop-up window, fill in the Name (it can be any name, but avoid using spaces or special characters, we used "ReceivingLabel" as an example) (1). Then select the corresponding Label Type (here "Received") (2). Finally we will need to find the Cloud Label Path (3) but for that, we need to go back to Nicelabel.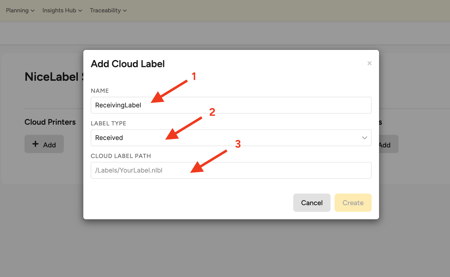
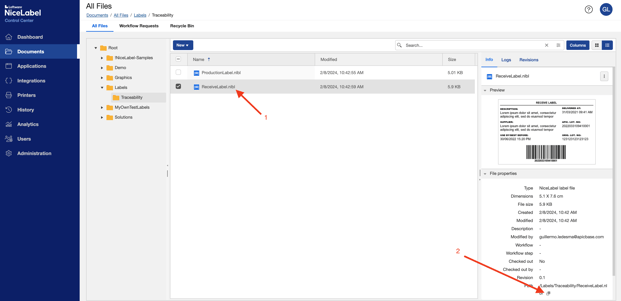
- Go back to the Nicelabel Control Center and click on the label you are mapping (1). The information about that label will appear on the right sidebar. In there (you might need to scroll down depending on your screen size), you will find the Path. You can copy it by clicking on the copy symbol (2).
Go then back to your Apicbase library, paste the Cloud Label Path (3), and finally click on Create.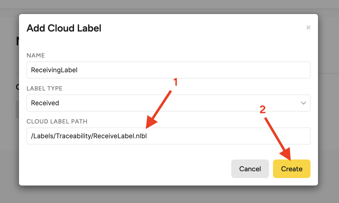
- Repeat Steps 4-5 with the Production label. Then we should be ready to map the printer.
- Let's now map your printer into Apicbase. Click on the Add button under Printers. A window will pop up.
The first thing we need to fill in is the Printer Name. This needs to have the same name as we registered on Nicelabel. For that, go to the Nicelabel Control Center, go to Printers (1), then Cloud Printers (2), the copy the name of your printer (3).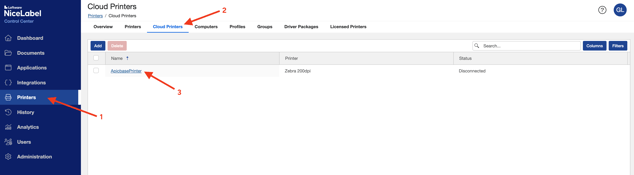
With that, come back to Apicbase and fill in the Cloud Printer Name (1). Then, Link the Labels we just created (2), and select the Outlet where the printer is located (3). Finally, click on Create (4).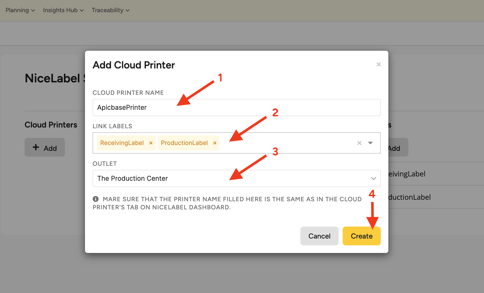
Done! With this, the Cloud Printing integration is all setup. You can now print your traceability labels when receiving and producing goods. We suggest doing a first test of the whole process of printing/scanning before fully rolling out with the Traceability module.