Before starting, make sure that you have the necessary equipment for the printer installation: a Windows device, a USB-A to USB-B cable, and the printer itself.
- Begin by downloading the Zebra Setup Utilities application on a Windows device and installing it. Follow the link to go to Zebra's website. Scroll down and click on Download next to the latest version of the Software.
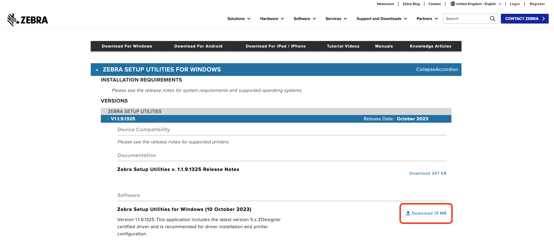
You will be redirected to a download page. Click on Accept and Begin Download Now.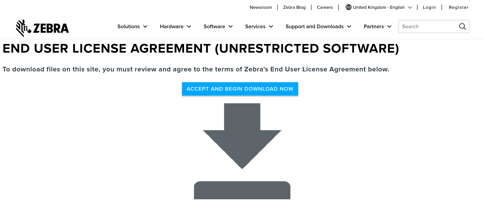
- Now, turn on your printer by pressing the power icon
 . All icons will be lit up at the first moment, but only the first one
  will remain on. In the first minutes/seconds, it will remain red: the printer is getting ready to be used. Wait until the first icon turns green.
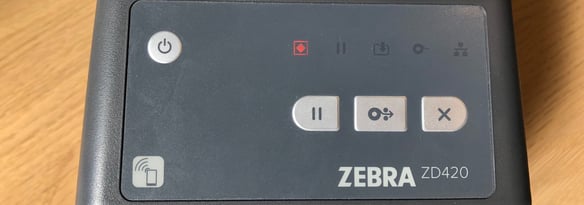
When the first icon turns green, the last icon will become red. That indicates that the printer is ready, but still not connected to any network. This icon will indicate the cloud availability of the printer.
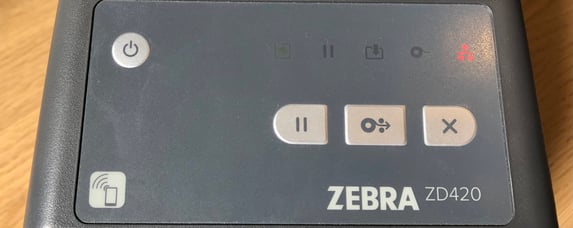
- Connect your printer to your Windows device using a USB-B (printer) to USB-A (laptop) cable. This is a key step for the communication between printer and computer.
- Then find the .exe that you downloaded in step one (it will probably be in your downloads folder) and open it. Follow the steps for the installation of the printer's drivers:
Choose USB as the computer port (selected by default) and click next.-1.png?width=581&height=363&name=Untitled%20(1)-1.png)
Then click on Finish to end the installation.-1.png?width=588&height=368&name=Untitled%20(2)-1.png)
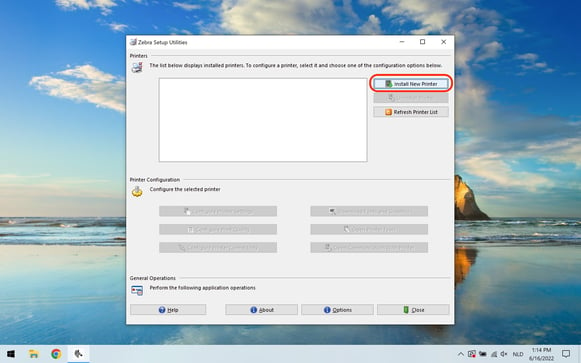
- When the overview of the application appears, press "Install new printer”.
Click on Next..png?width=594&height=371&name=Untitled%20(4).png)
Click on Install Printer..png?width=589&height=368&name=Untitled%20(5).png)
Select the printer model you will use. In this example, we are installing the ZD-420-203dpi-ZPL. You should find this information in your printer's original box..png?width=563&height=352&name=Untitled%20(6).png)
Select USB001 as the way to communicate with the printer, and click Next..png?width=570&height=356&name=Untitled%20(7).png)
Click on Finish (make sure that the checkbox for “Launch installation of Zebra Font Downloader Setup Wizard” is checked)..png?width=567&height=355&name=Untitled%20(8).png)
- Now the installation of the Zebra Font Downloader will begin. Follow the steps by clicking Next when asked. In the final step, click Install.
.png?width=557&height=348&name=Untitled%20(10).png)
Once the installation is over, click on Finish..png?width=552&height=345&name=Untitled%20(11).png)
- Now the printer is fully installed, and you should be able to see it on the list of printers.

Done! Now with your printer installed, you will need to connect it to your network so that it can work with our Cloud printing feature in Apicbase. To do this, follow the instructions in the next article.