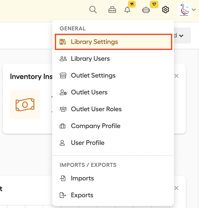
First of all, go to your Library settings. Click on the 'Settings'-icon in the upper right corner of the screen, then click "Library Settings".
A new screen will open, with multiple tabs. This article will review them one by one.
- General Settings
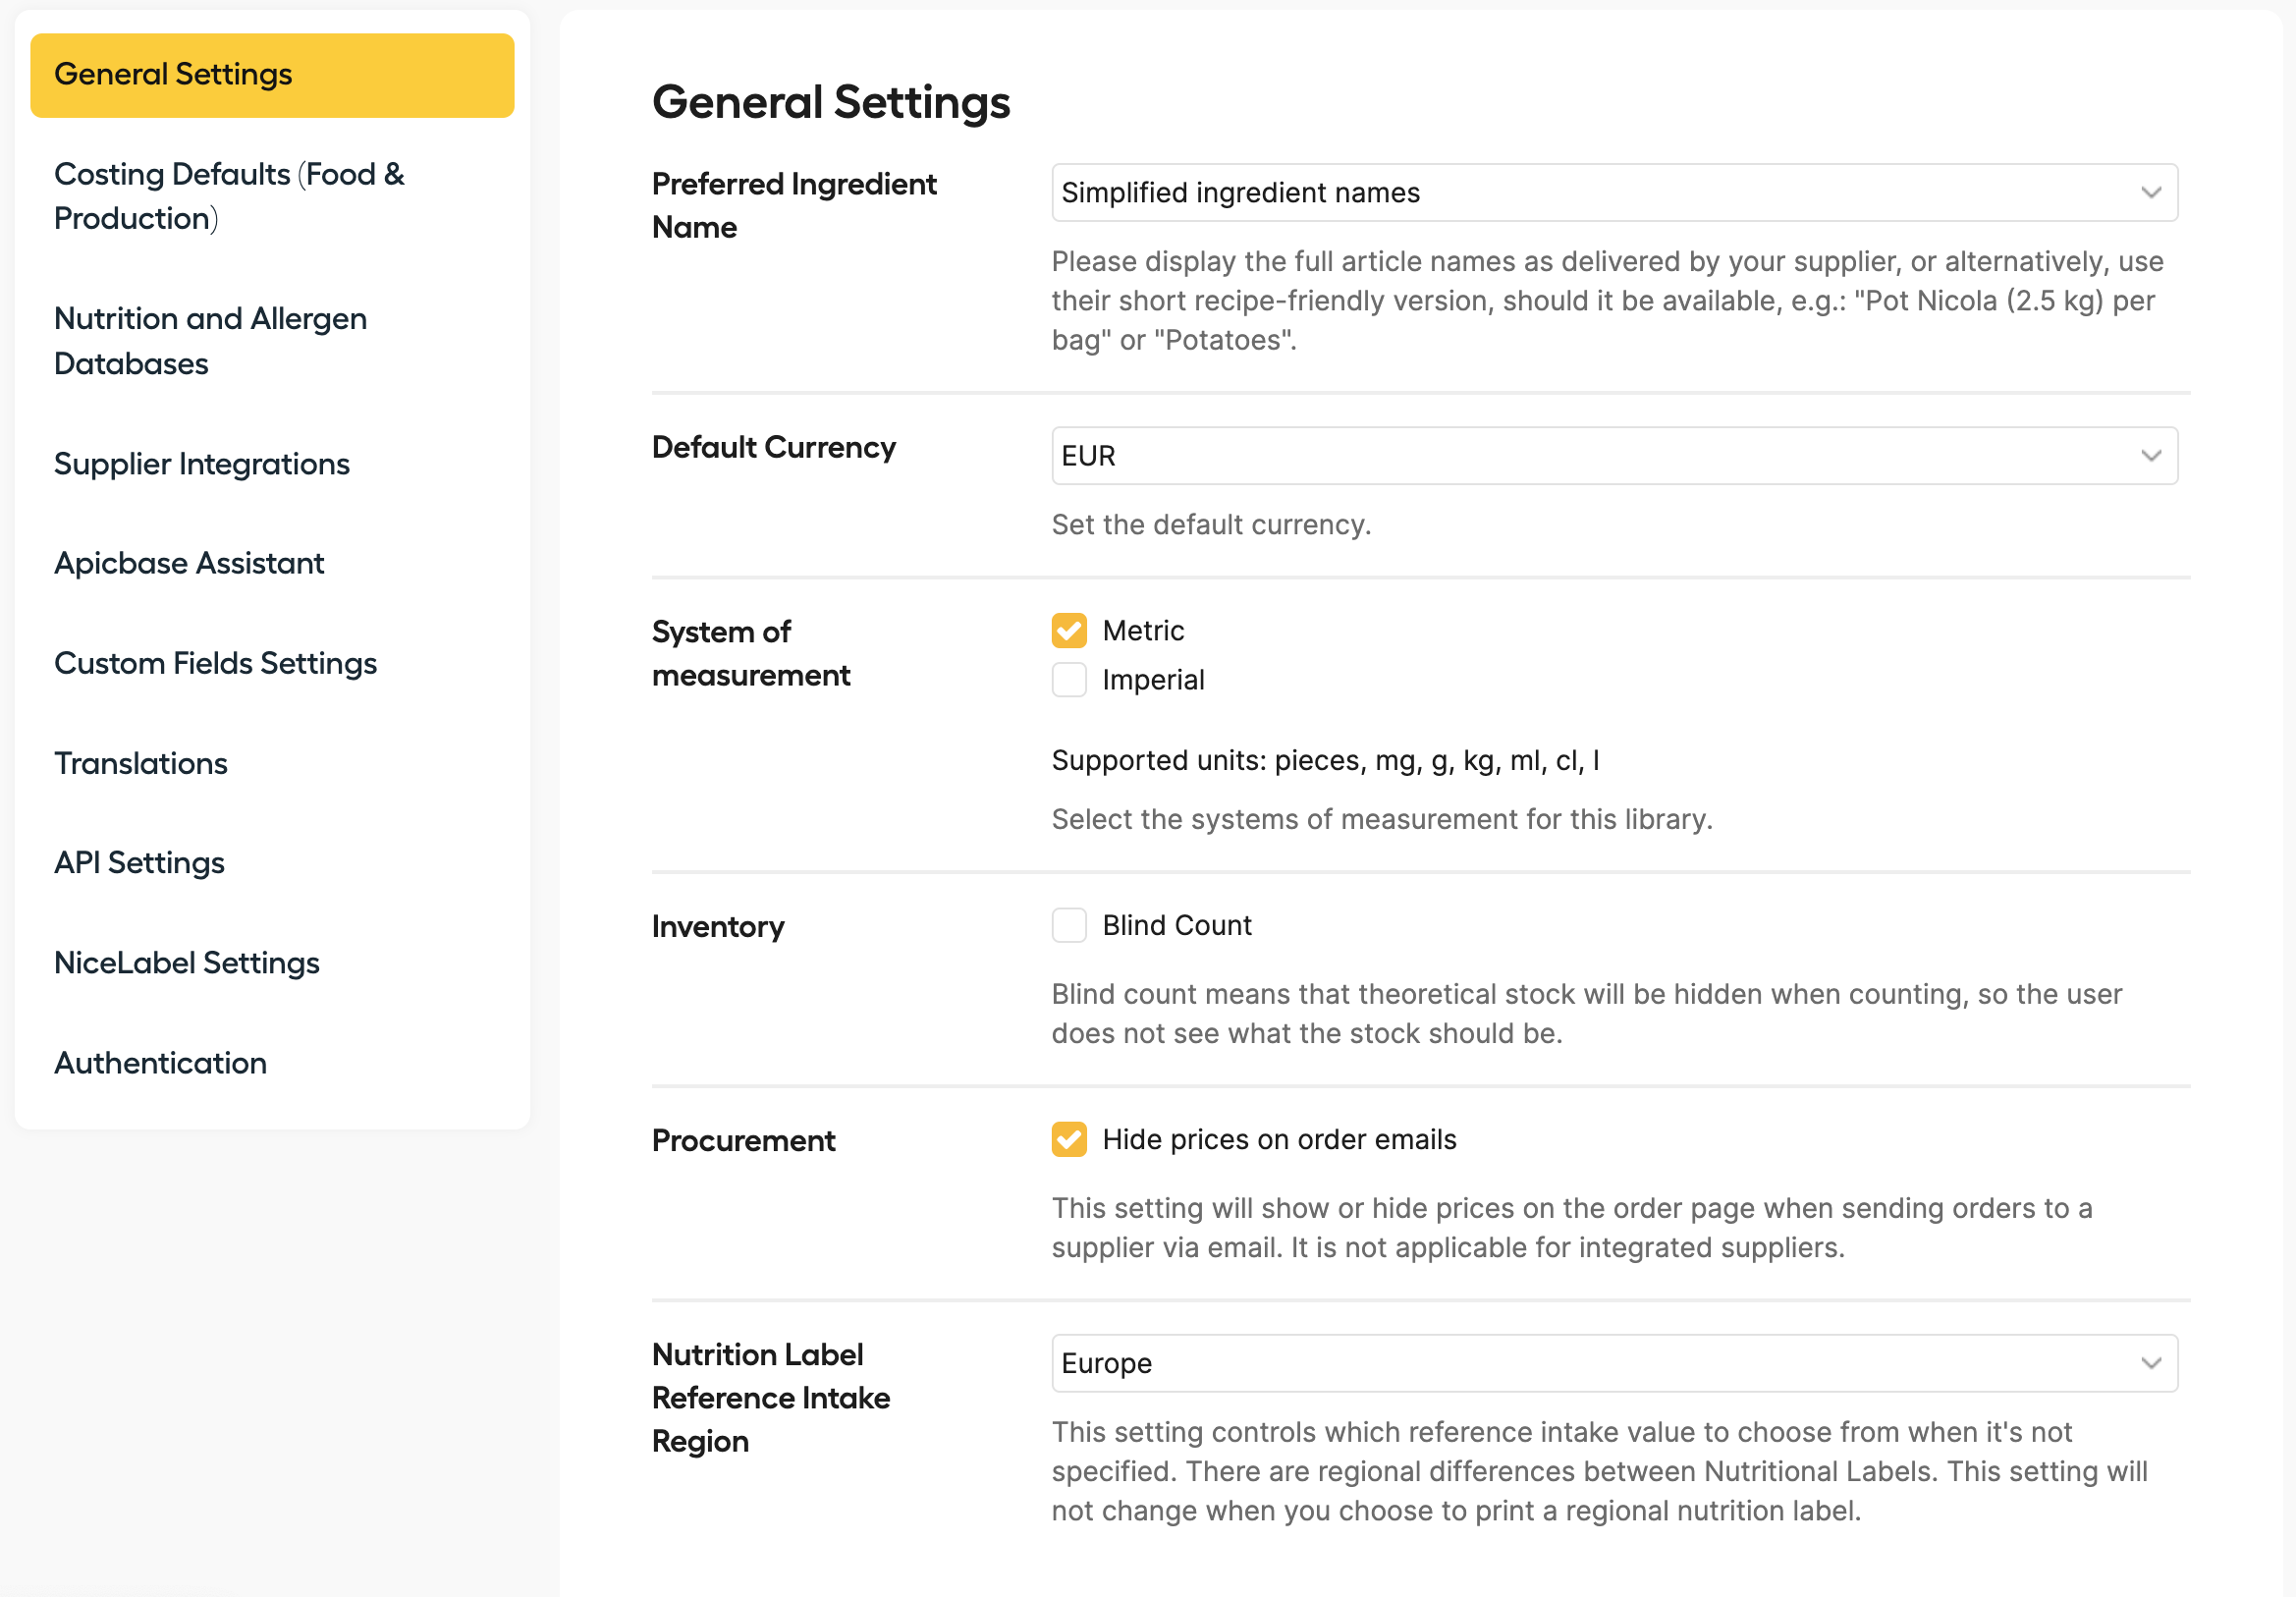
- Preferred ingredient names: Apicbase allows you to give your ingredients an official name, and a simplified name. Here you can choose how you want the ingredients to appear in your recipes.
- Default Currency: Set the currency you wish to use.
- System of measurement: Set the measurement system you wish to use. Note that you can check both boxes, this way you can use both the metric system and the imperial system at the same time.
- Inventory: Here you can check the 'Blind Count' box. This means that when doing an inventory count, the theoretical stock as calculated by Apicbase will be hidden when counting, so the user does not see what the stock should be.
- Procurement: Here you can check the 'Hide prices on order emails' box. With this option activated, package prices won't be shown in the orders you make to your suppliers via Apicbase's Procurement Module.
- Nutrition Label Reference Intake Region: Set the correct Region of the reference values for the recommended intake you want to have to appear in your Nutritional Labels.
- Costing Defaults (Food & Production)
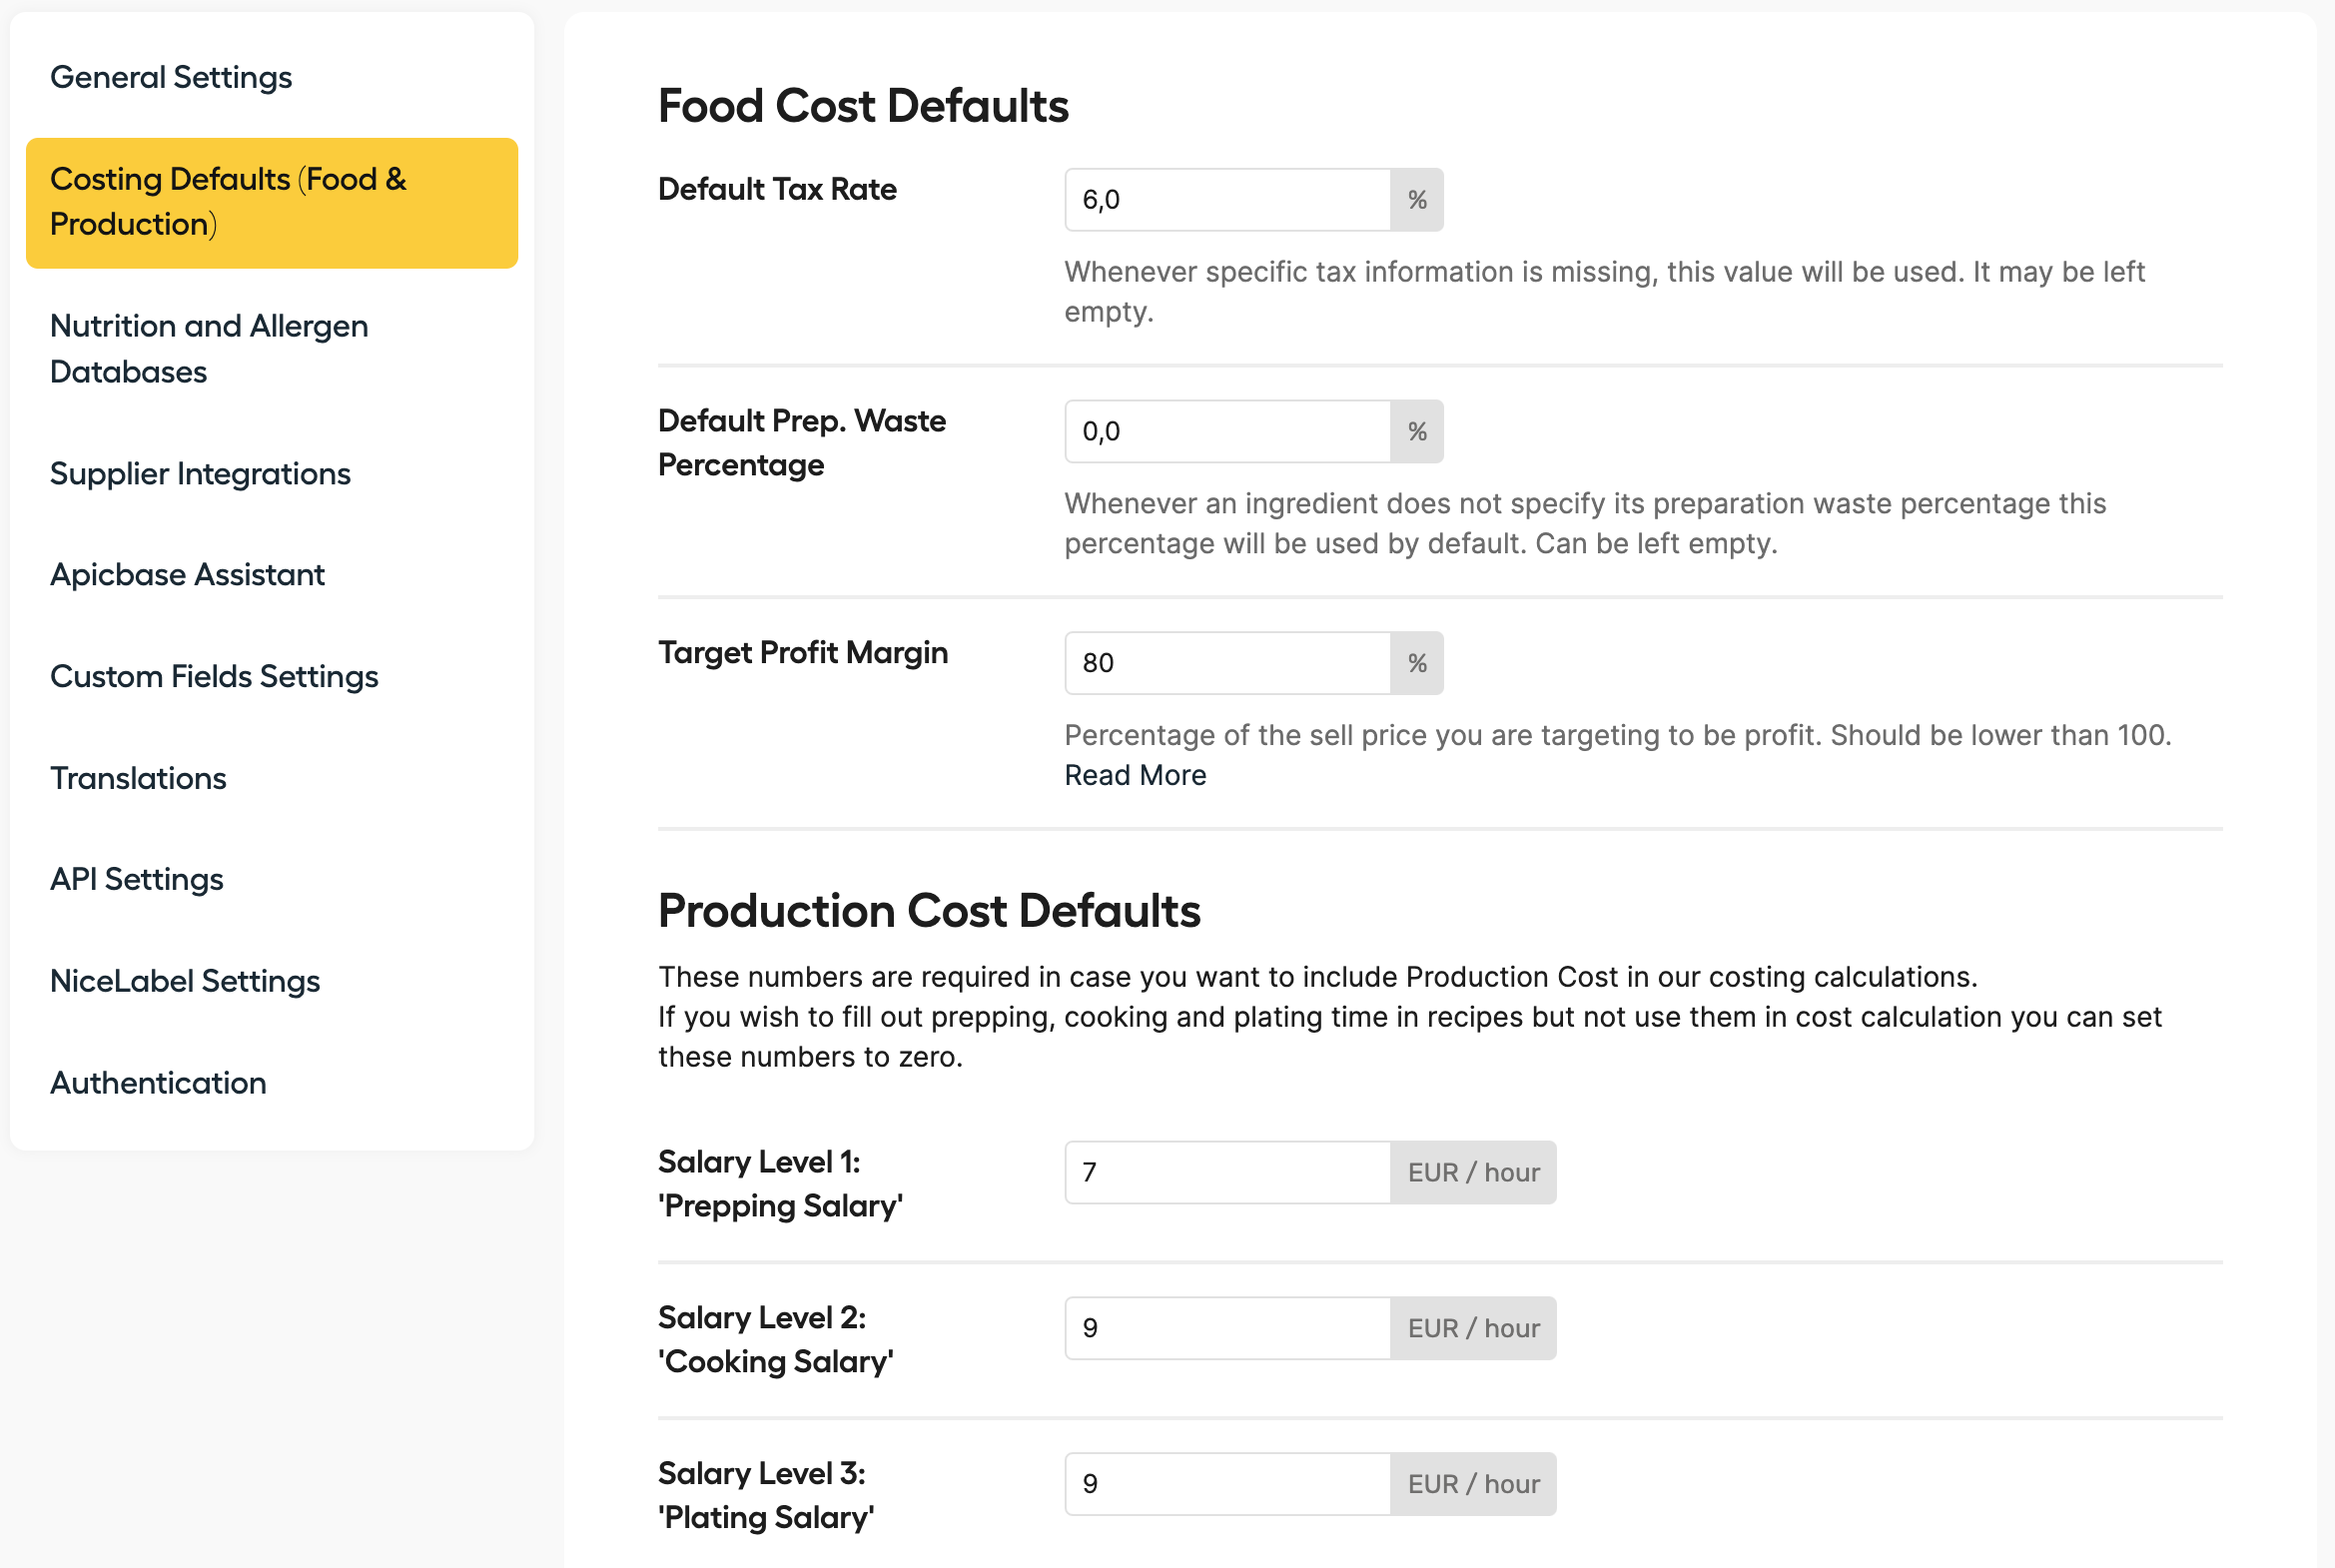
- Default Tax Rate: Set a default VAT rate for your recipes. You can still edit the VAT Rate on a recipe level, doing so will overwrite the percentage you've set in this box.
- Default Preparation Waste Percentage: Here you can set a default waste percentage per ingredient. In this article, you can read more about setting waste percentages.
- Target Profit Margin: Here you can set and edit a target profit margin per recipe. This is the profit margin you want to receive per sold recipe. This can be overwritten on a recipe level for individual recipes.
- Production Cost Defaults: This section is very useful in case you want to include personnel costs in your costing calculations. It allows you to enter 3 different salary levels. At the recipe level, you can add preparation-, cooking-, and plating time per recipe. When you set the production times in recipes, the production cost will then be included in the recipe, based on the salary levels you enter here.
- Nutrition and Allergen Databases
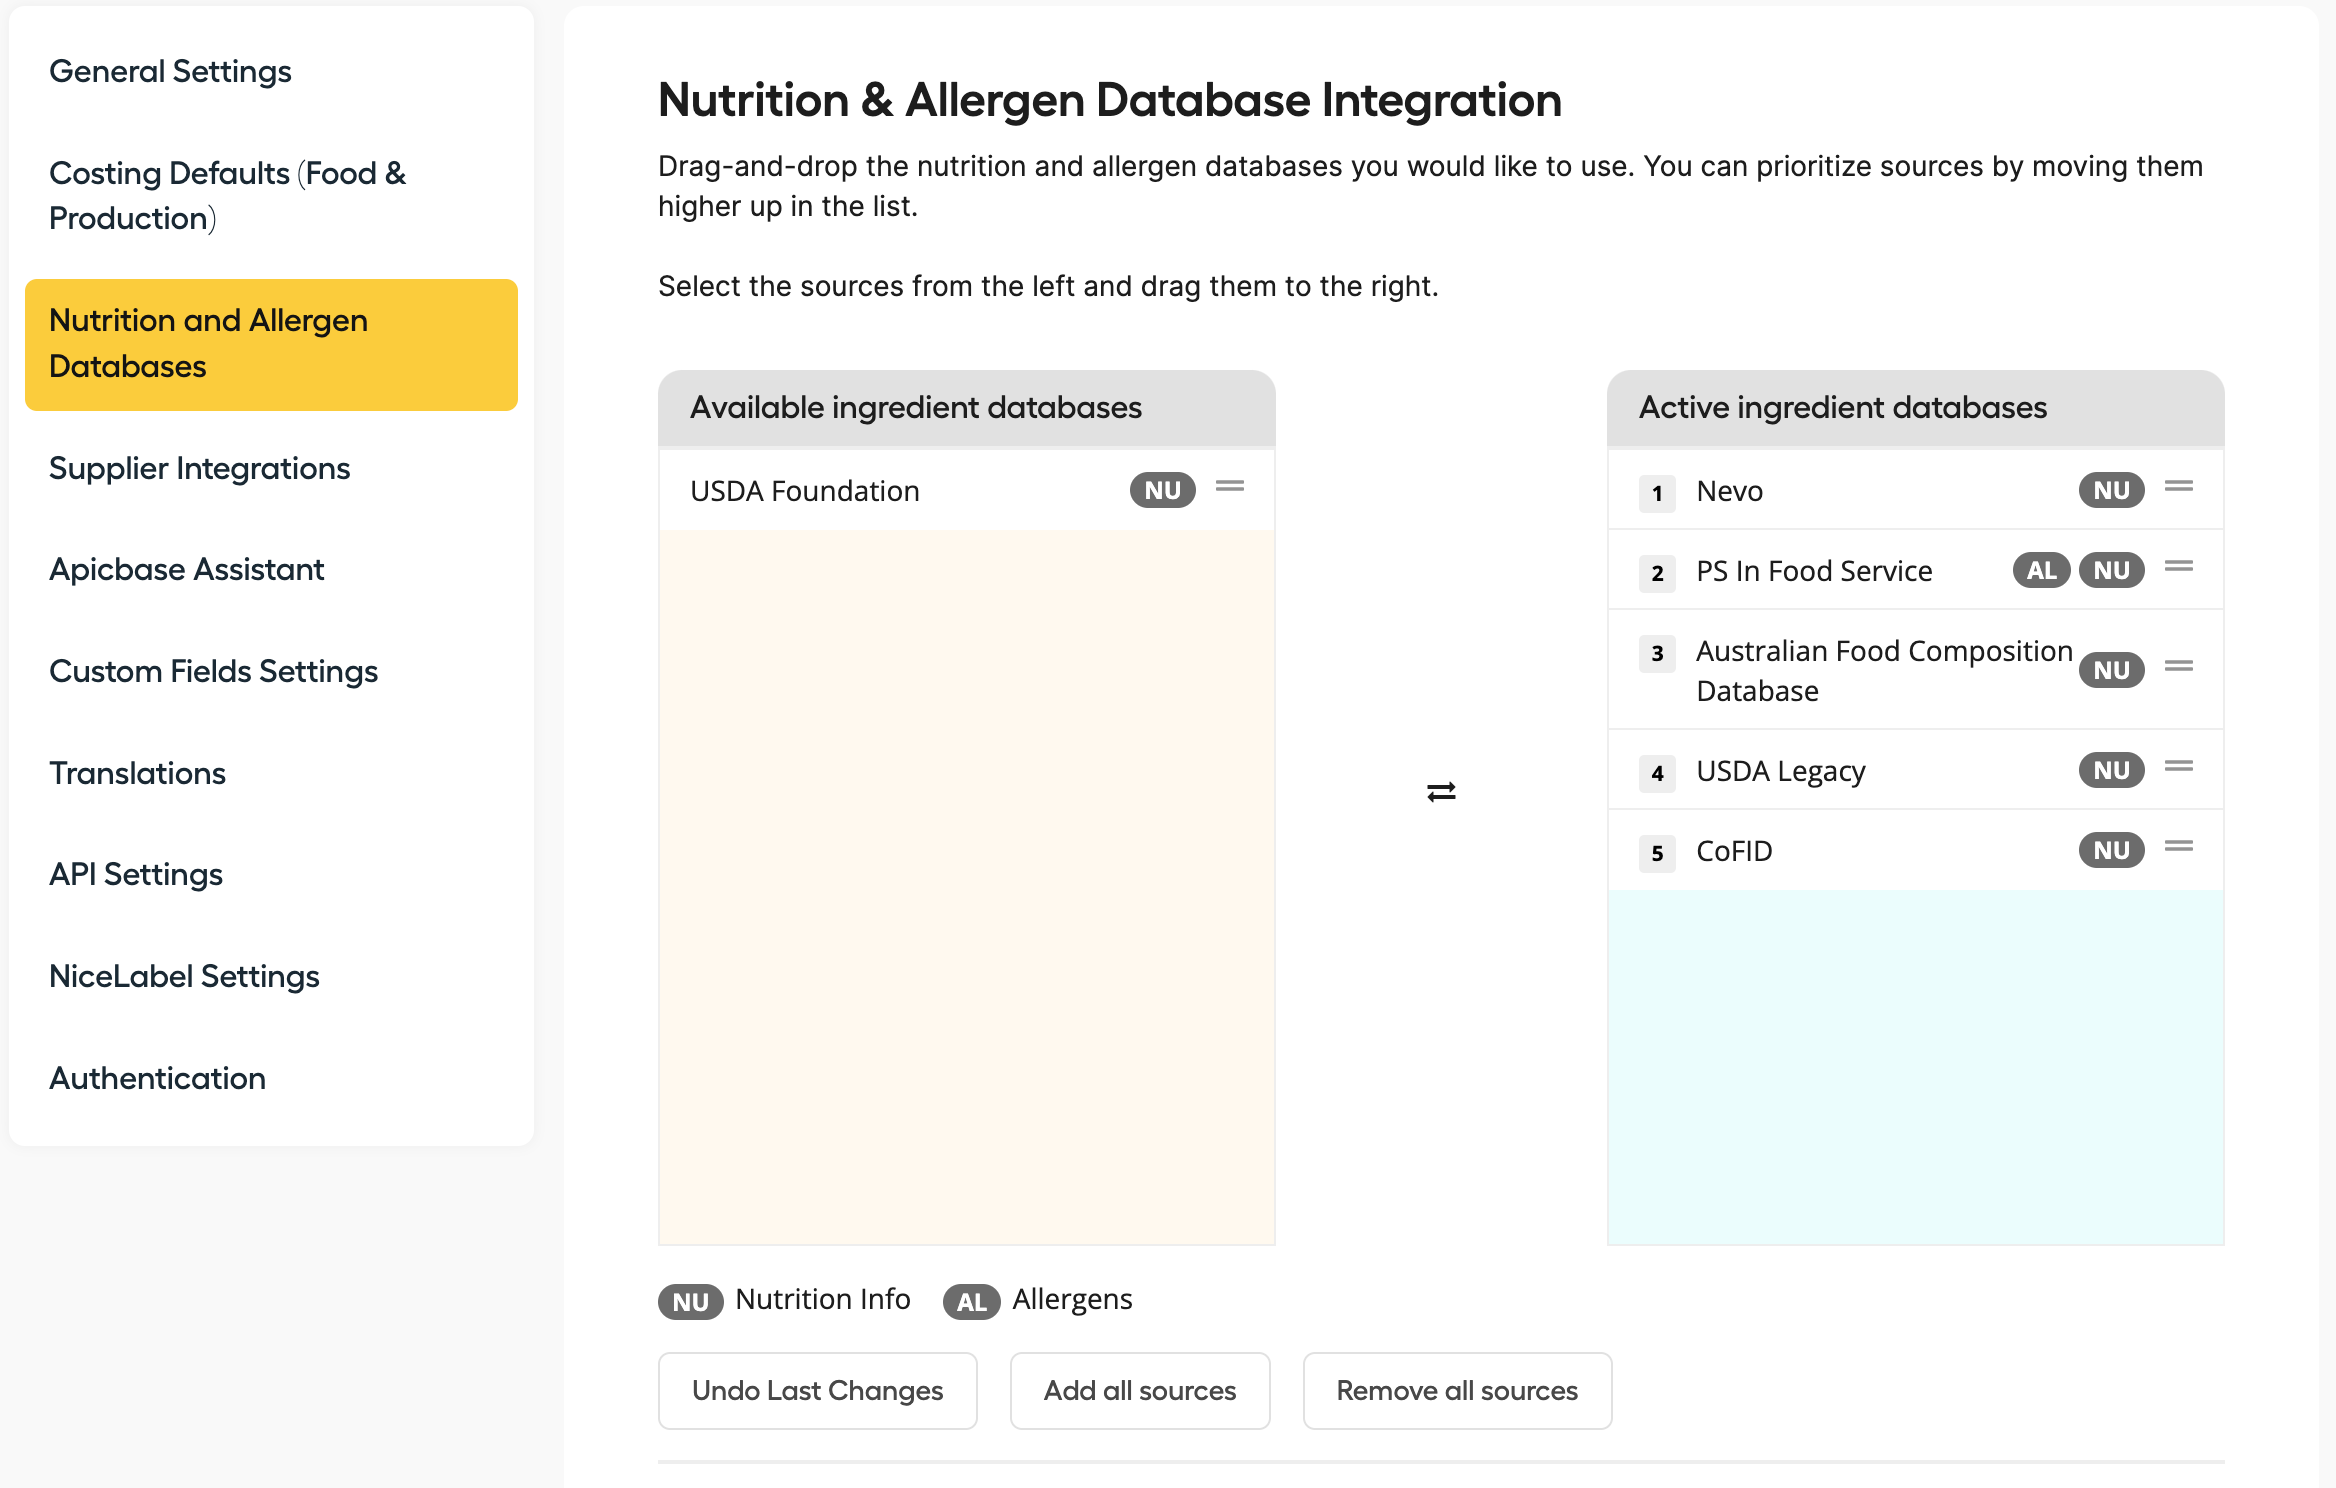
Here you can select which of our integrated Nutrition & Allergen databases you can access from your ingredients detail pages, by dragging them from the yellow 'Available' column on the left to the green 'Active' column on the right. You can read up on connecting nutrition and allergen databases here. - Supplier Integrations
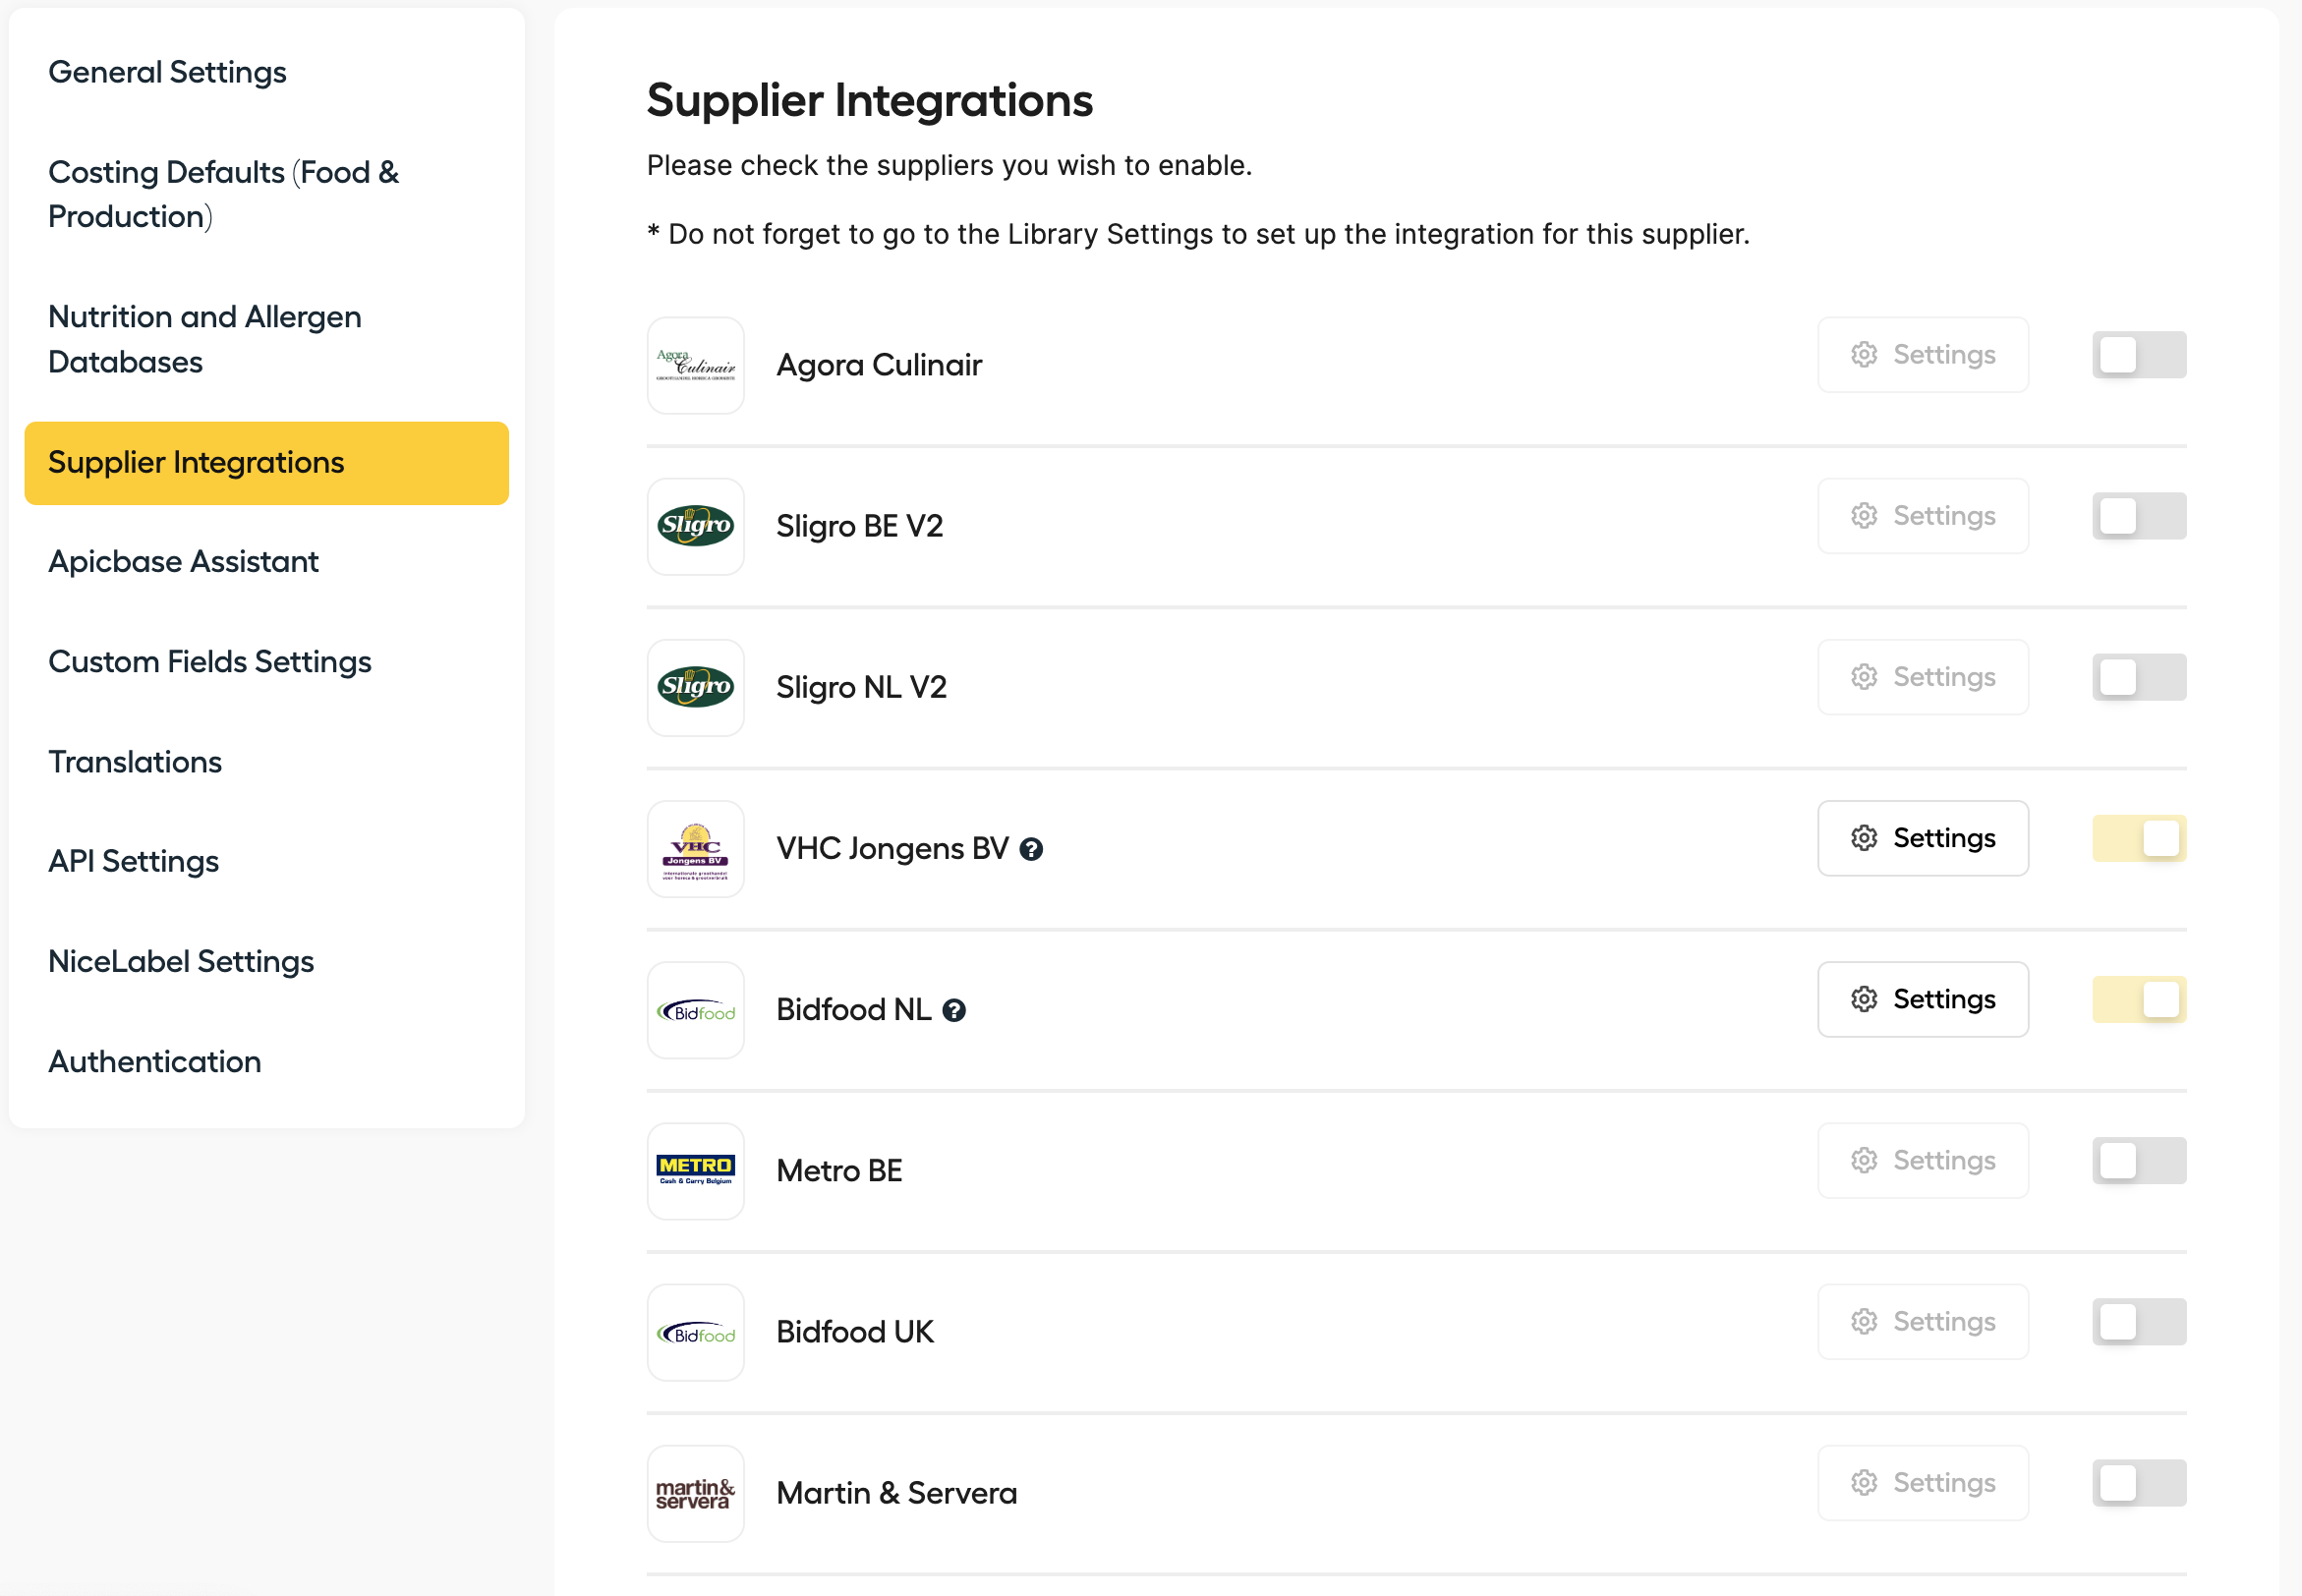
One of the most powerful features of Apicbase is the possibility to connect with integrated suppliers. Please send an email to support@apicbase.com if you want to add your ingredients from an integrated supplier to your Apicbase library. -
Apicbase Assistant
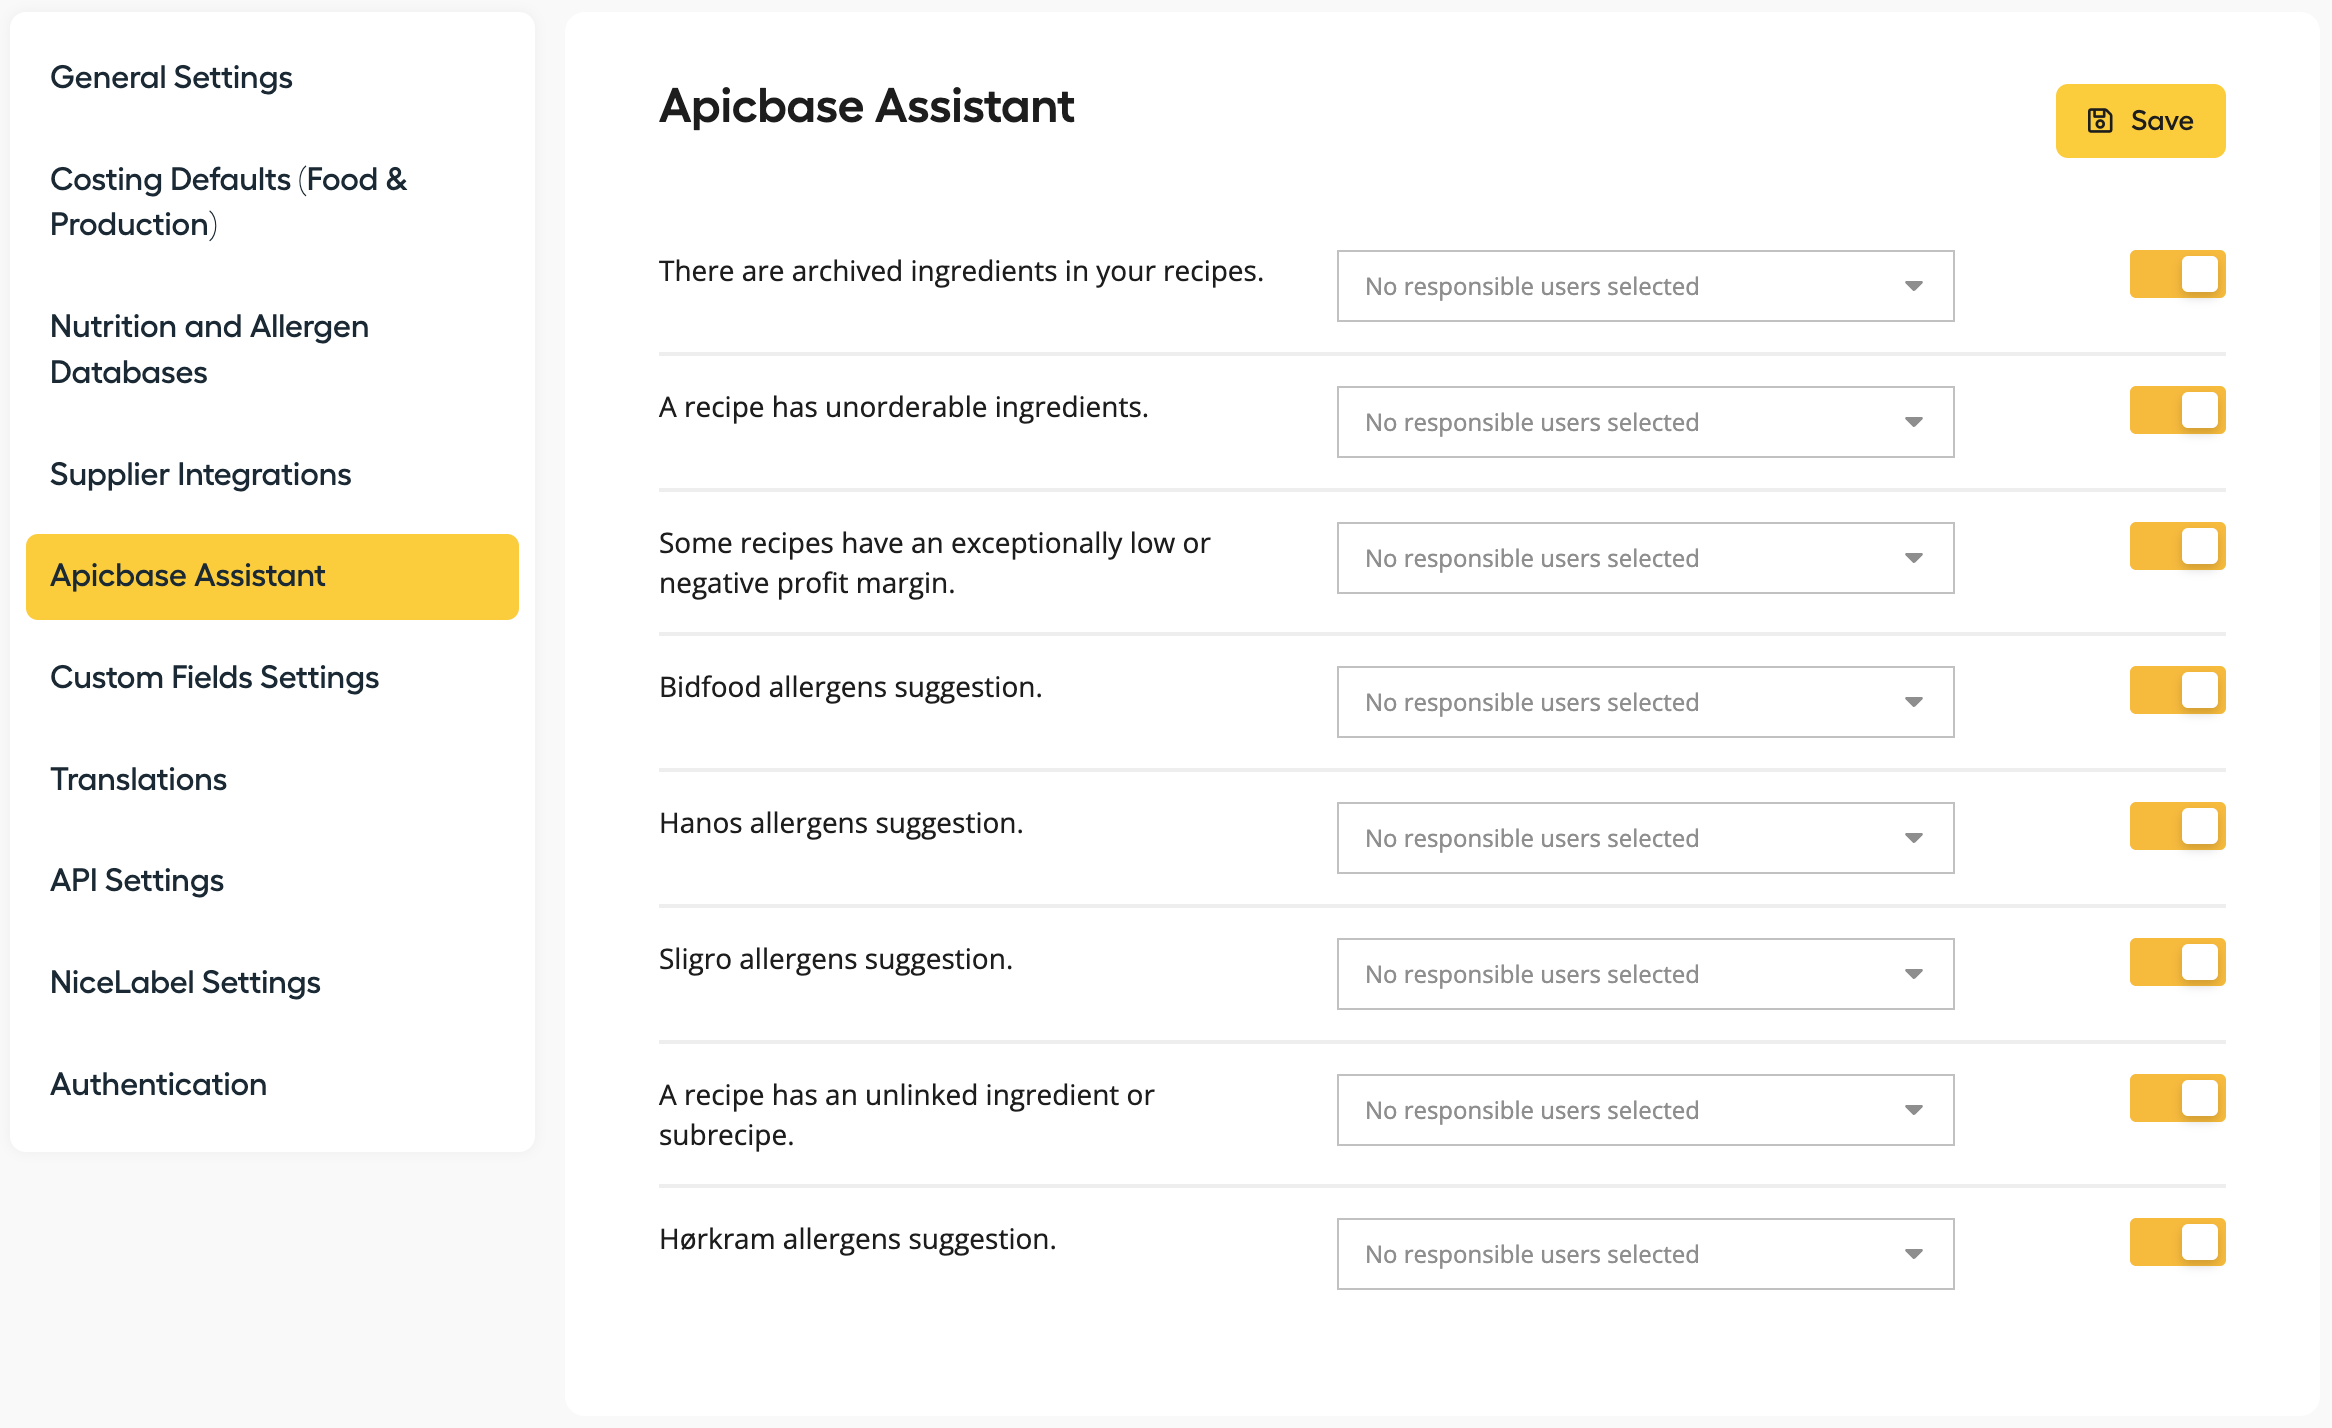
Here you will be able to activate/deactivate the different types of issues that the Apicbase Assistant (the little robot on your top right screen) will warn you about. You can also choose Responsibles for the different problem types: only these users will be warned about these issues by the Apicbase Assistant. If no responsible is selected, all users will be able to see the warnings.
- Custom Fields Settings
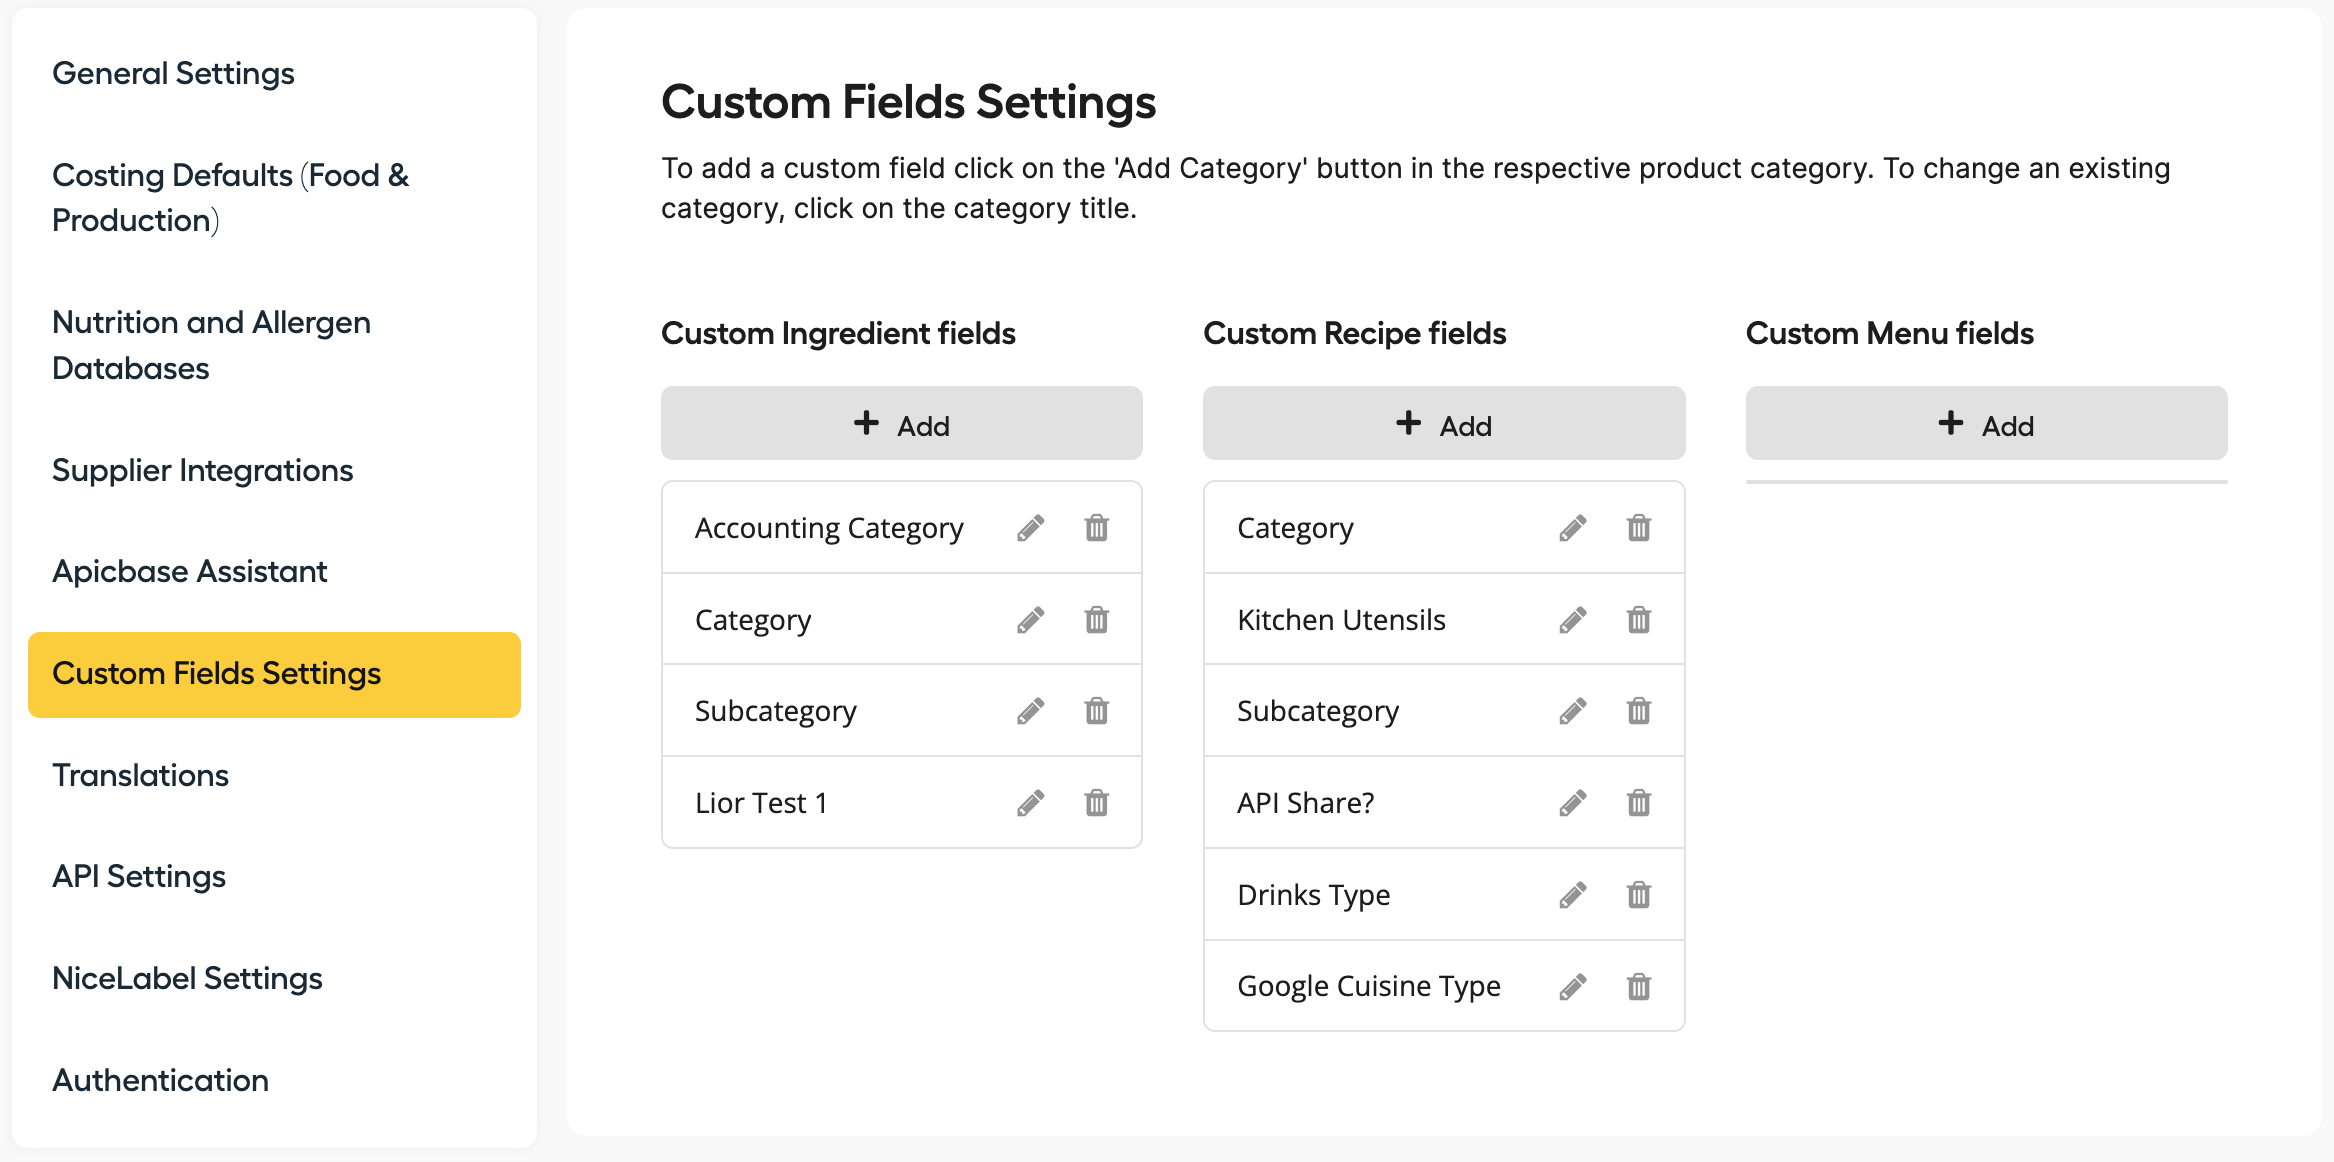
To organize your ingredients, recipes, and menus the way you would like them to be, you can create custom category fields. In this support article, everything you need to know is explained. - Translations
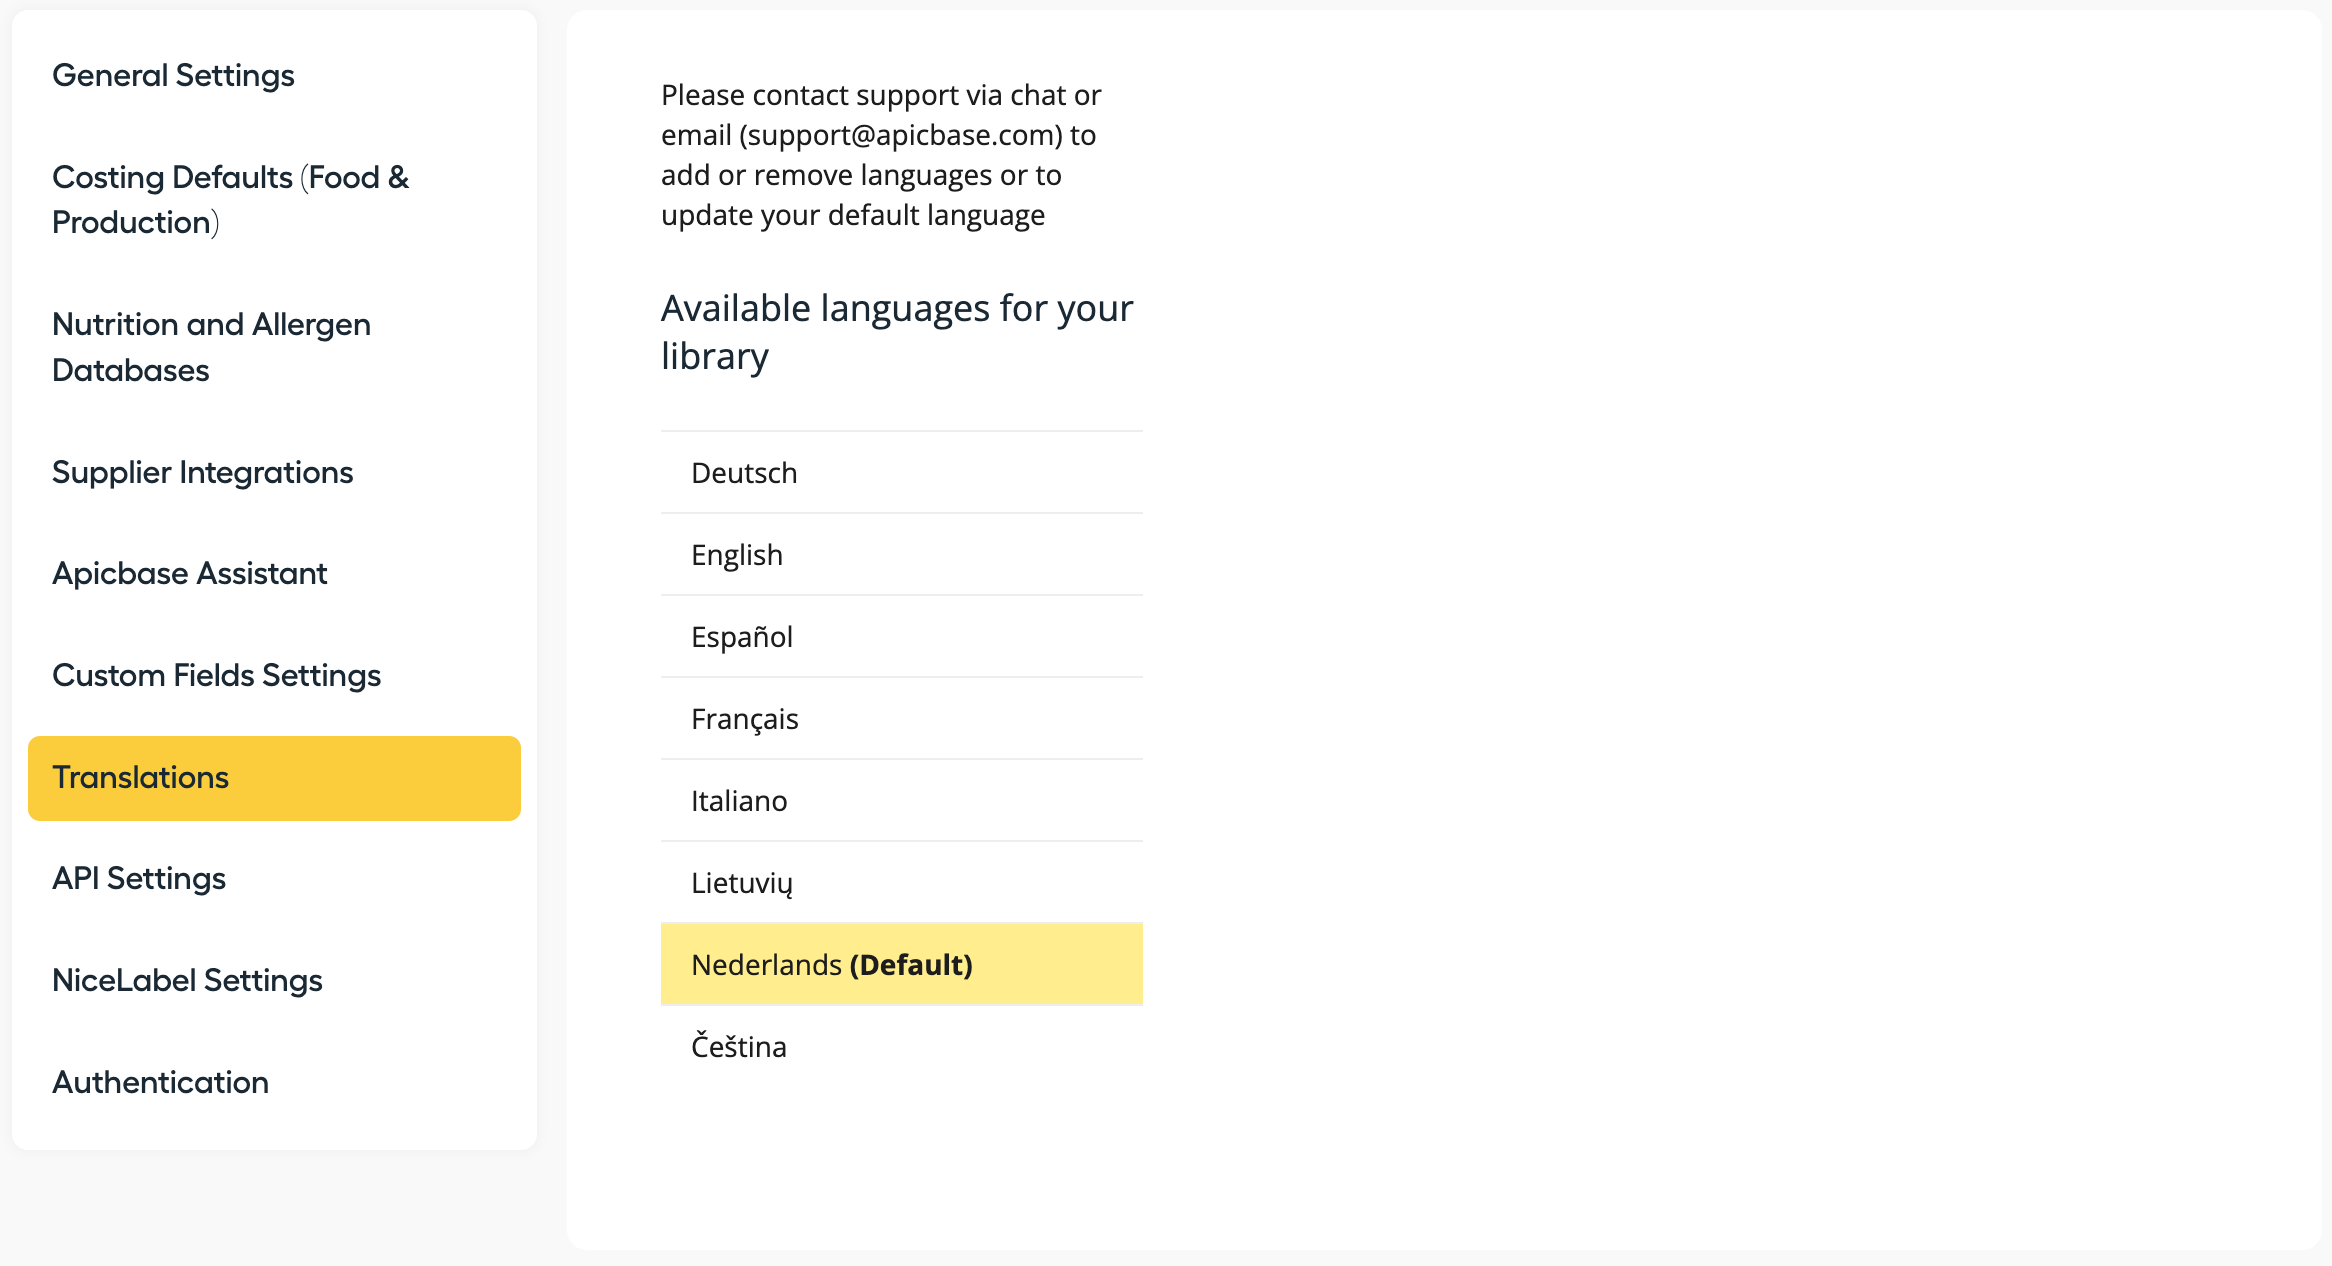
Under this tab, you can manage everything regarding translations. Contact our support team at support@apicbase.com if you want to make changes to the content languages in Apicbase. Click here for our support article regarding translations.
Tip: You can also change the language of your library by changing the language of your browser. - API Settings
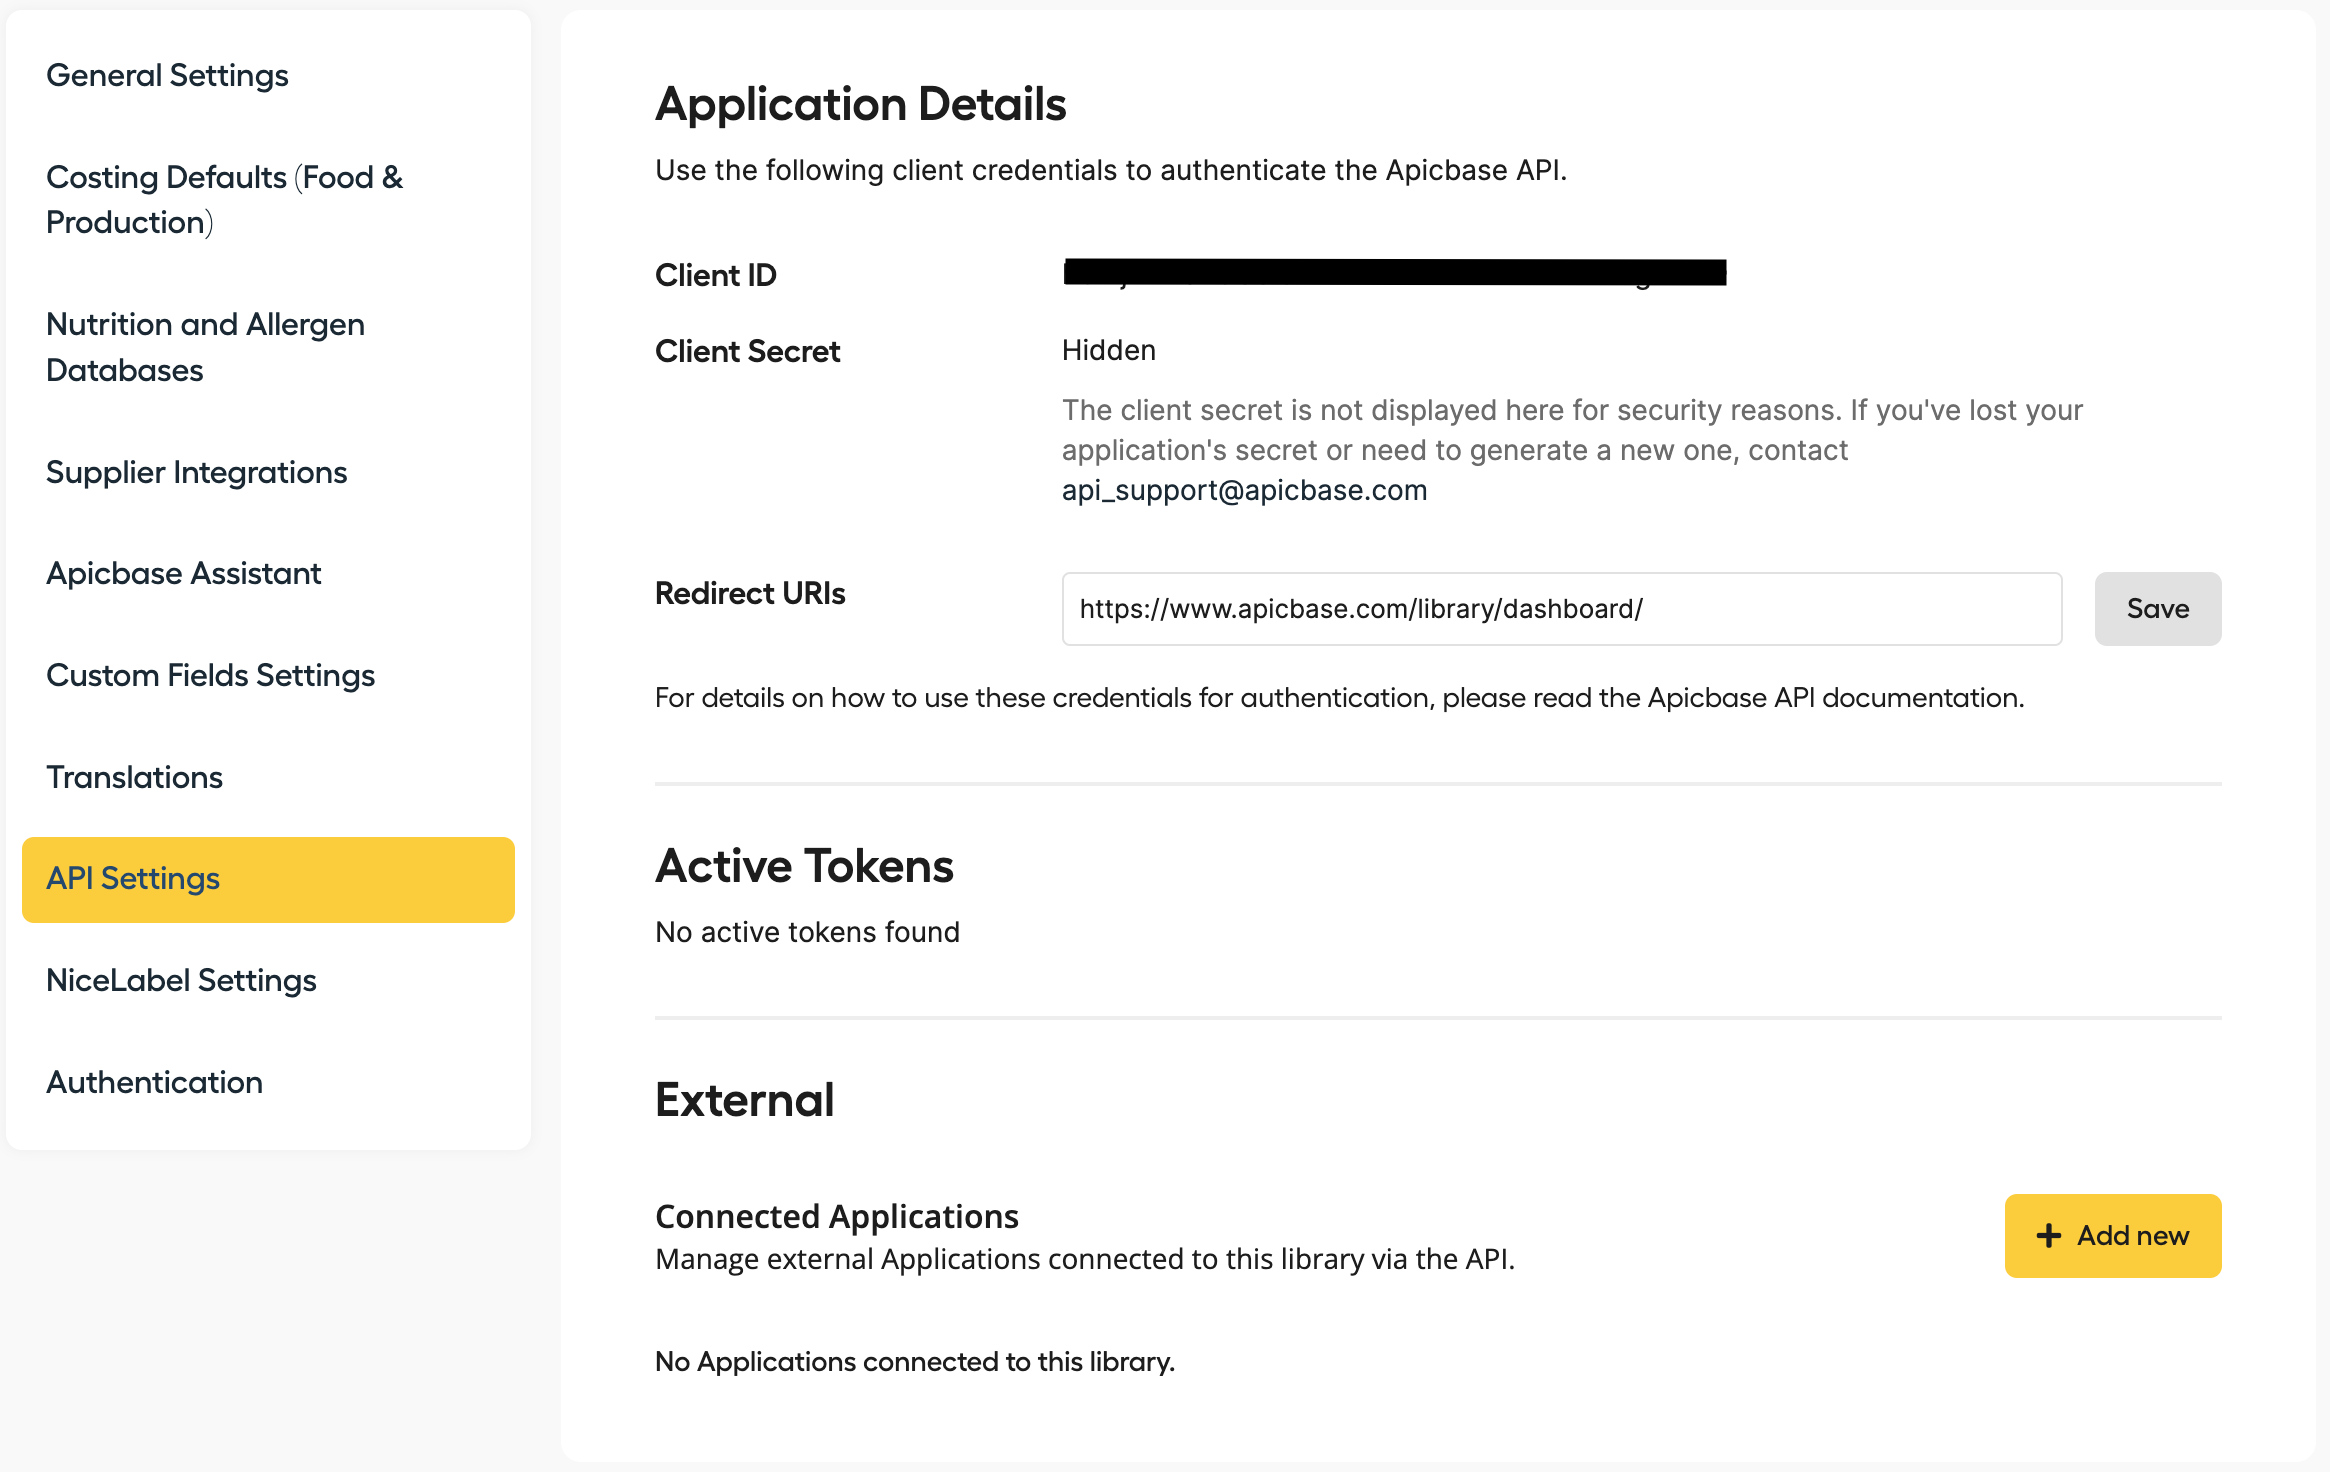
In this tab, you will find relevant information to set up your API with Apicbase. If you want to learn more about our API, you can check this article or our API documentation. - NiceLabel Settings
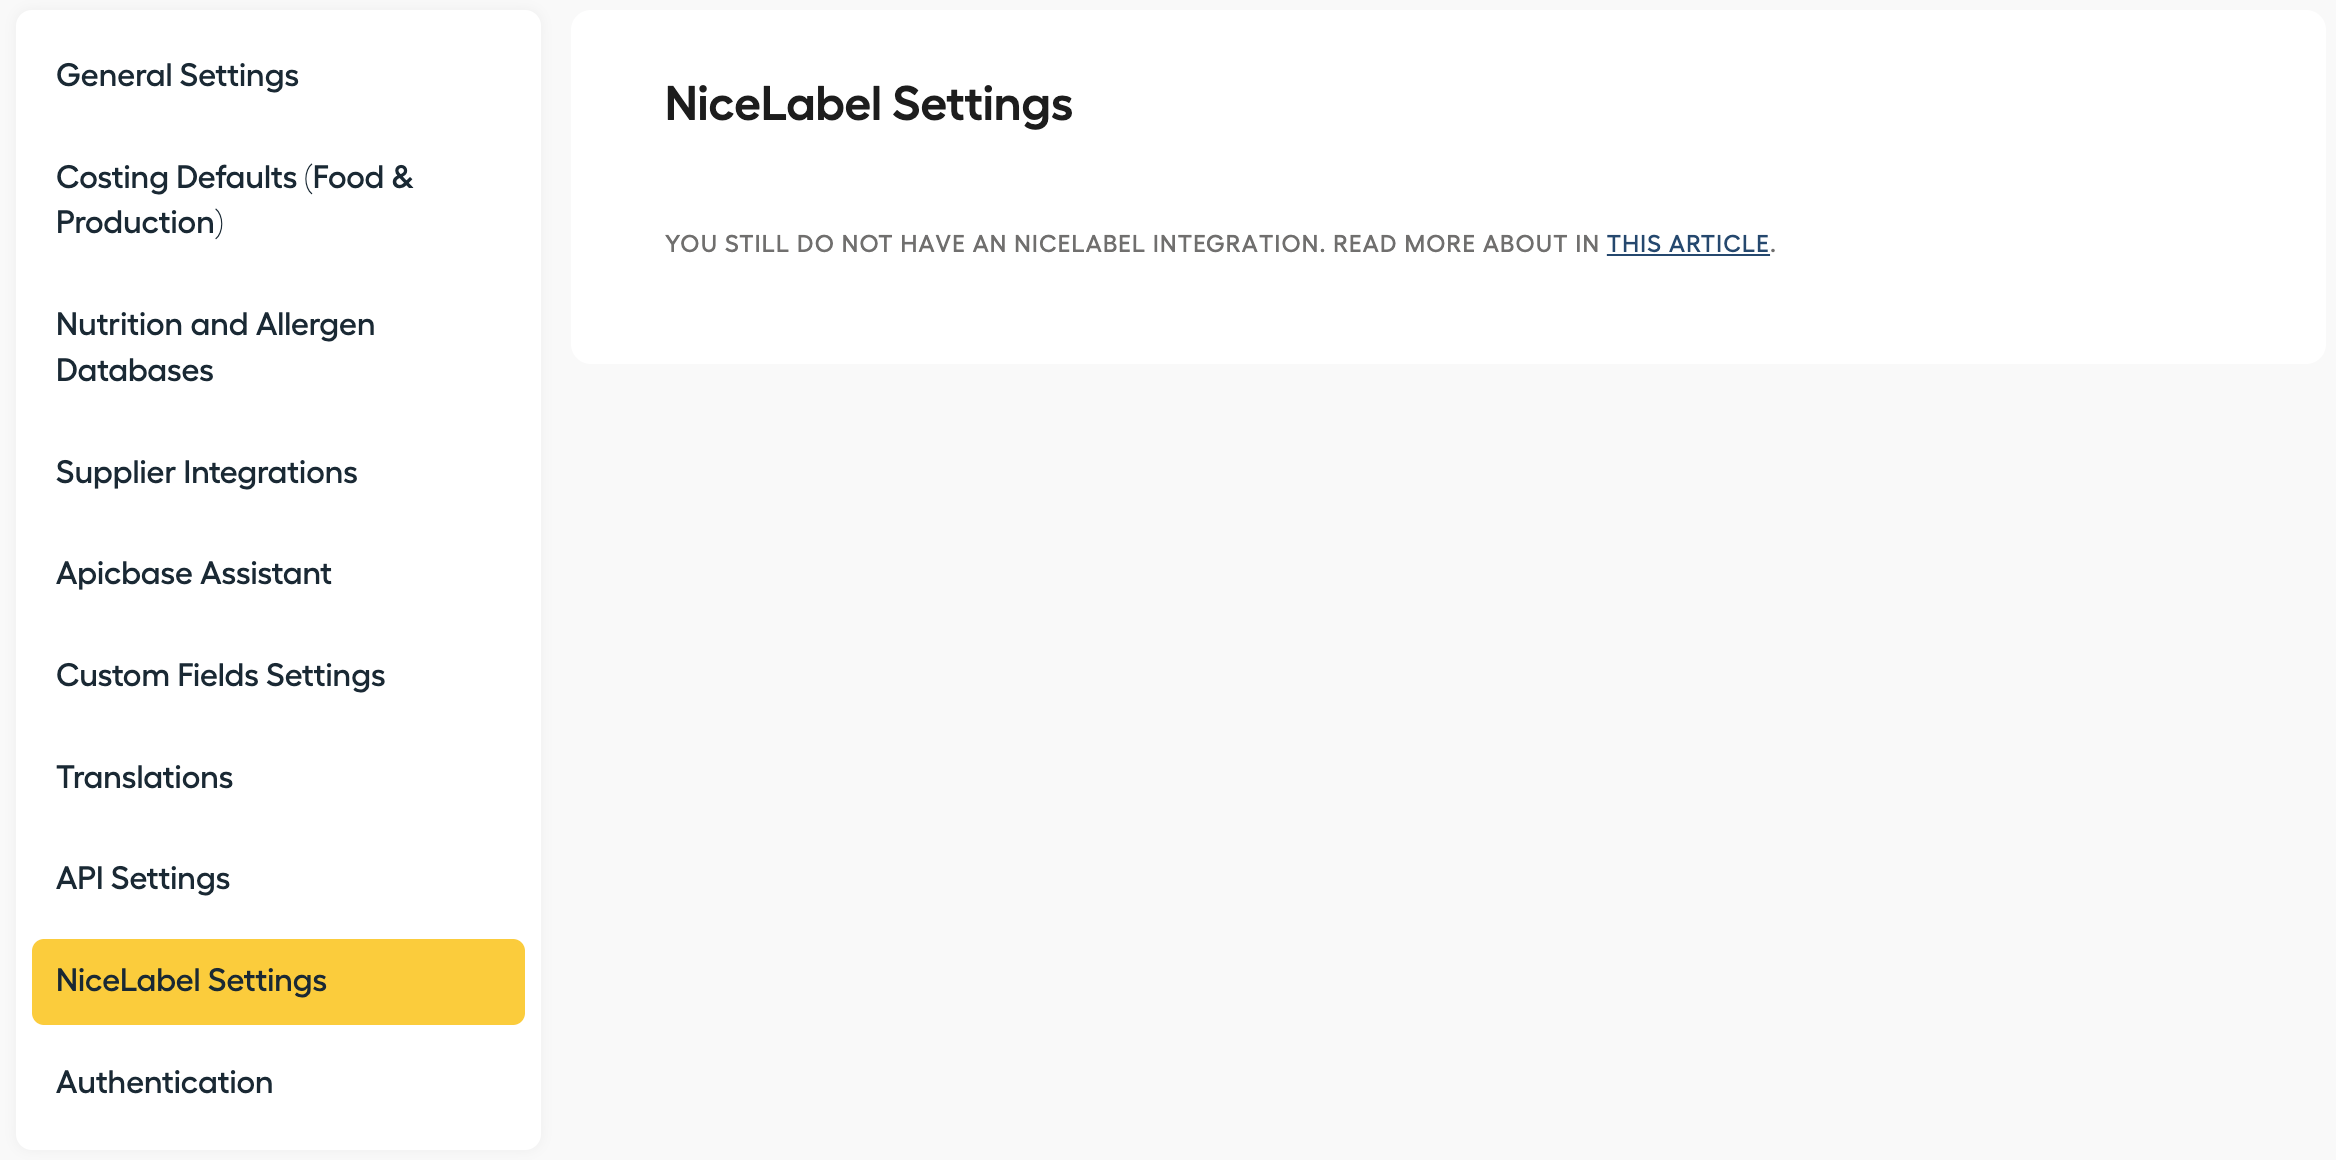
When the Traceability module is activated, the traceability "receive" page has the possibility to print labels for each product and each batch/lot number that is received from a supplier. Here you can set up a Nicelabel print integration. - Authentication

Here you can activate the option for your users to set up a 2-Factor Authentication before login into Apicbase. This was added to give a safer and more secure way to handle your data in Apicbase.