The roles feature is very customizable and powerful. You can create different roles for different users or groups of users. You can define roles per outlet. Every outlet user has a default role if you have not defined your own roles. The default role gives all possible permissions.
You can, however, create custom roles. New possibilities and permissions are added regularly, the most popular ones are listed below:
Recipe Permissions:
- The user can View- this user can view the recipes
- The user can Link- this user allows seeing all library recipes and link to outlets
- The user can Unlink- this user can unlink ingredients from outlets.
- The user can view Financial Details - this users can access recipe financial details.
Menu Permissions:
- The user can View- this user allows seeing all library menus
- The user can Link- this user allows seeing all library menus and allow them to link and Unlink recipes and also
- The user can Link- this user can link ingredients to outlets (barcode app scanning) /Unlink Ingredients to outlets.
- The user can view Financial Details - this users can access menu financial details.
Ingredient Permissions:
- The user can Link - this user can link ingredient to outlets (barcode app scanning).
Order Permissions:
- Create Order- The user can create orders (but not necessarily send them)
- Send Orders- The user can send orders to the supplier.
- Receive Orders (draft mode only)- The user can create drafts for receiving external orders, but he can't set them as received.
- Receive Orders- The user can fully receive external orders.
- Update Price- The user can update article prices when receiving goods.
- Manage Lists- The user can manage (create & edit) order lists.
- Edit Closed Deliveries- The user can edit closed delivered orders.
- Manage Procurement - The user can set supplier ordering details.
- Pick Orders- The user can pick orders coming from other outlets.
- Ship Orders- The user can ship orders coming from other outlets.
- Edit Closed Deliveries- The user can edit and change the date of closed shipped orders.
- Open, Close & Continue a count- The user can open, close, and continue any ongoing count. Closing a count will update stock.
- Open & Continue a count- The user can open and continue any ongoing count, but they cannot close it.
- Continue a count- The user can view and continue with an ongoing count, however, they cannot open or close it. The user can still open and close partial counts.
- Delete closed counts- The user can delete closed counts.
- Reopen counts- The user can reopen counts.
Note: Delete Closed Counts / Re-open Counts: This permission allows the user to alter stock history.
- Creation- The user can create creation events.
- Transfer- The user can create transfer events.
- Waste- The user can create waste events.
- Delete finalized events- The user can delete finalized events (except count)
- Edit finalized events- The user can edit and change the dates of finalized events
- Set Min & Par levels- The user can set minimum and par levels.
Note: Delete/Edit finalized events, this permission allows the user to alter stock history.
HACCP/Task permissions:
- Full access- The user can (Create, Edit, and Delete Tasks)
- Perform tasks- The user can perform tasks.
Production Plan permissions:
- Full access- The user can (Create, Edit, and Delete Tasks)
- Perform tasks- The user can perform tasks.
Sales permissions:
- Record manual sales- The user can record manual sales.
- Delete finalized manual sales- The user can delete finalized manual sales.
- Edit finalized manual sales- The user can edit and change the dates of finalized manual sales.
- PoS Connection- The user can perform PoS operations.
Note: Delete/Edit Finalized Sales, this permission allows the user to alter stock history.
Apicbase Assistant permissions
- Full Access- The user can see and take action on issues displayed on Apicbase Assistant.

Insight Hub permissions
- View Dashboard- The user can see the Insight Hub Dashboard
Create a new user role
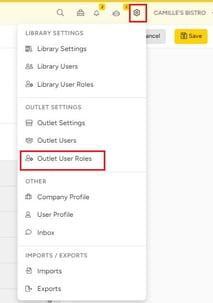
- Click the settings button in the upper right corner and select "Outlet User Roles".
- A new page opens where you see an overview of all the roles that are created in the library. You can edit the role by clicking on the edit button
 .
.
- You can also add a role by clicking the "+Add user role" button. When you click this button, a popup appears where you can create a new role.

- A popup will appear that allows you to:
- Set the role name.
- Set the permissions the users with this role will need.
- "Add role" to create the role and select Permission roles
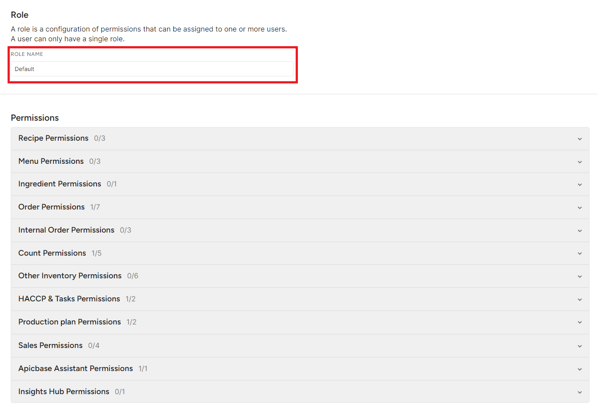
E.g.: In this example, the role of "Default" is created. The users with this role can add recipes and menus to this outlet.
You see the role has now been added to the list of user roles.

Assign the role to a user
- Go back to the "Outlet Users" tab and click on the edit button .
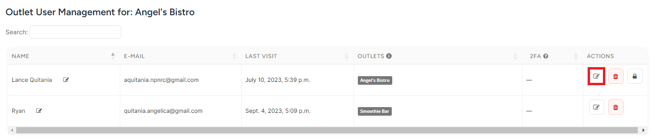
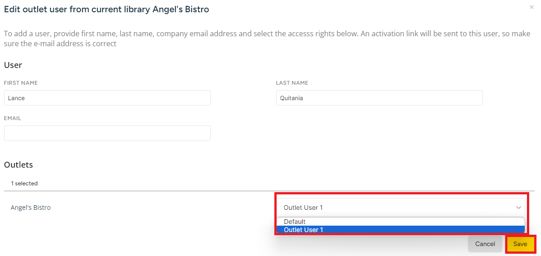
- The popup with user information will appear.
- Select which outlet permission you want to assign and click the drop-down menu in the lower-left corner. Select the role you want to assign. to give all possible permissions.
- Click on "Save".
In the "Outlet User Roles" tab, you see now the name of this user in the row of the "Staff 2" role.
If you want to delete an outlet user role, just click on the ![]() next to it.
next to it.