How can I add HACCP tasks?
Apicbase lets you add HACCP tasks easily according to your HACCP-plan. This will make following up on the progress of the tasks like a walk in the park. Read all about it in the following article.
To start adding the HACCP tasks, you have to add the CCPs as formulated in your HACCP-plan. If you want to learn how to add CCPs, read this article.
- Click on "Planning">"Tasks & HACCP"

- Select for which outlet you want to add tasks. (Tasks are (in contrast with CCPs) outlet specific. You can add tasks for multiple outlets. See later in this article)
- Click on "Create new task"
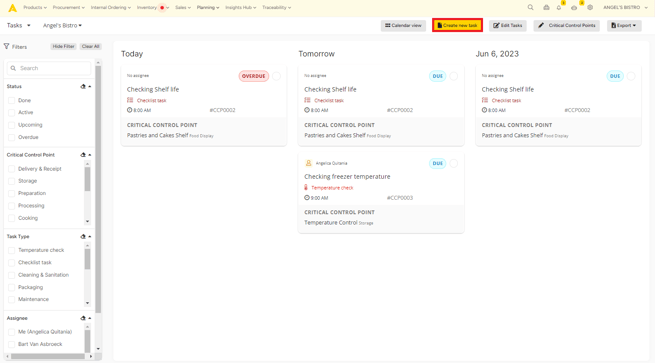
- A popup will appear that lets you fill in the following information
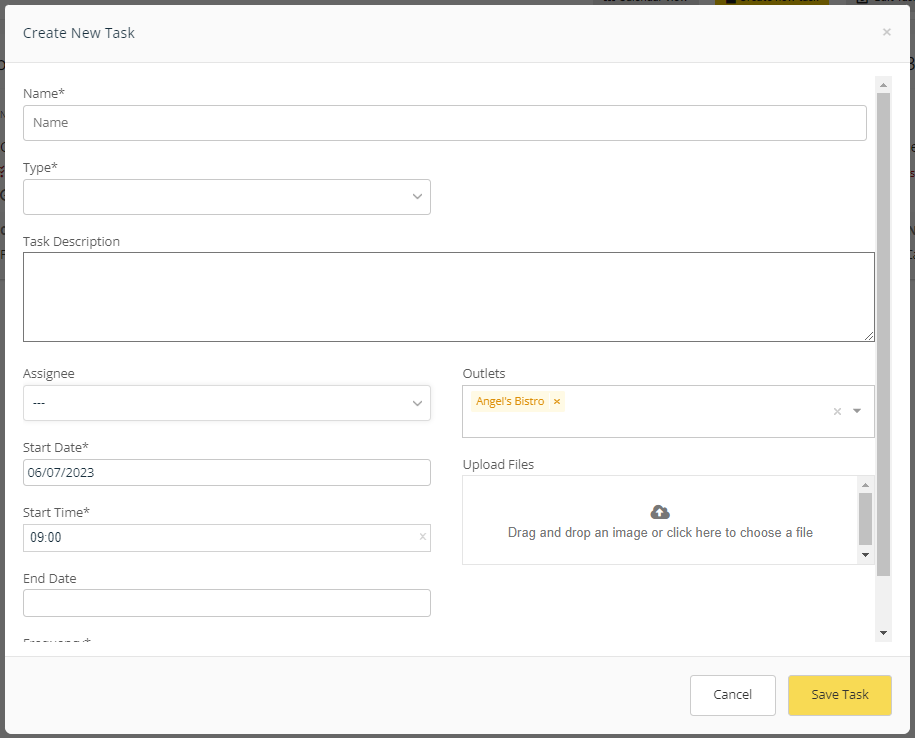
- Name of the task
- Type:
- Temperature check
- Minimum and maximum temperature (Only for Temperature check tasks)
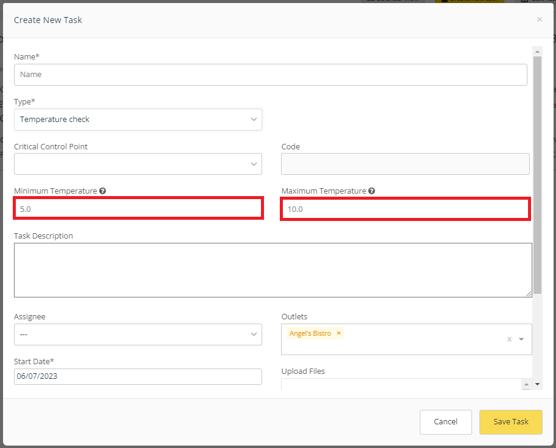
- Minimum and maximum temperature (Only for Temperature check tasks)
- General task (these are other tasks that are not HCCP related, but can be added to your plan. For this reason, general tasks are not linked to a CCP.)
- Checklist task: A checklist task allows you to add a checklist of subtasks within one task. This works easily if you want to be able to check multiple smaller tasks in on go.
- Checklist values: Add as many checks you want and click on the wastebin symbol to delete any.
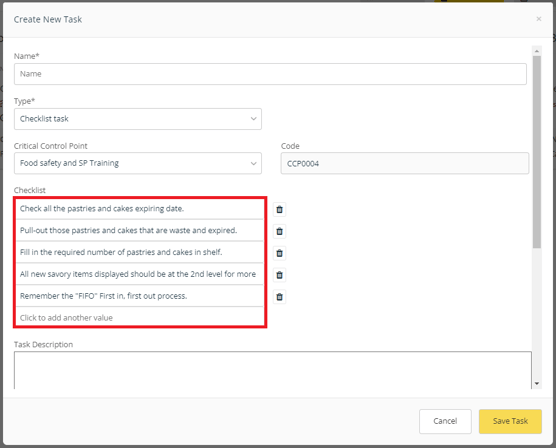
- Checklist values: Add as many checks you want and click on the wastebin symbol to delete any.
- Temperature check
-
-
- Cleaning and sanitation
- Packaging
- Maintenance
- Waste Management
- Pest Control
- Facility Management
- Stock Management
- Chemical control
- Training
- Traceability and Recall
- Order: by creating an order task, it will provide a Create Order button for the assignee that will redirect to the create order page for the chosen outlet.

- Count: by opening a count type of task, the assignee can directly click the Count Inventory button to be redirected to the count overview page of the outlet and perform a stock count.

-
-
- Critical Control Point (CCP): here you can select the CCP to which this task is linked.
- CODE: the code is filled in automatically if you select a CCP.
- Task Description
- Assignee (optional): here you can select the person that will generally do this task. If you add this task for multiple outlets, you can't select the assignee here, but you will do this when you plan the task.
- Outlets: Here you can select the outlets for which you want to create the task.
- Start date
- Start time
- End date (optional)
- Frequency:
- Inactive: no frequency is selected
- Once
- Daily
- Weekly
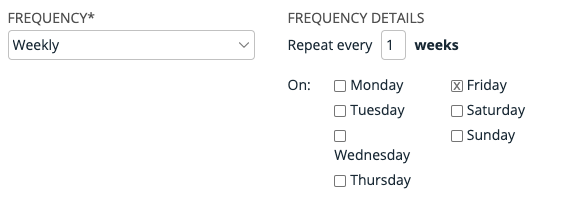
- Fill in the interval you want to use and select the days on which the tasks have to be planned. This example task will be planned every week on Friday.
-
-
- Monthly
- Fill in the interval you want this task to be repeated and on which day it has to be executed. This example task will be planned every month on the 1st day of the month.

- Fill in the interval you want this task to be repeated and on which day it has to be executed. This example task will be planned every month on the 1st day of the month.
- Yearly
- Fill in the interval that you want to use and select the date on which the task has to be repeated. This example will be planned every year on the 4th of February.

- Fill in the interval that you want to use and select the date on which the task has to be repeated. This example will be planned every year on the 4th of February.
- Monthly
-
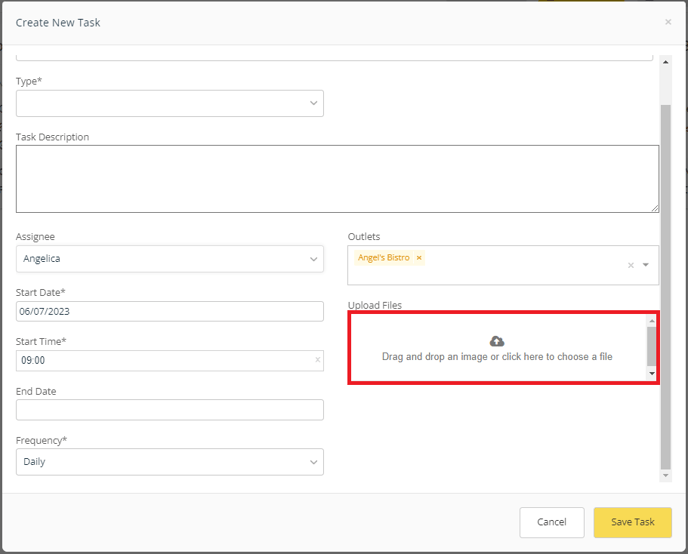
- You can also upload a document when creating a task.
Here is an example of a filled-in task
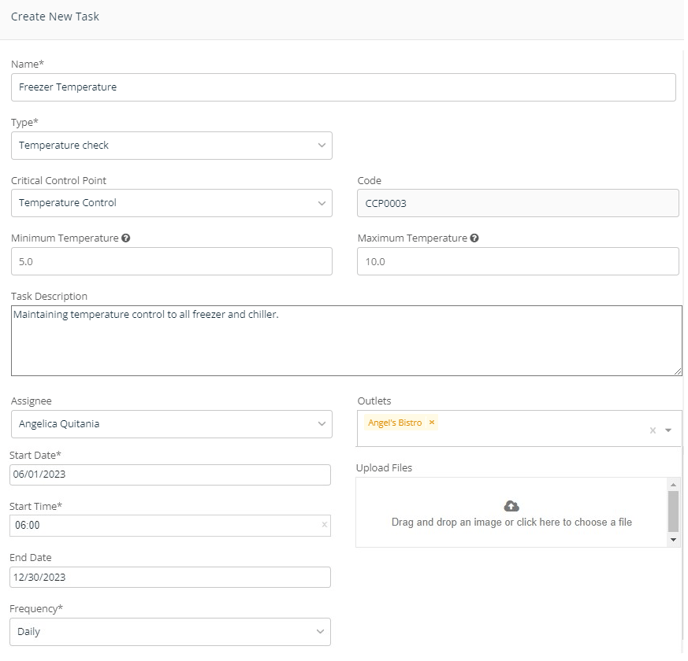
- Click on "Save task" and you have created the task.