Table of Content
1. Why do you need the Storage Location Filter?
2. Functions of the Storage Location Filter
3. How to Create Storage Locations per Outlet
3.2 Assign your ingredients to a specific storage location
4. How to add storage location directly from editing an ingredient
5. What to do when the Storage Location Filter is not functioning?
1. Why do you need the Storage Location Filter?
The Storage Location Filter is an important tool in the system that makes managing items easier and more organized. It helps keep track of where things are stored and shows only the necessary information needed for each task. This makes jobs such as making orders, checking stock, and counting items simpler and faster, improving the overall work process in managing inventory.
2. Functions of the Storage Location Filter
The Storage Location Filter aims to enhance organizational precision and operational efficiency in managing inventory. Here are the specific functions of the filter:
- Customized Recording of Storage Spaces: The feature ensures that all storage areas are well-documented, allowing every item to have a specific, recorded location, thus improving organization.
- Advanced Tracking Capability: The Storage Location Filter makes it easy to keep track of items, ensuring they are accurately placed and maintained within the inventory.
- Smart Inventory Management: This feature automatically filters and presents items relevant to specific needs, preventing confusion from unnecessary information, making the management process clearer and more efficient.
- Targeted Filtering for Enhanced Relevance: The Storage Location Filter shows only the necessary items when managing inventory or making orders, which helps in focusing on immediate needs and making accurate decisions.
You can use this filter to simplify the selection process in the following pages:
- Procurement - Create Order
- Inventory - Stock
- Inventory - Manage
In essence, the Storage Location Filter is not just a feature but a powerful tool that enhances the overall function of the storage location filter, making it an asset for achieving excellence in inventory management processes.
3. How to Create Storage Locations per Outlet
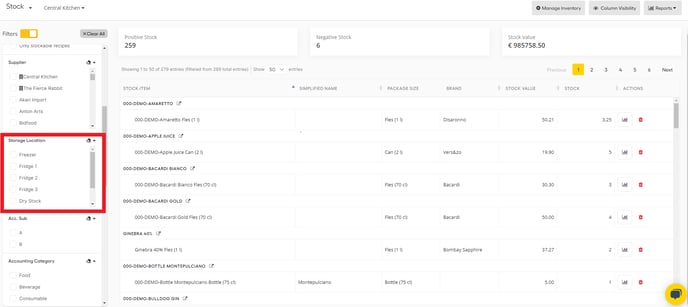
The filter for storage location can be found on inventory level: in the inventory overview (stock) and when counting your inventory. Click on the "search" button to use the filter. You will see 'storage location' preset as a category. Here's how to add sub-categories and to assign your stock items to each storage location.
❗This functionality needs to be set for each outlet.
3.1 Add custom fields
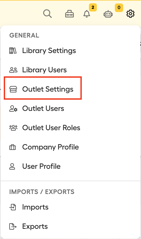
To add values to the category 'Storage location', Go to "outlet settings".
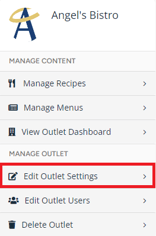
Next, choose the outlet you would like to add storage locations and click "Edit Outlet Settings". Go to the tab "custom fields". The category 'Storage location' is already being created by Apicbase. Click on the pencil.
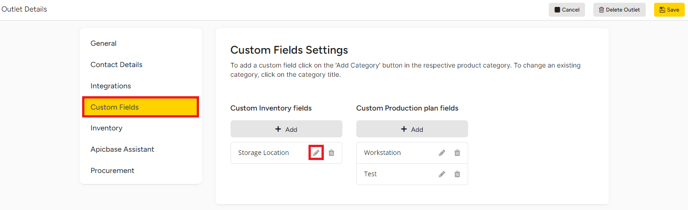
A pop-up will appear. Enter the storage locations as values in the left column. You will be able to see a preview in the right column. Click "save".
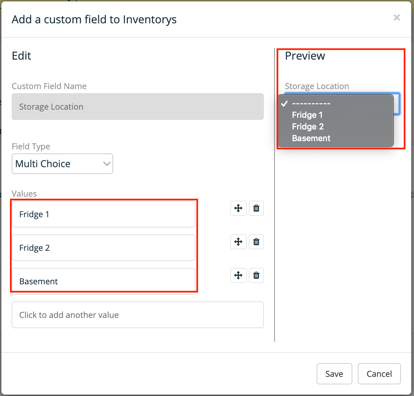
Now, these values will be added to the filter in the inventory overview. However, it is not yet usable as we first need to assign the stock items to it.
3.2 Assign your ingredients to a specific storage location
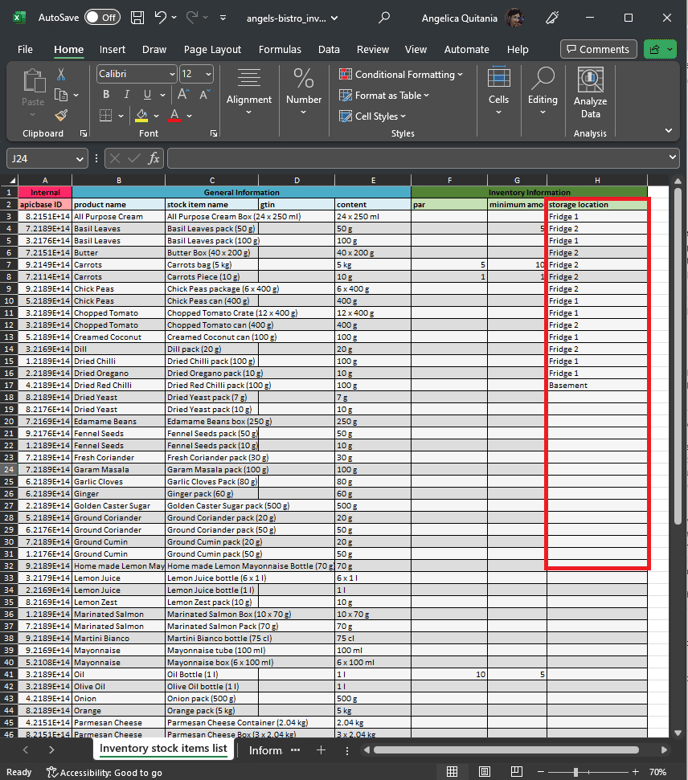
To assign stock items to the created custom fields, go to the settings of the desired outlet again, as described at the beginning of this article. Then, click on the tab "Inventory". There, you will be able to download your latest stock item list.

After downloading, you will have an Excel file containing all your stock items. Fill out the storage locations in column G. Bare in mind that the name of the storage location should be exactly written as the entered values! The software will make a distinction between uppercase and lowercase letters.
You can enter multiple storage locations by separating them using a ",". Eg. "Fridge 1, Fridge2"
After finalizing, save your Excel file.
Import it back again in the 'Inventory' tab in the outlet settings of the selected outlet. Click on "save" in the grey toolbar before quitting this screen.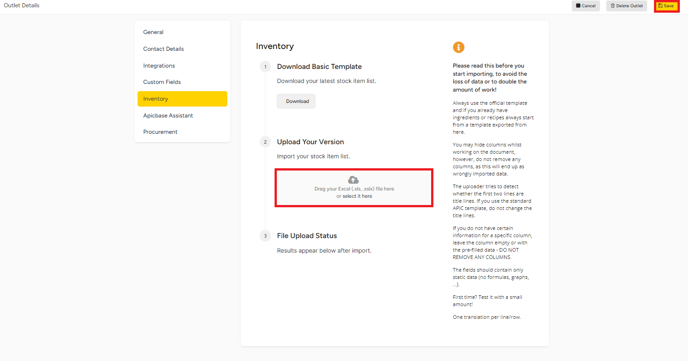
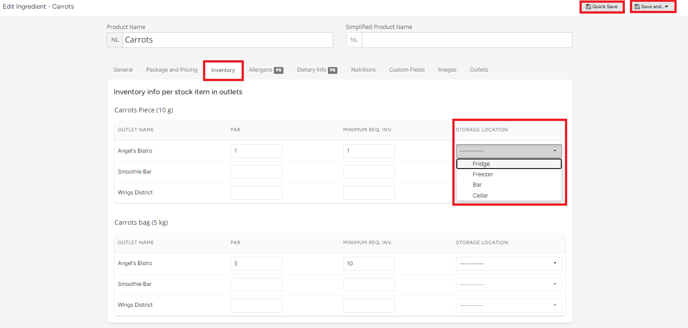
4. How to add storage location directly from editing an ingredient
To add storage location directly to your ingredient, select a specific ingredient and click "Edit"
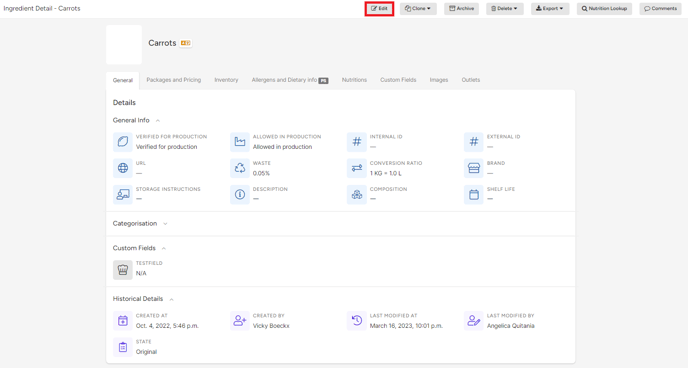
Go to "Inventory" tab, select the storage location by clicking the down arrow. Then choose an option on to save: 'Quick Save', Save and... ( go back, go to ingredient grid, go to ingredient detail, add new ingredient).
5. What to do when the Storage Location Filter is not functioning?
When you are using your Storage Location Filters and find them not working as they should, for example, they are not filtering the correct items or they are not filtering any item at all, here’s what you can do:
- First, please check your custom field settings first to ensure that there are no changes in the set custom field. You can also check your items if they are still assigned to the correct storage location.
- Once you are sure that everything is working accordingly on your end, please reach out to us via live chat or email us at support@apicbase.com.