Step 1: Make your recipe stockable
If you want to learn how to set a semi-finished product as stockable, read this support article.
Step 2: Add the stockable recipe to your inventory
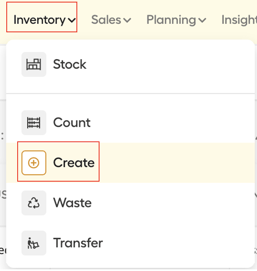
- To add a pre-made recipe to your inventory, go to the Create functionality in the Inventory Module. Select the right outlet.
- Next, click
 in the top right of your screen.
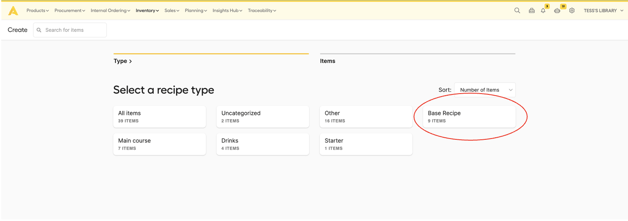
 - You will now have the option to use the search bar in the top left corner or select a recipe type. The search bar is the quickest way if you know how the recipe is called in Apicbase. Use the recipe type if you are not 100% sure. By selecting a type, you will then be redirected to all options.
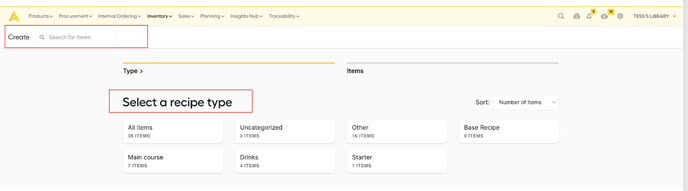
-
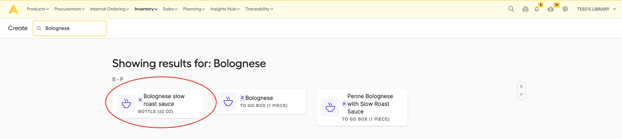
- In this example, we are specifically looking for Bolognese slow roast sauce. We have used the search bar in the top left corner.
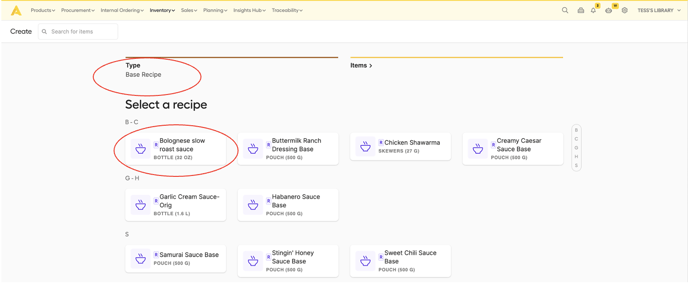
- In this example, we used the recipe type 'base recipe' to find our Bolognese slow roast sauce. We can specify our search by the alphabetical search at the right of your screen.
- In this example, we are specifically looking for Bolognese slow roast sauce. We have used the search bar in the top left corner.
- If you have found the recipe that you made, you can click on it. A pop-up will appear:
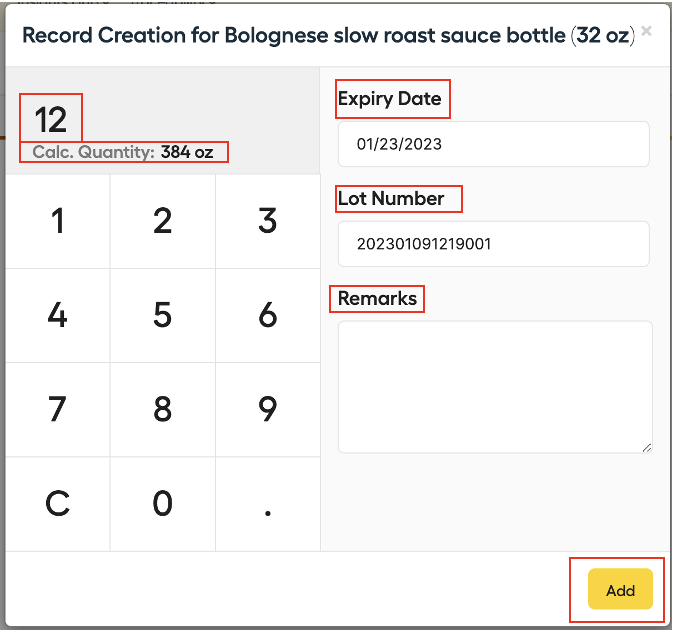
- Enter the produced quantity with the numbers on the screen or via your keyboard.
- Apicbase will automatically add an expiry date (based on the expiration date of this recipe) and lot number. Both are editable fields.
- You can enter more information in the remarks field, but this is optional.
- Click "Add".
- Repeat these steps for every recipe that you produced.
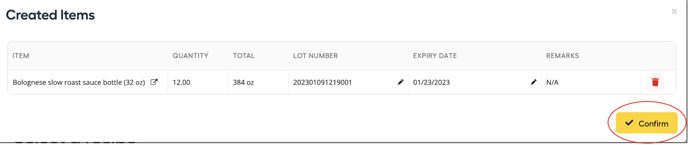
- All items entered as produced will be listed underneath the "view items" button in the top right corner. Here, you will be able to edit the Lot number and expiry date. You are also able to remove an item by clicking on the trashcan symbol.

- When all items have been entered, click "Save" in the top right corner. You will get a confirmation pop-up. In this pop-up, you will be able to modify the LOT number and expiry date. You will also be able to delete items by clicking on the trashcan symbol. Click "confirm" to continue. Once saved, the produced quantity will be added to your inventory, and the used ingredients to make this will be depleted from your stock.

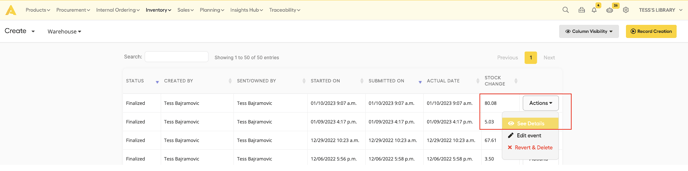
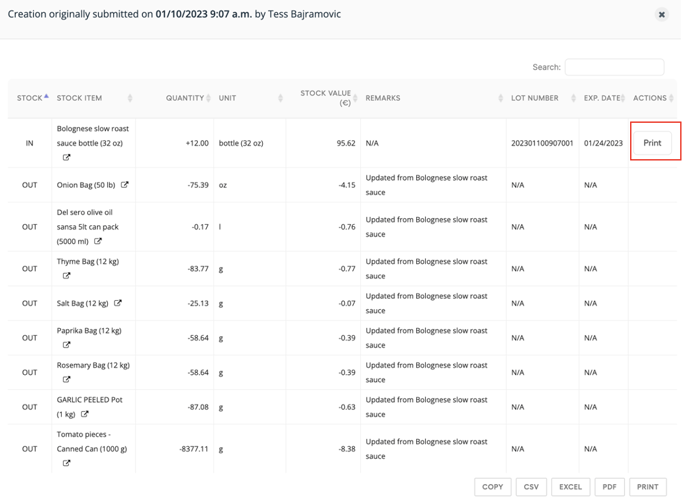
- You will be redirected to the Creation Overview page where previous actions are listed. Click on "Actions" and "see details" to see what was depleted from your inventory and what was added to your inventory.
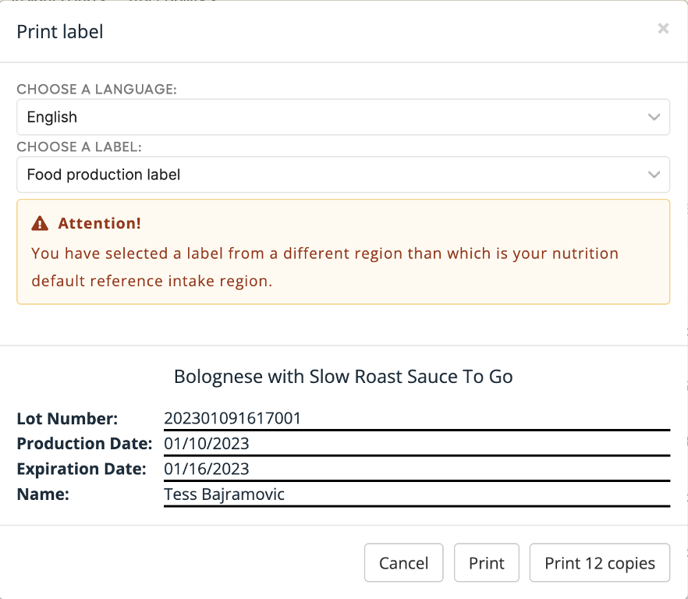
- In the details of your create-event, you are able to immediately print (food production) labels for everything that you have created. Click the 'Print'-button, and you will be redirected to the Food production label of this recipe, with Apicbase suggesting you to print labels for the number of portions that you've created.
Note: You can always revisit this page to view the history and details of creation events, production planning creation events by going to Inventory, Create