First Steps to turn on 2-Factor Authentication in Apicbase
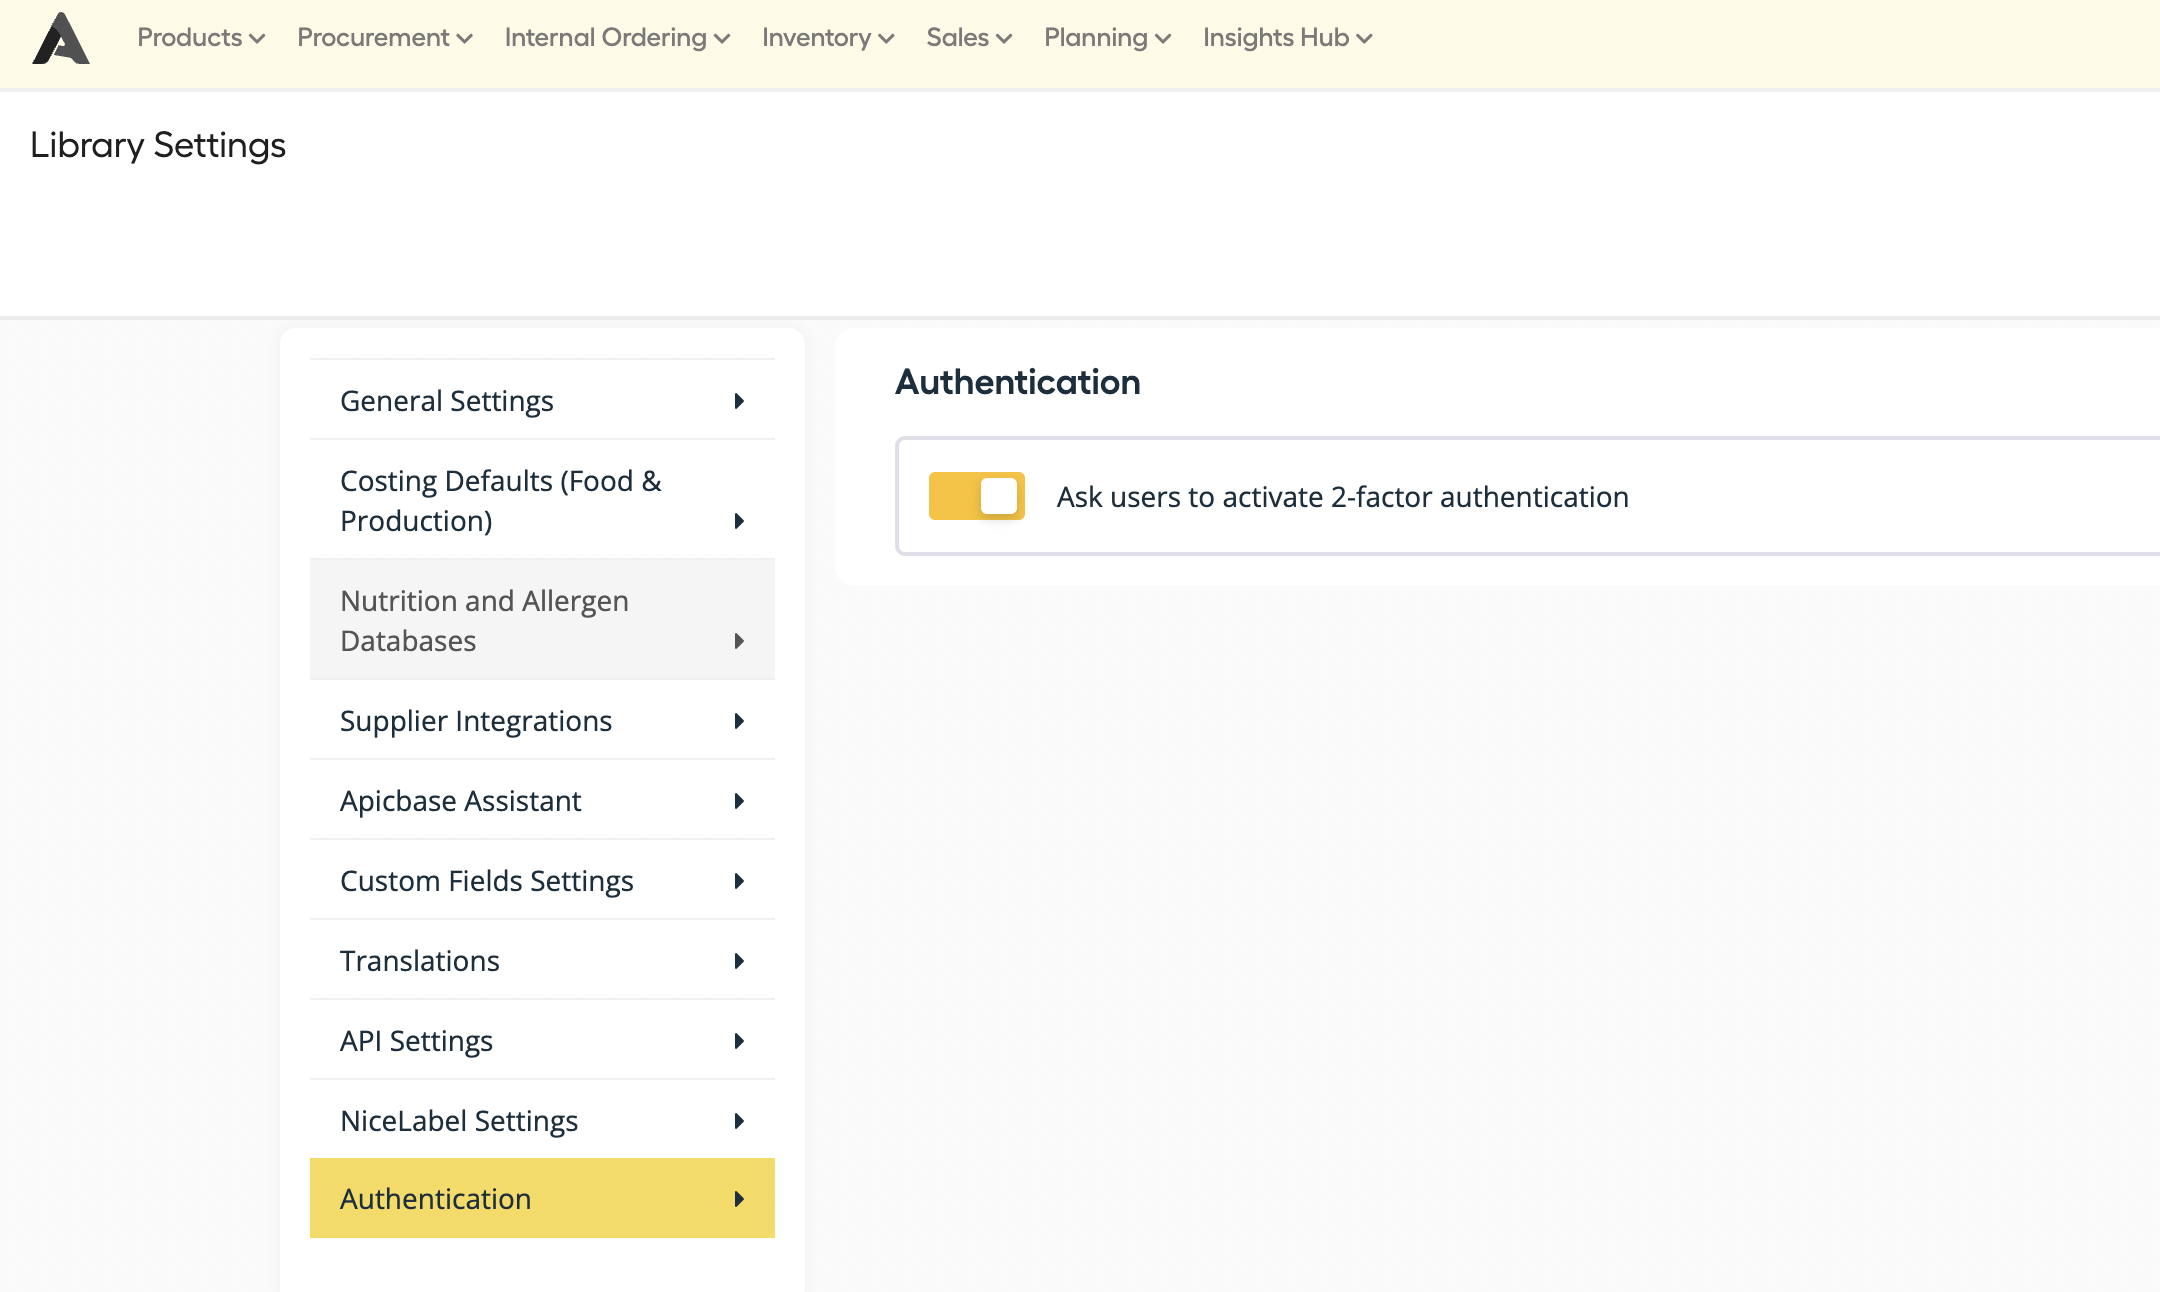
- Go to Library settings > Authentication.
- Click “Ask users to enable 2-factor authentication".
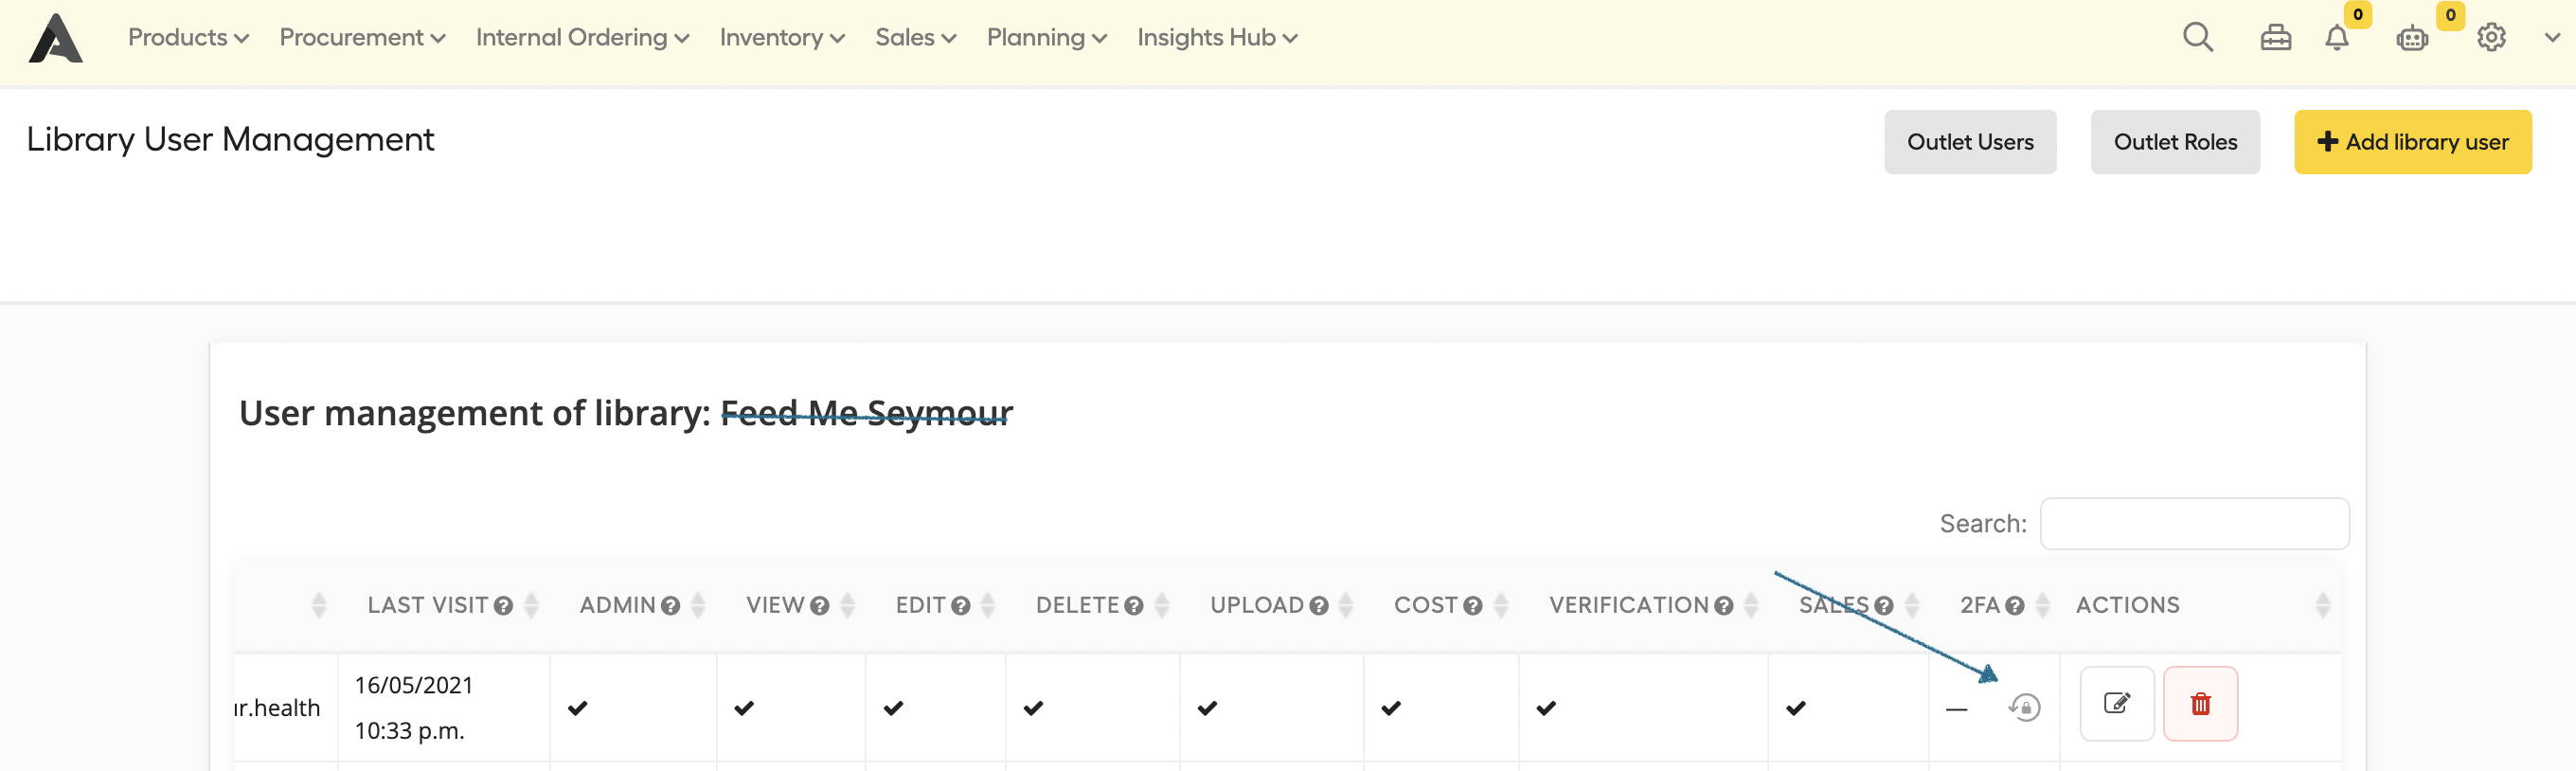
- Go to the user management (either library or outlet), here you can see who has activated the 2- Factor Authentication
- In case a user forgets or wants to reset the password - as an admin, click on the lock reset icon to reset 2FA settings of a given user (user will receive an E-Mail to activate the 2 Factor Authentication.)
- See that the user will be able to login normally, and see the warning on top of the dashboard
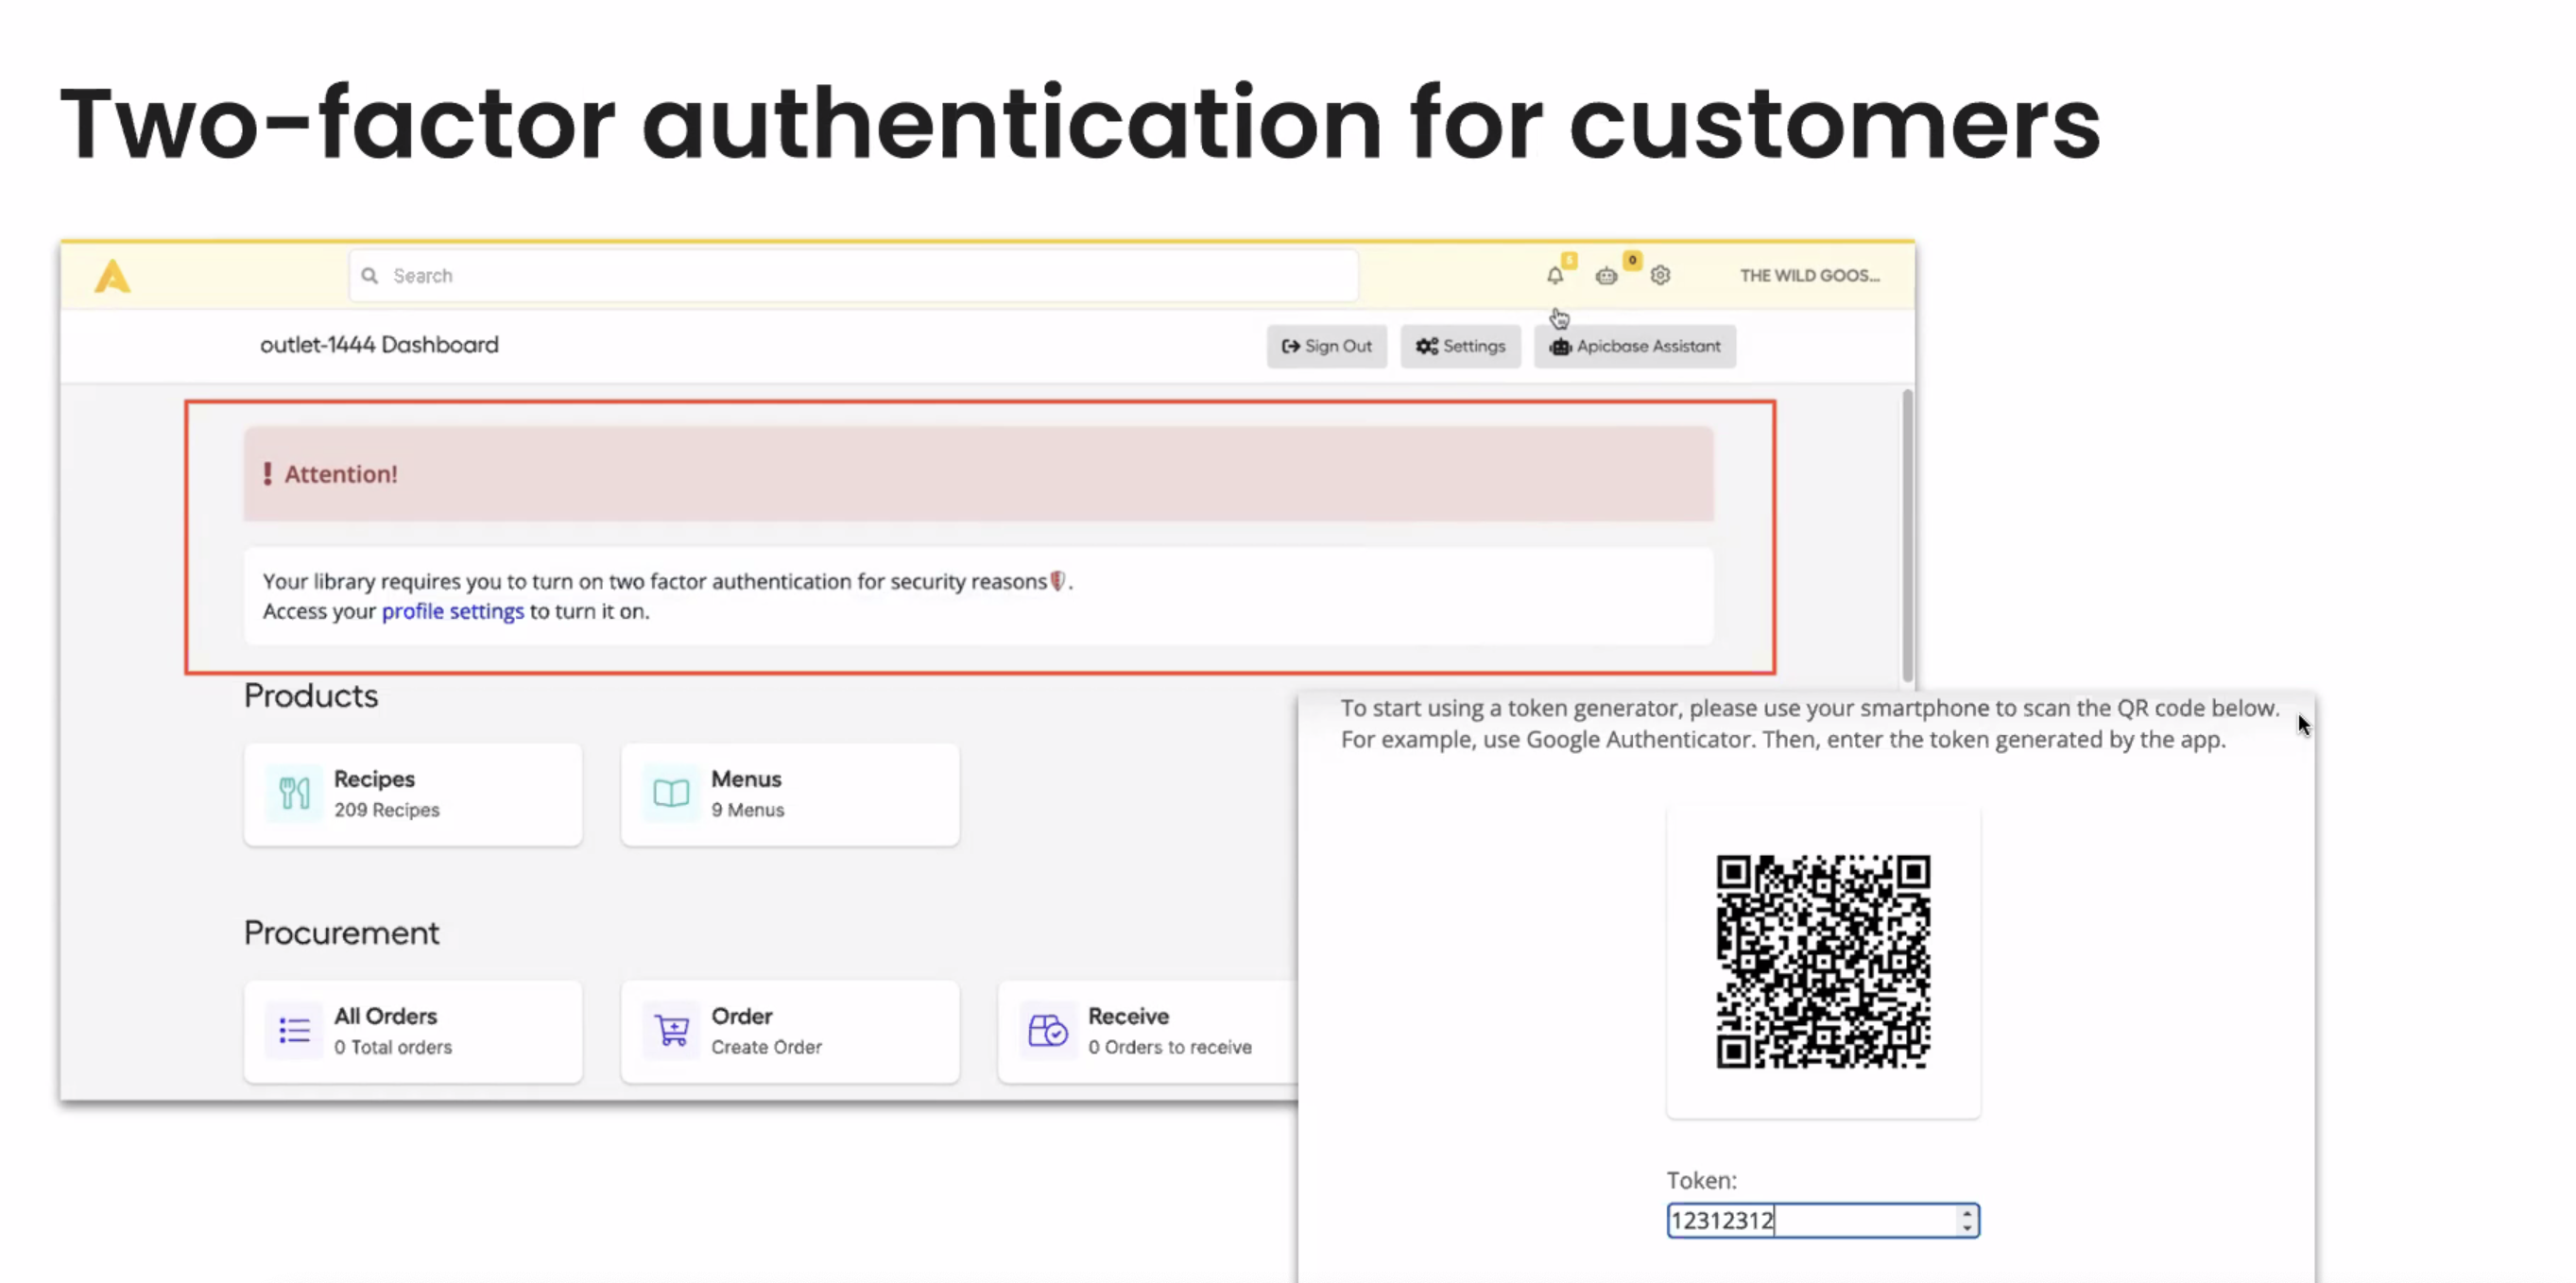
- See that the 2-Factor Authentication wizard pops up
- Enable the 2-Factor Authentication
Second Step - How to verify your login for the 2 Factor Authentication
- Download an Authenticator App (If you don’t already have an app installed on your device, you’ll need to download one. You can use any authentication app like Google Authenticator, Authy, Duo Mobile, 1Password, etc.)
- Click the checkbox next to Authentication app
- Read the instructions, then click Start
- Enter your credentials and click Verify
- If you haven’t already, we’ll ask you to confirm an email for your Apicbase account: Enter your email address, then click Next. We’ll then send you a confirmation code via email. Back in your Apicbase account, enter the code in the prompt, then click Verify
- You’ll be prompted to link your authentication app to your Apicbase account by scanning a QR code
- After you scan the QR code, click Next
- Enter the code generated by your authentication app, then click Verify
- You’ll see a confirmation screen. Click Got it to finish setup