How to register an external order
Sending orders using Apicbase is pretty easy. It happens, however, that you have to buy some ingredients that you have not ordered. No worries, this article shows you how to register orders that were not sent in Apicbase.
Registering external orders updates your inventory and adds the items to your procurement reports, just as with a regular order.
You can add any item from any supplier using the external order option, however, you first have to add the supplier and the ingredients to Apicbase before you can register the external order.
To receive an external order, follow the steps below:
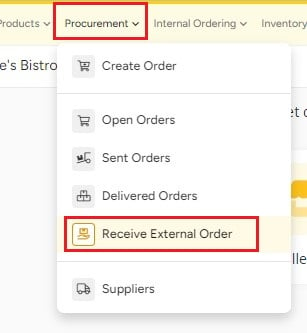
- Go to "Procurement" and click on "Receive external order".

- Select the outlet for which you want to receive the external order. This will now bring you to a new page.

- Select the right supplier.

Note: Past event option will allow you to set the actual date. It will only be possible to register events in the last 6 months (180 days). Click here
- Start typing the ingredient's name in the "Stock Item" field and select the right one.

- Add the number of packages you have received in the "Delivered Qt." field.

- You can add "Remarks" per item in the text field or you can choose one of the options from the dropdown menu:

-
- Accepted
- Wrongly delivered (accepted)
- Wrongly ordered (accepted)
- Delivered too much (accepted)
- Late delivery (accepted)
- Pricing issue (accepted)
-
- The "Price Paid" will be filled in, based on the known price in Apicbase. You can change it like a regular order.

- The "Update Price" checkbox works the same as with a regular order. Leave checked if you want to update the price of the ingredient based on the price in this order.

- You can remove items by clicking the " erase " button next to the ingredient.

- You can add an item when you click below the one you have already added.
- You can attach a delivery note or invoice by:
- Clicking on the correct box for the type of note you want to attach

- Upload your documents

- You will see the quantity you uploaded indicated in the boxes

- To view the name of the documents, select the drop down from the document type box and you can easily add more files, remove all files or remove an individual file

- Clicking on the correct box for the type of note you want to attach
- Click on "Save Draft" if you want to resume the intake at a later time without losing the information already entered.

- You can then continue the input in the "Sent Orders" tab.

- Click on "Close Order & Go to Sent Orders" or "Close Order & Go to Delivered Orders" to finalize the order either from the Save drop down box or from the bottom of the screen.

- You find the order in the "Delivered" tab and you can select match the invoice information afterward if necessary.

- You can scroll to the right and select "Match the Invoice" to add more documents or edit and update details in the order

