![logo-mark-primary-color-4.png]](https://support.apicbase.com/hs-fs/hubfs/logo-mark-primary-color-4.png?height=40&name=logo-mark-primary-color-4.png)
1. Open Templates
Go to Products > Templates. The page opens on an overview of your most recent recipe books and templates. Click the Templates tab at the top right to see all your templates.
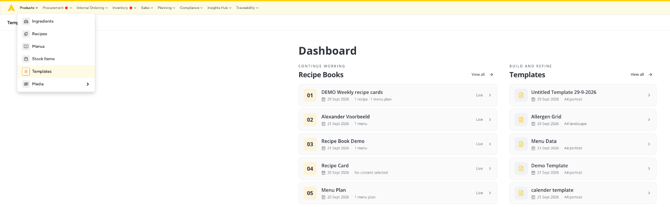
The menu entry needs the Manage Templates permission, in the Recipe group of your role. If it is missing, ask your administrator. As an outlet user you have no menu entry: open Recipes in the list view and choose Templates > Templates.
2. Create a template
- On the Templates tab, click New Template.
- Choose the Page Format and the Orientation. Besides A4, A5, A3, Letter and Legal, there are label sizes and a Custom Size.
- Click Create Template. The editor opens, and the template is saved straight away as Untitled Template with today's date.
- Click the name in the top bar and type a clear name. Click Save to keep it.
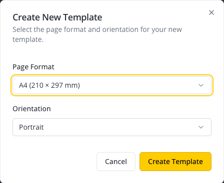
Pick the format with care. When you use templates in a recipe book, the first section of the book fixes the page size and orientation for the whole book.
3. Add content
The editor has three parts. On the left, Content Blocks lists everything you can drag onto the page. In the middle is the page itself. On the right, the properties panel shows the settings of what you selected: the page, or one block.
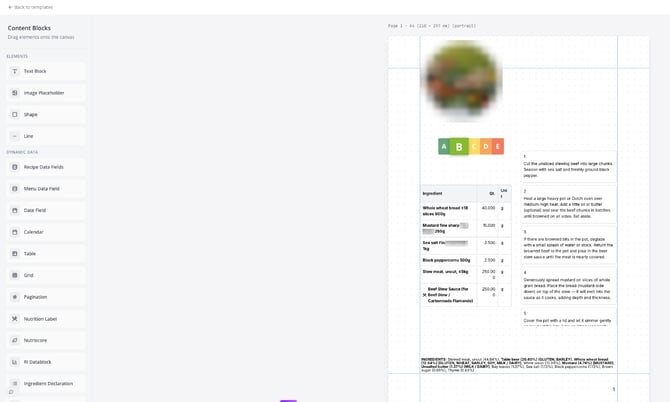
Drag a block onto the page, then click it to change its settings. Blocks under ELEMENTS hold fixed content: text, images, shapes and lines. Blocks under DYNAMIC DATA fill themselves with your Apicbase data when you print:
- Recipe Data Fields: one piece of recipe information, such as the name, description, portions or preparation time.
- Table and Grid: the ingredients, the preparation steps or the recipes of a menu, with the columns or fields you choose.
- Ingredient Declaration: the ingredient list as it appears on a label, with allergens in bold.
- Allergen Grid, Nutrition Label, Nutriscore and RI Datablock: allergen and nutrition information.
- Menu Data Field and Menu Allergen Matrix: information about a menu, and an allergen table for all recipes on a menu.
- Calendar: a week or month of your menu planning, with the courses and recipes planned each day.
- Date Field and Pagination: today's date and page numbers.
Until you load a recipe, dynamic blocks show sample content or a field name such as {{recipe.name}}.
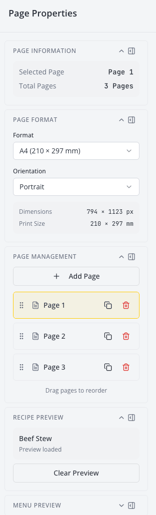
Every block has a Show object on setting under MULTI-PAGE SETTINGS: This page only, All pages, All odd pages or All even pages. Use it for headers, footers and page numbers when a template has more than one page. Add pages with Add Page in the page properties.
3.1. The ingredient declaration
This block has the most settings. These are the ones people ask about:
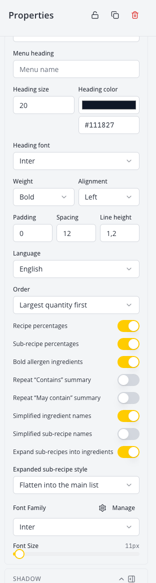
- Simplified ingredient names shows the short names of your ingredients instead of their full names.
- Expand sub-recipes into ingredients replaces a sub-recipe with its own ingredients. With it on, Expanded sub-recipe style lets you flatten everything into one list, or keep the sub-recipe name with its ingredients in parentheses.
- Order sorts by largest quantity first (the default), smallest quantity first, or alphabetically.
- Language sets the language of the fixed words in the declaration.
4. Preview with a real recipe
- Click an empty part of the page, so the page properties show on the right.
- Under RECIPE PREVIEW, click Load Recipe Example.
- Search for a recipe, select it and click Select Recipe.
The template now shows that recipe's real data, so you can check that long names and ingredient lists fit. Click Clear Preview to return to the sample content. The preview does not change the template.
5. Save and print
Click Save to keep your changes, or Save As to save a copy under a new name.
To print, your role needs the Print / PDF permission in the Recipe group. A role your administrator creates starts without it.
To print recipes with your template:
- Go to Products > Recipes and use the list view.
- Tick the recipes you want to print.
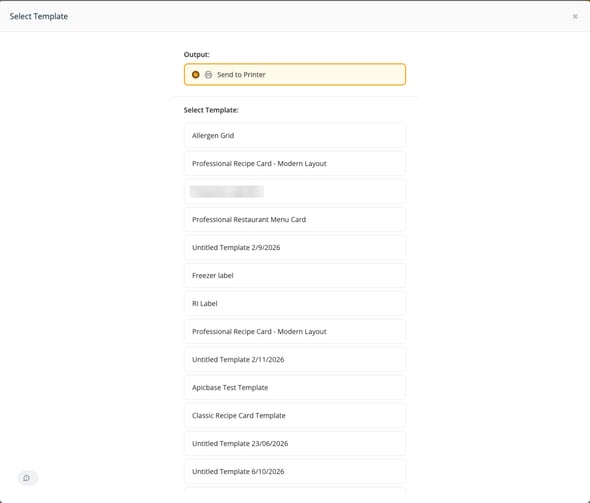
- Click Templates > Print / PDF.
- Click the template you want. Your browser's print dialog opens with one page per recipe. Print it, or save it as a PDF.
Everything you place on a template is printed and shared with it. If you add fields such as Sell Price or Food Cost, they also appear in recipe books you share with people outside your company.
Limits
- A template is a page design. It does not change your recipes.
- Print / PDF on the recipe list works in the list view, for up to 50 ticked recipes at a time, and not with the select all checkbox. For larger sets, use a recipe book.
- The Templates button is not available on a phone-sized screen.