- Help Center
- Getting Started
- Integrations
-
Getting Started
-
Settings
-
Product Development
-
Procurement
-
Inventory
-
Sales Analytics
-
Allergens, Dietary and Nutritions
-
Planning
-
Photo & Media Management
-
APIC Studio
-
Business insights
-
API
-
Outlet users
-
FAQ
-
Online training sessions
-
Barcode Scanner App
-
Ingredient management: Advanced
-
Traceability
-
Menu Planning
How to do the manual Micros POS import
This article shows the steps to do the manual Micros import.
- Export your POS items from Micros. (Please contact Micros if you have any questions on exporting your POS items.)
- Upload your POS items export-file to Apicbase:
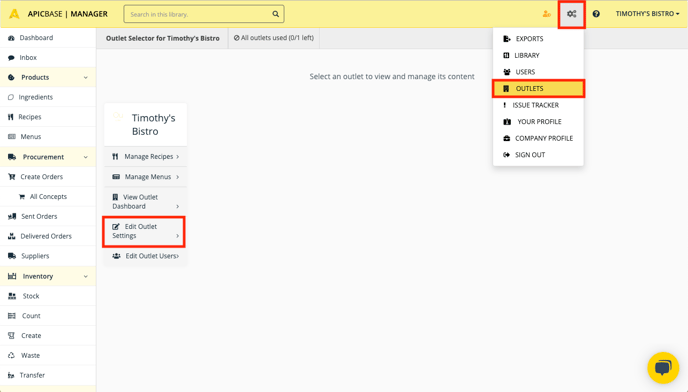
- Go to the outlet settings of the outlet for which you want to link Micros to Apicbase.
- Click on the "Settings" button and select "Outlet settings".
- Click on "Edit Outlet Settings".
- Go to the outlet settings of the outlet for which you want to link Micros to Apicbase.
-
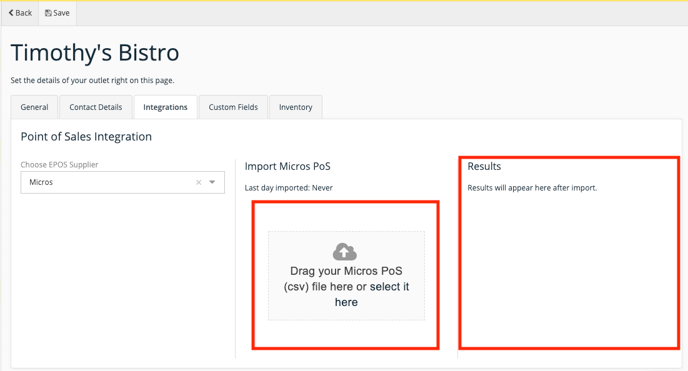
- Click on the "Integrations tab" in the outlet settings and select "Micros" in the dropdown.
- Click on the "Save" button on top of the screen.

-
- In the middle panel, you will be able to drag and drop the Micros export file or select it.
-
- The POS items will now be uploaded to Apicbase.
- Wait until you see the upload was successful in the right "Results" panel.
Please contact us at support@apicbase.com if you have problems with uploading the Micros export-file.