In order to set up the connection, you need access to your Square Dashboard.
If you want to learn more on the POS connection in Apicbase, read this article.
Follow these steps to connect your Square POS to Apicbase:
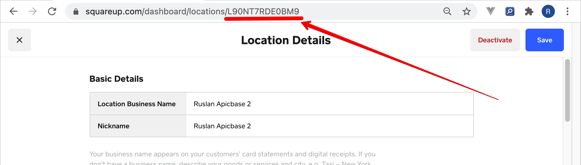
- Find the right Location in your Square Dashboard.(https://squareup.com/dashboard/locations/) The location corresponds with an outlet in Apicbase.
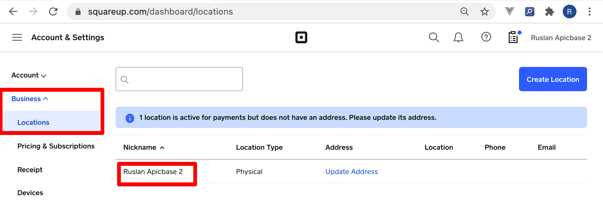
- Select the location and copy it.
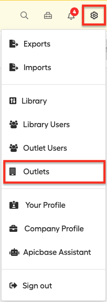
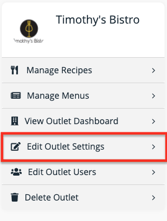
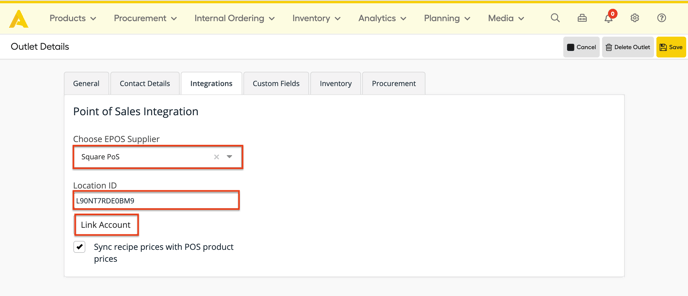
- Click on settings wheel in Apicbase, select "Outlets"> "Edit Outlet Settings".
- Go to the integrations tab and select "Square PoS" in the "Choose EPOS Supplier" field.
- Paste the "Location ID" in the right field and click link account.
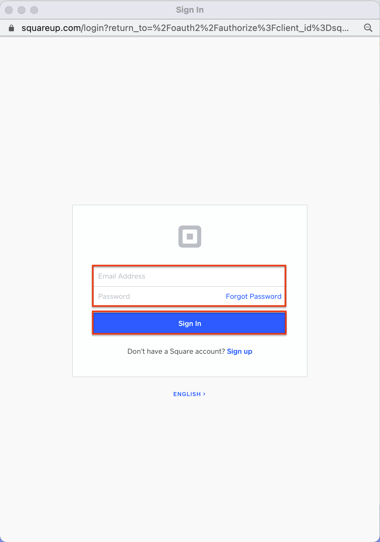
- A Square login popup will appear. Fill in your Square login email, the right password, and click on "Sign in".
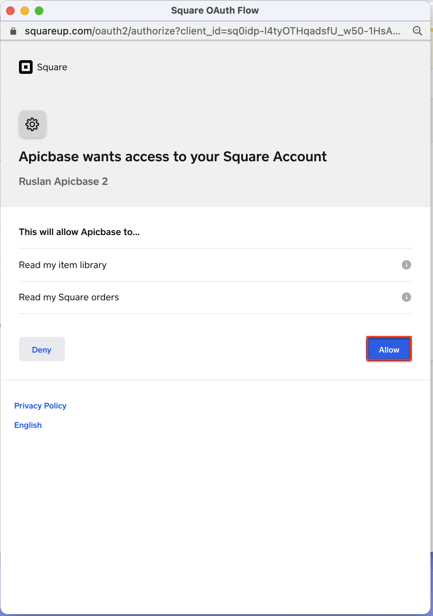
- Square will ask you to confirm that Apicbase will get access to your Square account. Please click on "Allow".
- To finalize, click on "Save" in the integrations tab in Apicbase.
- Your Square POS is now connected to Apicbase.