If you have not installed the app, take a look here.
Table of content
- Counting: Scanning and manually
- Creating a new pack while counting
- Claim sub-counts
1. Counting: Scanning and Manually
Step 1: Log in using your Apicbase credentials. Make sure you select the correct outlet if your user account has access to multiple outlets.
Step 2: Navigate to Count in the app. You can start a new count here, or start one in your web browser and access it in the app.
Step 3: If you’re the first to begin, start a new inventory count by clicking on start. You’ll see that a sub-count is created for you.

There can only be one active inventory count in each outlet. Each inventory count can have several active sub-counts. So you can count on Apicbase with several users at the same time.
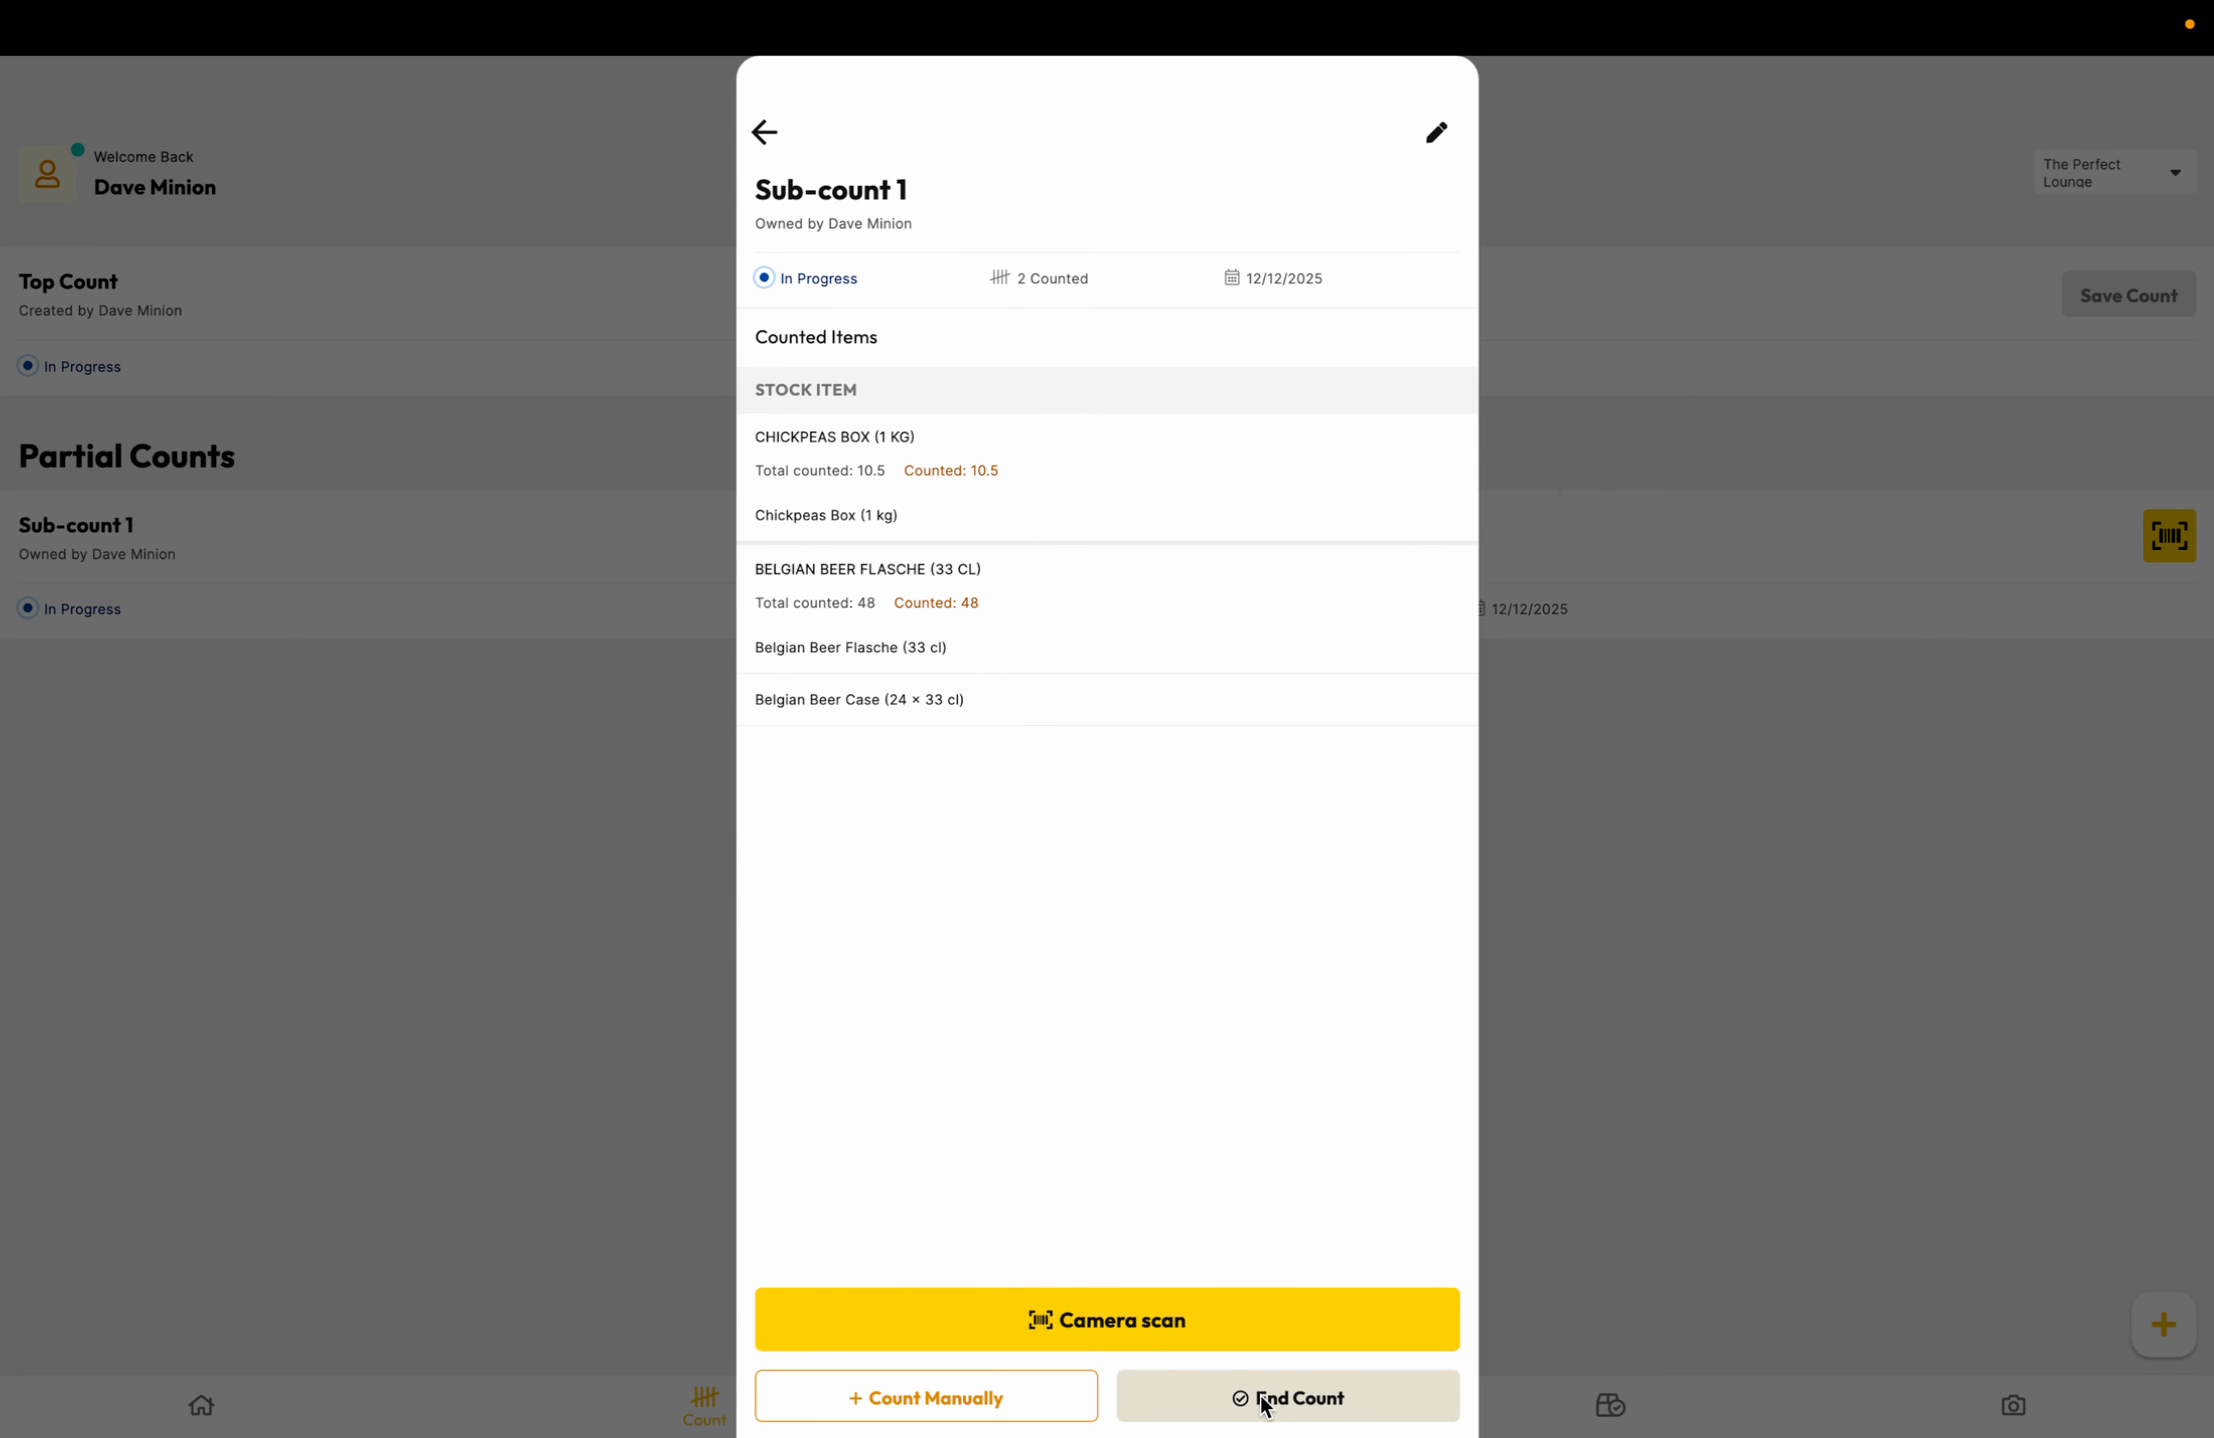
Step 4: If you already started a count, you will be immediately see the following screen. To start counting tap on the barcode scanner sign.

- For each sub-count you will see:
- The owner: user that is doing the count.
- The status: In progress/Finished
- The counted Stock Items
- The date it was started
- To edit the name of the sub-count click on the pencil symbol
Step 5: Click on Camera Scan to open the scanner.
If the barcode is not yet linked to an existing item, you can link the barcode to that item. Learn here how.

Step 6: Aim with the device's camera on the barcode of the product in the center square on your screen.
Step 7: Tap on the found item, then enter the counted quantity. Use the plus/minus buttons or type the number directly. You can also add partial quantities.
Step 8: Tap submit to save your count for that item.
The app displays the Counted Quantity (for this sub-count) and Total Quantity (for every sub-count of this main count)
Step 9: Want to enter a count manually? "+Count manually" search for the item, select it, enter the amount, and submit.
Step 10: To add more sub counts, select the the + in the lower right-hand corner. To review your count, tap the eye icon.

Step 11: Once finished, tap end count to close the active session.
Check permissions for each outlet user to control visibility and editing rights before starting your next inventory count.
When you save the main count, you can't make changes to the count and the stock will be changed.
2. Creating a new pack while counting
When you scan an item that doesn’t yet have a package in your library, you can create a new one.
Step 1: Scan the barcode of the item, and you’ll receive a notification that the barcode could not be found.
Step 2: Click on Yes, it's correct.
Step 3: Click on Create new package.

Step 4: Fill in all the information and click on +Add and the new pack is added and you can start counting.


3. Claim sub-counts
This process ensures that only one user can actively work on a partial count at a time. Claiming the count prevents conflicts or overwriting changes when multiple users are working in the same outlet, and it guarantees that all updates are properly synchronized and reflected on the website.
-
After a one user created a sub count, log in with another user.
-
Select the same outlet.
-
Click on the “Hand” button above the partial count.

-
A bottom sheet will appear. Confirm the claiming of the count.
-
You will then be able to perform actions on that count.
Do you want to learn more about the Barcode Scanner App read here.