Table of Content
1. How to Connect
Following the instructions in the PoS Integrations article, you should navigate to the Integrations Tab in your outlet settings.
To begin, look for Foodics in the list of PoS suppliers (1), then click on Link Account (2). This will open a new tab in your browser where you can log in to your Foodics account (3). Once logged in, return to Apicbase and click on Fetch Branches (4), then select the corresponding Branch to this outlet (5). With this, you are all set, but don't forget to click Save in the top right corner of the screen!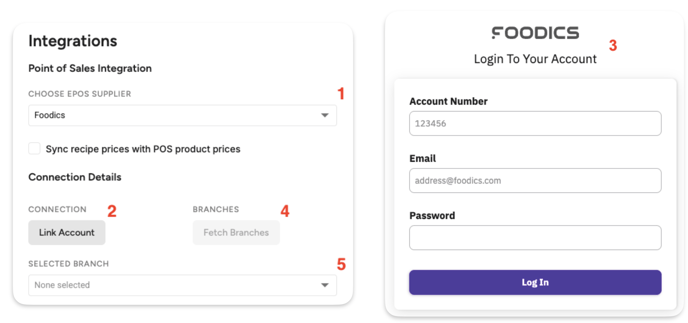
If an error occurs while fetching the list, first verify that the token is correct. If the issue persists, contact your Apicbase CS Manager or the Foodics support team.
Once your PoS is connected to your outlet, you can move on to the next steps, as explained in the PoS Integrations article.
2. Contact Details
For issues with the PoS connection, you may contact your Foodics Account Manager, support@foodics.com, or your Apicbase CSM for assistance.